DIY Garage Door: Installation Tips and Tricks

By: HowStuffWorks.com Contributors  | 
A yellow single-story home with carriage-style garage doors.
A garage is a place where vehicles are kept. You can build a garage door yourself with the proper steps and materials. Patricia Marroquin / Getty Images

Garage doors can be expensive, but with the right know-how and the right tools, you can build a DIY garage door of your very own.

Advertisement

Building a Sectional Garage Door

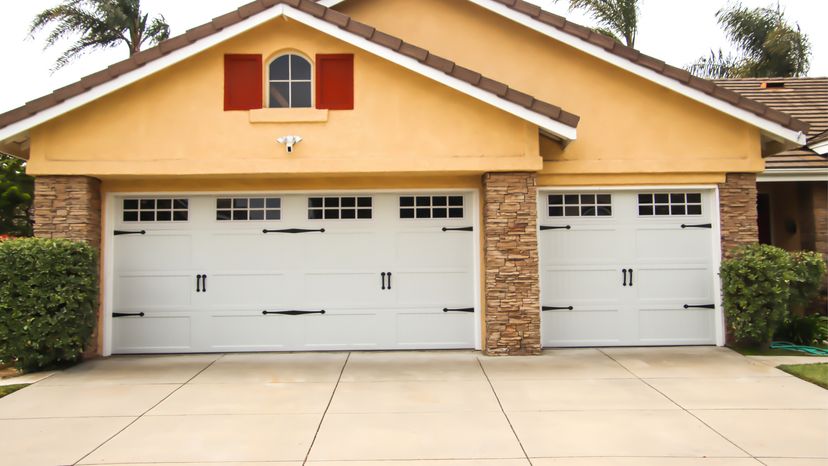
The most popular garage door is the roll up sectional garage door. It's typically made of three sections, which are mounted horizontally and hinged together. The door slides with rollers on a track attached to the sides of the door frame [source: DIY Guides]. That's what we're going to build.

Materials

  • Electric saw
  • 1½-by-2 studs
  • ⅛ inch plywood
  • Wood glue
  • Heavy duty hinges and screws
  • Rollers
  • Hammer
  • Tape measure
  • Nails
  • Door handles

Here's what to do:

Advertisement

  1. Measure the width and height of the door opening. We'll make a 12-foot (3.7-meter) wide and 9-foot (2.7 meter) high door opening.
  2. Divide the height evenly by three.
  3. Make three panels, each measuring the width of the door by the height obtained in step 2. Each of our panels will be 12 feet-by-3 feet (3.7 meters-by-.9 meters).
  4. Cut two pieces of 1½-by-2-inch wood studs to the width of the door less 2 inches (5 centimeters). These will allow the door to roll freely. In our example, we'll cut the studs 9 feet-by-142 inches (2.7 meters-by-3.6 meters). These will be the top pieces of the frame.
  5. Cut two pieces of the 1½-by-2 stud to the height of your panel less 2 inches (5 centimeters). This will be placed between the two top pieces. In our example we will cut the stud 34 inches (86.4 centimeters) long.
  6. Place the two 34-inch (86.4 centimeter) pieces between the two 9-foot (2.7-meter) pieces on each end, to complete the rectangular shaped frame.
  7. Nail and glue the wood pieces together.
  8. Repeat the procedure two more times, so you have three panels.
  9. Cut three sheets of plywood to 12 feet-by-3 feet (3.7 meter-by-.9 meter). Glue the plywood to the frames.
  10. Nail a roller on the top and bottom of the 3-foot (.9-meter) side of every panel. Each panel will have four rollers.
  11. Roll the panels onto the tracks.
  12. Screw on the hinges when the panels are one on top of the other on the track (i.e. in the closed position). Attach the panels to one another. Each panel has three hinges, one on each end and one in the center.
  13. Attach one door handle on the inside and one on the outside [sources: Mademan, DIY Guides].

This is far from the only way to build and install a garage door. The magic of a DIY garage door project lies in the creativity of the builder. So go ahead, use creative materials, cut out a window opening, or even repurpose you old door. The possibilities are truly endless.

Advertisement

Installing A Garage Door Opener

Building your own garage door has it's perks. Homeowners can use the money they save to splurge on the electric garage door opener of their dreams. Installing an automatic opener all by yourself isn't recommended, but that's not to say that you can't take the project on.

The first thing you'll want to do is shop around for the ideal opener. There are a lot of options here, including chain drive, belt drive, and direct drive openers. Though each type has it's subtleties, the installation processes follow similar installation steps [source: Home Depot].

Advertisement

Here's what to do:

  1. Assemble the carriage tube. Start by laying out the supplied materials and following along with the instruction manual provided by the manufacturer.
  2. Start by laying out the supplied materials and following along with the instruction manual provided by the manufacturer.
  3. Mount the carriage tube. Once assembled, attach the carriage tube to the power unit.
  4. Once assembled, attach the carriage tube to the power unit.
  5. Install the header bracket.The unit's instruction manual should specify an appropriate location for the header bracket.
  6. The unit's instruction manual should specify an appropriate location for the header bracket.
  7. Install the power unit. Make sure there's an electrical outlet near the install location, and that the power unit is high enough so as not to interfere with foot traffic inside the garage.This is also a good opportunity to install the light bulb inside the electric opener if your model has a socket for one.
  8. Make sure there's an electrical outlet near the install location, and that the power unit is high enough so as not to interfere with foot traffic inside the garage.
  9. This is also a good opportunity to install the light bulb inside the electric opener if your model has a socket for one.
  10. Connect the carriage arm bracket. Once the power unit is installed, connect the carriage arm bracket to the garage door in accordance with the manufacturers instructions.
  11. Once the power unit is installed, connect the carriage arm bracket to the garage door in accordance with the manufacturers instructions.
  12. Install safety devices.This includes the automatic reversal sensor located near the bottom section of the garage door's track, and the emergency release rope.
  13. This includes the automatic reversal sensor located near the bottom section of the garage door's track, and the emergency release rope.

Remember, the steps above can certainly change depending on the type of door being used, and the type of opener being installed. Automatic openers use a combination of electricity and spring tension, and understanding garage door springs is half the battle.

Fortunately, most of those knowledge gaps are filled by the detailed installation instructions that manufacturers create. Many of them even produce how-to videos to help simplify the process that much more.

Advertisement

Good Bye Garage Doors, Hello Barn Doors

More and more home owners are going the unconventional, and more affordable route of installing barn doors (aka carriage doors, or carriage house doors) in place of more traditional options. Unlike conventional overhead doors that require a long list of specialized parts and hardware, barn doors are simpler and much easier to build and install.

Barn doors rely on heavy-duty hinges that help the twin doors swing in and out of the driveway. By opting for barn doors instead of the more traditional option discussed above, you can free up a lot of space inside the garage itself, and pay a fraction of what you might expect to pay for new garage door [source: RealCraft].

Advertisement

Carriage doors are much simpler to DIY, more secure, and require far less long-term maintenance. Homeowners can purchase pre-made steel doors and hang them themselves, construct barn doors from scratch, or hire a professional to tackle the entire project.

Advertisement

Loading...