How to Replace a Brick
A loose or broken brick in a wall or chimney not only looks bad, and it can provide an opening (literally!) for further damage. Act quickly to prevent moisture from entering the wall or chimney. And don't worry -- the repair is an easy one.
Tools:
- safety goggles
- cold chisel
- sledgehammer
- bucket
- wide brick chisel
- wire brush
- garden hose
- mixing bucket and stir stick
- sharp trowel
- mortar jointer or thin metal rod
- stiff scrub brush
Materials:
- mortar mix
- mortar coloring
- corrugated cardboard scrap
- replacement brick
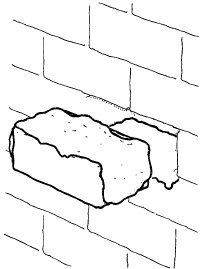
Time: 1 to 2 hoursWearing safety goggles, begin by using a cold chisel and sledgehammer to remove the mortar around the loose brick. Work carefully to avoid damaging the loose brick or surrounding bricks. Lift the loosened brick out from the wall or chimney and set it in a bucket of water to soak.If a loose brick cannot be easily removed, or if the brick is broken, break it up to remove it. Wearing safety goggles, chop out the damaged brick with a wide brick chisel and sledgehammer. But still be careful not to damage the surrounding bricks. Fill a bucket with water and set the replacement brick in it to soak.Still wearing safety goggles, remove all remaining mortar from the hole where the brick was removed; use the sledgehammer and cold chisel to remove large chunks of old mortar and then wire-brush the cavity to remove any debris still adhering to the bricks. Flush the cavity thoroughly with the garden hose.Mix a small batch of mortar according to the directions on the package. To see what color the mortar will be when it dries, spread a little mortar on a scrap piece of corrugated cardboard; as the cardboard absorbs water from the mortar and it dries, the mortar's color will lighten. Add mortar coloring as necessary, experimenting with mortar applied to the cardboard, until the new mortar matches the old. Mix enough mortar to secure the brick, and add coloring in the proportion used in the test batch.Before replacing the brick in the wall, spray the cavity again with the garden hose to dampen it; the cavity should be wet but not streaming. Spread a thick bed of mortar on the bottom surface of the cavity, smoothing it roughly level.
Advertisement
Remove the replacement brick -- salvaged or new -- from the bucket of water and shake it to remove excess water. Apply mortar generously to the top and ends of the brick, but don't mortar the back. Set the brick carefully into place in the prepared hole, pressing it in firmly. It should align with the bricks on each side of it; adjust it to match, and apply more mortar as necessary. Make sure the face of the new brick is flush with the surface of the wall.
When the new brick is firmly in place, force mortar into the top and side joints of the brick to fill them completely. Smooth the mortar all around the new brick, making sure there are no gaps. Scrape excess mortar from the wall with the side of the trowel. Then, using the trowel, a brick jointer, or a thin metal rod bent to form a handle, tool the new mortar joints to match the joints in the rest of the wall.
To keep the new mortar from drying too quickly, spray it lightly with the garden hose several times a day for 2 or 3 days. When the mortar has set completely, use a stiff scrub brush to remove any excess mortar from the face of the wall.
If you can handle repairs with mortar, concrete is the natural next step. On the next page, learn how to repair crumbling concrete stairs.
For further tips and instructions on how to fix things around the house:
- Home-Repair Safety Tips: Doing the job yourself doesn't save you money if you end up in the emergency room. Read these tips to make sure you work smart when doing home repairs.
- Home-Repair Tool Basics: Does your tool box have what it takes? Learn what tools you're likely to be looking for when making repairs around the house.