How to Drill Pilot Holes

By: HowStuffWorks.com Contributors  | 
A closeup image of handyman drilling a hole.
Drilling pilot holes requires planning and precision. Ales-A / Getty Images

Home improvement jobs are nearly impossible without a drill, as you'll need to drill holes for screws, hinges, and everything in between. The tool used for drilling a hole is an electric drill with drill bits that are screwed into it. Nearly as important as possessing the right tools is knowing how to drill pilot holes.

In this article, we'll explain the importance of pilot holes and how to create them with precision. We'll also discuss how the right screw size and the right drill bit can help you achieve a tighter space for sturdier assembly projects.

Advertisement

Understanding Pilot Holes

Pilot holes are small-diameter holes drilled into a material. They guide a screw, bolt, or nail during subsequent fastening. Drilling pilot holes prevents the material, like wood or plastic, from cracking or splitting.

Accurate placement of pilot holes is essential for a project's aesthetics and structural integrity. Use a pencil or marker to indicate where you will drill. This step ensures precision and uniformity in your work.

Advertisement

Find the Right Size Drill Bit

The drill bits are what drill the actual hole. Drill bits are available in various sizes and shapes, as well as for different purposes. There are bits for drilling into wood and bits for drilling into masonry and concrete. In fact, there are bits for drilling into nearly anything. Drill bits must be maintained and kept sharp.

The most popular drill is a 3/8-inch-variable-speed drill, which can handle a variety of bit sizes and is suitable for basic drilling into wood [source: Vandervort].

Advertisement

How to Drill Small Holes

Let's take the drilling process step by step and learn how to drill a hole in wood. This will provide a helpful contrast when we explain how to drill a pilot hole.

  1. Measure the width of the piece of wood you are drilling into, to make sure the drill bit is long enough.
  2. Make sure you have the right type of bit. There are different bits for drilling different types of holes, including the brad point bit, forstner bit, expansive bit, auger bit, multi-angle bit and flat wood bit [source: Woodworking Institute].
  3. Mark the spot where you want to drill the hole with a pencil or marker.
  4. Punch a small hole on the spot you marked, using a hammer and nail. This will make a slight indentation in the wood for you to place the dill bit.
  5. Fit the drill bit into the hole.
  6. Start drilling at a low speed. Slowly increase the drill speed.
  7. Reduce the speed of the drill when your hole is made, and slowly pull the bit out. Switch the drill off when the bit is completely out of the hole. If you switch the power off while the bit is in the hole, you will not be able to remove the bit [source: Readers Digest].

Advertisement

Creating Pilot Holes

Drilling a hole and drilling a pilot hole are similar processes, but they serve different purposes and involve some distinct considerations. Achieving the correct pilot hole size requires matching the drill bit to the inner diameter of the screw threads, not the outer diameter. This precision ensures the threads can bite into the material effectively, providing a strong, secure hold without exerting undue stress on the material.

Applying the correct pilot hole size to the screw diameter is a fundamental aspect of skilled craftsmanship. Let's explore how to drill a pilot hole, step by step:

Advertisement

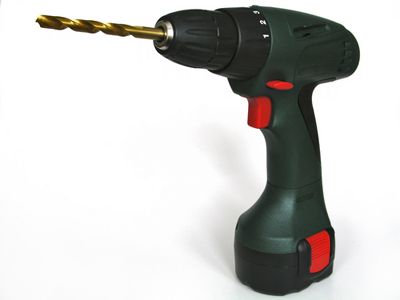
1. Gather Your Materials

Before you begin, make sure you have all the necessary tools and materials. You will need a drill, a set of drill bits, a screw or fastener, a pencil or marking tool, and a tape measure or ruler.

You'll also want to make sure you have safety equipment. Always wear safety glasses when using a drill to protect your eyes from flying debris. Gloves can also offer additional protection.

2. Select the Appropriate Size Drill Bit

Choose a drill bit that matches the diameter of the inner core of your screw, not including the threads. This ensures the screw will fit snugly without splitting the material. If unsure, measure the screw’s diameter with a caliper and compare it to your drill bits.

3. Mark the Spot for the Pilot Hole

Using your pencil or marker, clearly mark the point where you want to drill the pilot hole. Make sure this spot is precisely where you want your screw to go. Use a tape measure or ruler for accurate placement if necessary.

4. Set the Drill Depth

Determine the depth of your pilot hole. It should be equal to or slightly longer than the length of the screw. Many drills come with a depth setting or a depth stop. If yours doesn't, you can wrap a piece of tape around the drill bit to ensure you reach the same depth.

5. Position the Drill

Align the drill bit with the mark you made. Hold the drill firmly and make sure it's positioned straight, at a 90-degree angle to the surface. This ensures the screw will enter straight and not at an angle.

6. Start Pre Drilling

Pre drill slowly to establish the hole. Once the hole is started, you can increase the speed. Maintain a steady pressure, but do not push too hard as this might bend the drill bit or damage the material.

7. Clean the Hole

After drilling, remove any debris from the hole and the surrounding area. This step is essential for a clean finish and to ensure the screw will fit properly.

8. Test the Screw Fit

Carefully insert the screw into the pilot hole to test the fit. It should fit snugly without resistance. If the screw is loose, the pilot hole is too big; if it doesn’t fit, the hole is too small.

9. Final Adjustments (if necessary)

If the screw doesn’t fit, you may need to create a slightly larger pilot hole using a slightly larger drill bit. Be cautious not to make the hole too large.

10. Finish Your Project

Now that the pilot hole is drilled, you can proceed with your project, knowing that your screw will fit perfectly and the material won't split.

Advertisement

Advanced Techniques

Once you've mastered basic pilot hole drilling, explore advanced techniques. This includes angled drilling and working with different materials. Each material, like hardwood or metal, requires specific considerations.

Drilling pilot holes is a skill that enhances the quality and longevity of your projects. It requires precision, the right tools, and a keen understanding of materials. Whether you're sizing up wood screws or slightly smaller options, the goal is to avoid wood splitting. Keep developing your technique, and soon you'll be able to drill perpendicular!

Advertisement

This article was updated in conjunction with AI technology, then fact-checked and edited by a HowStuffWorks editor.

Advertisement

Loading...