Planting a Garden

Be gentle with the new seedlings in your garden.

While a great deal of work goes into getting your garden ready for this stage, planting feels like the real first step to getting your garden started. You must take great care with your new plants to make sure you get them in the ground without damage or distress.

The information in this article will give you everything you need to know to plant a garden. Learn about:

Advertisement

In our next section, we'll talk about starting plants from seeds.

Looking for more information about gardening? Try these:

  • Gardening: Learn the basics of successful gardening.
  • How to Start a Garden: Even beginning gardeners can get a healthy garden in the ground and growing.
  • Annuals: Plant these beauties in your garden for bountiful blooms all summer.
  • Perennials: Perennial plants grace your garden year after year.

Advertisement

Starting Plants from Seeds, Cuttings, Divisions, and Layerings

Growing plants from seeds allows gardeners to save money.

Starting your own plants from seeds, cuttings, divisions, and layering saves money and expands options. But be prepared to give propagation a certain amount of attention. Young plants need tender loving care to get them off to a good start.

Many plants grow well from seeds, especially annual flowers, herbs, and vegetables. You can find new, rare, or old-fashioned varieties that aren't available in local nurseries in seed catalogs. Seed sowing allows you to grow a few, dozens, or even hundreds of seedlings from a seed packet that costs a dollar or two. That's economy!

Advertisement

Certain special plants don't grow from seeds. They need to be cloned (vegetatively propagated). This is done by rooting sections of stems, roots, and, in a few cases, leaves. Clump-forming perennial plants can be divided into several pieces. Stems of some kinds of plants can be rooted while still attached to the mother plant. This is called layering. Some plants can be propagated equally well in several ways. For example, lantana can be grown from seed (flower color will vary); started from cuttings, either in soil or in water; or propogated via layering.

Keep reading to learn how to divide perennials.

Looking for more information about gardening? Try these:

  • Gardening: Learn the basics of successful gardening.
  • How to Start a Garden: Even beginning gardeners can get a healthy garden in the ground and growing.
  • Annuals: Plant these beauties in your garden for bountiful blooms all summer.
  • Perennials: Perennial plants grace your garden year after year.

Advertisement

How to Divide Perennials

Separating plants into divisions results in growing smaller plants faster.

Easily divide daylilies, hostas, astilbes, or other clump-forming perennials with a sharp shovel. Just slice off an edge of the clump in spring or late summer. Uproot it and replant elsewhere. Keep the new division watered for at least several weeks or until it has regenerated lost roots.

Divide a large perennial clump into small divisions to get many little plants fast. This is a quick and easy way to make enough plants for the big drifts of perennials such as asters, goldenrod, sneezeweed, and blazing stars before encouraging them to grow. Division renews a declining clump of perennials. As many perennials grow, new shoots emerge at the perimeter of the clump, which keeps spreading outward. The center becomes increasingly older -- sometimes woody, sometimes completely barren. In spring, late summer, or fall, dig up the entire clump. Cut out the old heart and discard it. Refresh the soil with organic matter, and replant the healthy young pieces.

Advertisement

Perennials that can be divided easily include asters, daylilies, yarrow, phlox, lady's mantle, salvia, coreopsis, hardy geraniums, irises, mint, thyme, oregano, and winter savory.

Here's how to make smaller divisions:

  • In spring or late summer, dig up the entire perennial plant clump and wash soil off the roots with a hose.
  • If dividing in late summer, cut back the foliage by half or more.
  • Use your hands to break rooted sprouts into individual pieces. If roots are too hard to work apart by hand, slice them free with a knife or pruning shears. Each section should contain at least one leafy sprout and one healthy root.
  • Replant very small divisions into pots of peat-based planting mix and tend them carefully until they get a little bigger. Larger divisions can go right back into the garden if kept moist until they become reestablished.

Keep reading to learn about plants from seeds indoors.

Looking for more information about gardening? Try these:

  • Gardening: Learn the basics of successful gardening.
  • How to Start a Garden: Even beginning gardeners can get a healthy garden in the ground and growing.
  • Annuals: Plant these beauties in your garden for bountiful blooms all summer.
  • Perennials: Perennial plants grace your garden year after year.

Advertisement

Plants from Seeds Indoors

Mimic the conditions of a greenhouse with a homemade mini-greenhouse.

Indoors you have more control over growing conditions and a lot of flexibility about what time of year to plant the seeds. Use specially prepared seed-starting medium, which is available from mail-order seed companies and from garden centers. Start seeds indoors under lights, rather than in a window, for even, compact growth. Seedlings must have bright light from the moment they peer up out of the soil or they will be weak and leggy. In climates with cloudy weather or homes without south-facing windows, sun may not be reliable enough. A light garden is an ideal solution.

Set seedlings in their containers a few inches below a fluorescent shop light. You can place seedlings on a table or counter and suspend the shop light from the ceiling over them, or set up three or four tiered light stands. You can adapt ordinary shelves by attaching lights to the bottoms of the shelves and setting growing trays below each light. Put the lights on a timer set to turn on 14 hours a day and then off again (one less job for you). You can't beat the results!

Advertisement

Make a mini-greenhouse under lights with a clear plastic garment bag. This traps humidity near seedlings, helping to protect them from wilting. To cover nursery flats full of seedlings, bend two wire coat hangers into arches and prop them in the corners of the flat, one at each end. Work the plastic over the top of the hangers, and tuck the loose ends in below the flat. It's even easier to make a greenhouse cover for individual pots. Slide two sticks into opposite sides of the pot. Then top with the plastic and fold it under the pot.

If starting seeds in a window, take extra care to maximize light. Use a south-facing window that will receive sun all day. It should not be blocked by a protruding roof overhang or an evergreen tree or shrub. (If you don't have a south-facing window, you should consider using plant lights.) Hang foil reflectors behind the flat to keep seedlings from leaning toward the sun. If the seedlings are sitting on a windowsill, make a tent of foil behind them, with the shiny side facing the seedlings. This will reflect sunlight and illuminate the dark side of the seedlings. They will grow much sturdier and straighter as a result.

Don't transplant seedlings into a larger pot until they have one or two sets of true leaves. This allows seedlings to develop enough roots to be self-supporting, even if a few roots are lost in the process. It's also a time when seedling roots are fairly straight and compact, making them easy to separate from nearby plants. This is not as simple as counting the number of leaves on the stem, however, because the seedling usually has an extra set of leaves called cotyledons. They emerge first and store food that nourishes the sprouting seedlings. Looking closely, you can see that cotyledons are shaped differently from true leaves. Squash seedlings, for instance, have oval cotyledons, but the true leaves are broad and lobed. When transplanting, handle the seedlings by the cotyledons to prevent squashing the delicate stem.

Mini-Greenhouses

Start seeds or cuttings in an aquarium or clear sweater box to keep humidity high. These are more permanent alternatives to makeshift options with plastic and are good for cuttings that need more overhead and rooting room than seedlings. To reuse these containers, wash them with soapy water, rinse, and sterilize with a solution of 1 part bleach to 10 parts water.

Keep reading to learn about plants from seeds outdoors.

Looking for more information about gardening? Try these:

  • Gardening: Learn the basics of successful gardening.
  • How to Start a Garden: Even beginning gardeners can get a healthy garden in the ground and growing.
  • Annuals: Plant these beauties in your garden for bountiful blooms all summer.
  • Perennials: Perennial plants grace your garden year after year.

Advertisement

Plants from Seeds Outdoors

Straight lines help you tell the difference between plants and weeds.

There are times to plant seeds directly in the garden. When this is successful, it is economical and very effective, for the plants grow without the disruption of being transplanted. 

Prepare the soil for planting and be sure the plot is fertile and smooth. Make rows or wide swaths for the seeds, following the timing and spacing directions on the packets. Straight lines help you discriminate between your plants and the weeds. The classic way to make straight lines is with posts and strings as a guide. Hoe along the string line for the shallow row. Plant seeds at the depth indicated on the packet and cover lightly with soil. Tamp down the soil over the seeds to make sure they are contacting the soil, and water them in. Be sure to mark the rows.

Advertisement

Many of the guidelines for indoor planting also apply to outdoor planting, but a main difference is pest control. Tiny plants are vulnerable to everything from aphids to chipmunks, so it's a good idea to plant more than you need and thin the plants later. Once they get past babyhood and are several inches high, thin them; they need space for the fast growth they are about to make.

Keep reading to learn about cuttings from stems.

Looking for more information about gardening? Try these:

  • Gardening: Learn the basics of successful gardening.
  • How to Start a Garden: Even beginning gardeners can get a healthy garden in the ground and growing.
  • Annuals: Plant these beauties in your garden for bountiful blooms all summer.
  • Perennials: Perennial plants grace your garden year after year.

Advertisement

Cuttings from Stems

Many plants can be grown from stem cuttings.

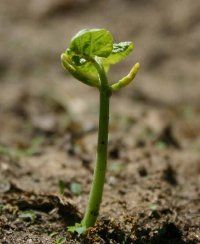
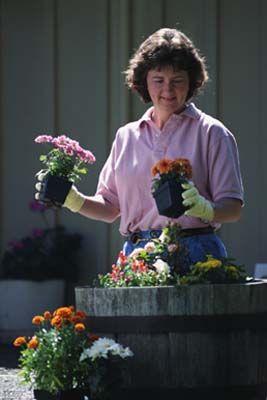
Most annuals are grown from seeds. However, impatiens, fibrous begonias, coleus, and geraniums can be grown from stem cuttings.

To propagate stem cuttings, select a mature plant that is in a stage of active midsummer growth. Prepare a container filled with rooting medium. It should be at least 3 to 4 inches deep, filled with 2 1/2 inches or more of rooting medium. Clean, coarse builder's sand, a mixture of half perlite and half peat moss, or half perlite and half vermiculite are good choices. Fill the container with the moistened medium, then let it settle and drain for a half hour.

Advertisement

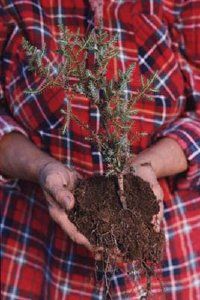
Take stem cuttings in the morning. Using a sharp knife, cut off growth tips just above the node, or the point where a leaf or side shoot attaches to the main stem. Each of the cuttings should be between 3 and 6 inches in length and have 4 to 6 nodes. The stem tissue should be easy to cut through.

Don't spend more than five minutes taking cuttings from the parent plants. To prepare a cutting for rooting, remove the leafless piece of stem at the bottom. Cut it off about 1/8 inch below the first node with a clean knife or razor cut, leaving no torn or angling pieces of tissue hanging from the stem. Remove all of the leaves from the lower half of the cutting. These can be cut off with a knife or manually snapped off.

If there are any flower buds on the cutting, cut these off as well. Cut back the tips of any large leaves remaining on the cutting so that one-third to one-half of their surface remains.

To help stimulate root formation, it's helpful to coat the lower one-third of each stem cutting with rooting hormone powder. Just dip each stem in the rooting powder and shake off any excess.

Poke a hole in the dampened rooting medium, insert the cutting in the hole to one-third of its length, and press the medium firmly around the stem with your fingers. When all of the cuttings are set in the medium, water the surface.

Place a plastic bag over the cuttings to form a tent, using bamboo takes or wooden dowels as supports. This will serve as a mini-greenhouse, which should be kept out of direct sunlight. If the bottom edge of the plastic tent is left a bit loose, some fresh outside air will be able to circulate up inside. This will help reduce the possibility of mildew and mold problems.

Some growers prefer to hold the plastic tightly against the container with an elastic band. In this case, it's necessary to remove the elastic and lift up the tent sides for a short period each day or else to poke holes in the plastic bag in order to supply the cutting with necessary fresh air. With a plastic tent there will be little need for watering the cuttings.

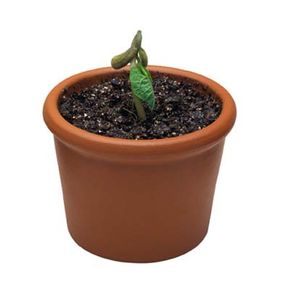
Annual cuttings will root quickly. They should be checked in a week to ten days. Insert a narrow knife blade or a fork beneath one of the cuttings and gently lift it out. When the longest roots are 1/4 inch long, remove the cuttings from the rooting medium and transfer each to a 1 to 1 1/2-inch pot filled with planting mix.

Following are some additional tips for working with stem cuttings:

  • Be sure to record when you took stem cuttings from roses, lilacs, geraniums, impatiens, chrysanthemums, dahlias, and other plants. Rooting success often depends on the season in which the cuttings were taken.
  • Take softwood stem cuttings in late spring or early summer for fast rooting. New spring shoots are vigorous but soft and succulent. They may wilt before they root. But if the shoots are allowed to mature for a month or two, they firm up slightly and are ideal for rooting.
  • Take stem cuttings in the morning when they are fresh and full of water. Once the stem is severed from its root, it will not be able to soak up moisture for several weeks or until new roots develop. If cuttings are started without enough stored moisture, they will simply wilt and die.
  • Use rooting hormone on older or hard-to-root cuttings. Rooting hormones, available in powdered and liquid forms, contain chemicals (called auxins) that allow cut stems to begin to produce roots. They must be applied as soon as the cutting is taken and before the cutting is put into sterile planting mix. Not all stems need extra rooting hormone (mints and willows, for instance) as all plants produce some of their own. Adding rooting hormone can make slow starters much more reliable.
  • Avoid feeding softwood shrub cuttings any additional nitrogen after rooting. A little nitrogen, which is available in nutrient-enriched planting mixes, can help the rooting process proceed. But excess nitrogen can encourage fast, tender new growth that is vulnerable to winter damage. Once the cuttings have survived the winter, transplant them into the garden or a larger pot and fertilize them normally.
  • Set a clear glass jar over cuttings of roses, willows, dogwoods, or other easily rooted stems put directly in the garden. The jar will maintain high humidity around the cutting and help prevent wilting. But be sure to protect the jar from the hot sun so the cuttings don't get cooked.
  • Test if a cutting has rooted by gently tugging on the stem. If it shows resistance, roots have formed. After first rooting, allow the roots to develop for several more weeks, if possible, before transplanting.

Keep reading to learn about cuttings from roots.

Looking for more information about gardening? Try these:

  • Gardening: Learn the basics of successful gardening.
  • How to Start a Garden: Even beginning gardeners can get a healthy garden in the ground and growing.
  • Annuals: Plant these beauties in your garden for bountiful blooms all summer.
  • Perennials: Perennial plants grace your garden year after year.

Advertisement

Cuttings from Roots

Some plants can be grown from root cuttings.

Gardeners have another option when it comes to planting: root cutttings. Take root cuttings when stem cuttings are not possible. Some perennials, like Oriental poppies and horseradish, have clusters of foliage close to the ground without any stems at all. You can dig up a root and cut it into pieces that may sprout into new plants.

With horseradish, you can cut off a side root in the fall and replant it for a new start in the spring. But root cuttings of most other perennials need more help than horseradish.

Advertisement

Here's how to do it:

  • Dig the root in early spring before shoots begin to emerge.
  • Cut the roots into pieces 1 to 2 inches long.
  • Lay them horizontally in a flat of well-drained propagating mix such as perlite or coarse sand. Cover lightly.
  • Keep slightly moist but not wet (to prevent root rot) and watch for new sprouts to emerge.
  • When the new plants are growing strongly, transplant them into individual containers or put them out in the garden.

It's also possible to propagate roots still attached to the mother plant -- a process called layering.

Keep reading to learn about plants suitable for softwood stem cutting.

Looking for more information about gardening? Try these:

  • Gardening: Learn the basics of successful gardening.
  • How to Start a Garden: Even beginning gardeners can get a healthy garden in the ground and growing.
  • Annuals: Plant these beauties in your garden for bountiful blooms all summer.
  • Perennials: Perennial plants grace your garden year after year.

Advertisement

Plants Suitable for Softwood Stem Cutting

Many plants can be grown from stem cuttings.

Starting your own plants from stem cuttings is a great option for gardeners who want to save money and expand their options. Propagation from stem cuttings, though, demand a bit of attention and care.

If you want to give propagating stem cuttings a shot, try your luck with these plant varieties:

Advertisement

Keep reading to learn about layering plants.

Looking for more information about gardening? Try these:

  • Gardening: Learn the basics of successful gardening.
  • How to Start a Garden: Even beginning gardeners can get a healthy garden in the ground and growing.
  • Annuals: Plant these beauties in your garden for bountiful blooms all summer.
  • Perennials: Perennial plants grace your garden year after year.

Advertisement

Layering Plants

Layered stems develop roots while still

The process of layering is typically used to propagate hard-to-root shrubs like azaleas. Layering also works well with shrubs that have low-growing or creeping branches, like creeping rosemary. Layered stems develop roots while still connected to the mother plant, which helps encourage the rooting process.

Follow these steps for layering:

Advertisement

  • In the spring, select a low, flexible branch that will bend down to the ground easily.
  • Prepare well-drained but moisture-retentive soil where the stem will touch the ground.
  • Nick the bark off the side of the stem that will touch the ground and remove the leaves near the nick. Dust the cut with rooting hormone.
  • Cover the barren and nicked stem with soil. Top it with a rock, or pin it in place with a stake or metal pin.
  • The branch tip will become the new plant. If it is an upright grower, stake the tip upright to give it a good shape.
  • Keep the rooting area moist for several months, until roots develop and become large enough to support the new plant.
  • Cut the new plant free from the parent branch and transplant it to a pot or new site in the garden.

Looking for more information about gardening? Try these:

  • Gardening: Learn the basics of successful gardening.
  • How to Start a Garden: Even beginning gardeners can get a healthy garden in the ground and growing.
  • Annuals: Plant these beauties in your garden for bountiful blooms all summer.
  • Perennials: Perennial plants grace your garden year after year.

Advertisement

Advertisement

Loading...