How to Make Your Own Photography Dark Room

Create your own memories, then create your own prints.
Hemera/Thinkstock

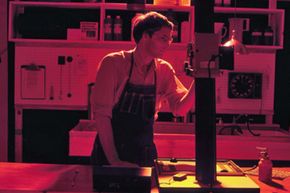
Any creative soul who has ever watched the goings-on of a photography dark room has probably had a yen to develop some photos of her own. There's something very enticing about working in a quiet, dark room with only a dim red bulb to light the way. And in the movies, the cool photographer girl always has a cute guy seek her out while she's working.

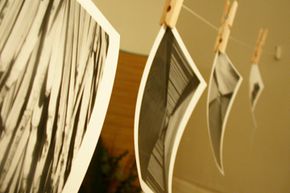
The tools of the trade are also pretty cool: those trays full of liquids that take a moment in time and turn it into a permanent memory. But despite what they do in movies, color photo developing is way too complicated for even many experienced photographers to attempt on their own. Plus, it's kind of boring! Color photography can't even be exposed to the red light so everything happens in complete darkness, and then in a tube with the chemicals! However, you can fairly easily set up a black and white dark room in the comfort of your home. So, next time you get that late-night burst of creativity, you'll have the tools you need to fan the fire. Cute guy not included.

Advertisement

Setting Up a Photography Dark Room

A dark needs to be, well, dark to get quality prints.
Comstock/Thinkstock

The main thing you need for your dark room is, well, a room that's dark. If you don't have a room you can dedicate, a bathroom or an area of the basement will work. A room with no windows is ideal, but not entirely necessary. There are plenty of things you can do to achieve the darkness you need.

Layered black fabric is useful for blocking out windows or the edges of doors where light leaks in. The rule of thumb for testing your darkness is to stand in the room and hold up a piece of white paper. After five minutes, if you can see a little bit of the white, you still have too much light.

Advertisement

A sink in the dark room is ideal, but if you can't make that work, you'll at least need one nearby. You'll want to set up two areas of your dark room -- a wet side and a dry side. This will keep your chemicals away from everything but the photo in progress. The wet side is usually set up in a particular order for a seamless work flow. Developer is first, then the stop solution, next is the fix solution and then the bath. The drying area should be near the bath, away from the other stations.

You'll be working with chemicals, so an area with good ventilation is a must to stop fumes from building up.

Advertisement

Photography Dark Room Equipment

There should also be room to hang your prints to dry.
iStockphoto/Thinkstock

Once you have your area set up, it's time to make a trip to your photo supply store to get the equipment you need to start developing pictures. In the dry area, one of the big budget items is an enlarger to blow up the negative. If money is an object, there are instructions on the Internet for making your own.

You'll also need an easel and a timer, and of course, photo paper. In the wet area, you'll need three sets of trays for the chemicals, sized to fit the photo paper you'll be using for your prints. Three sets of tongs are next on the list, one for each tray to prevent cross contamination.

Advertisement

Hopefully you already have some sort of worktable -- one that sits at counter height is preferable. If not, a 6-foot table propped up on plastic bed risers is a quick way to make one.

You'll also need a dark room light, which can be a costly item. But photo stores often sell just the red bulbs, which are much cheaper and can be used in any light fixture. You'll also need your chemicals for developer and fixer. A solution of water and white vinegar works as a stop bath. Fortunately, the only one you'll have to replace on a regular basis is the developer.

Advertisement

Lots More Information

Related Articles

  • "Creating Your Own Darkroom." University of Wisconsin-Extension, 2005. 4h.uwex.edu/pubs/showdoc.cfm?documentid=4591
  • "Set up your own darkroom." Dshed.net, 2010. http://www.dshed.net/digitised/neighbourhood/resources/set_up_darkroom.html

Advertisement

Loading...