A kitchen can be the most warm, inviting room in your home, a room where friends and family gather.
Make your kitchen even more special with the stencil projects in this article. There's no better room for these wonderful handmade, one-of-a-kind projects.
Advertisement
The following pages take you to simple stencil projects you can complete to decorate your kitchen. Each article includes simple step-by-step instructions, colorful photos, and a stencil design you can download and print. Stretch your creativity and explore these stencil projects.
How to Stencil a Farmhouse Plate. This delightful stencil project includes designs for a farm-inspired plate and matching shelf.
How to Stencil a Grand Table Runner. Don't save this stunning table runner for special occasions -- a statement this dramatic should be made every day.
The Farmhouse Plate stencil project includes a country plate and lovely matching shelf. Learn how to complete this kitchen stencil project on the next page.
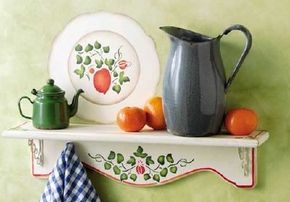
The supporting shelf is real, but theeye-catching plate is a stencil.
Fool-the-eye stenciling works its delightful magic here to create a faux plate. The supporting shelf is real, but its matching design accents the plate nicely. Learn how to create this great stencil design with our step-by-step instructions below.
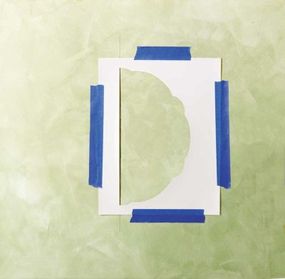
Step One: To prepare the wall for the faux plate stencil, base-coat with latex paint. Determine where the plate will be painted on the wall, then measure and mark a vertical line where the center of the plate will be. Use a plumb line or level to make sure the line is straight.
Step Two: The plate stencil provided is only half the image. Line up the stencil along either side of the guideline, and tape it in place.
Line up the stencil along either side of the guideline.
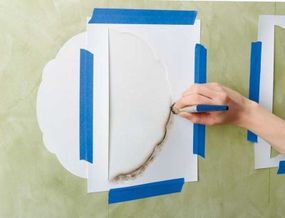
Step Three: Base-coat this half of the plate Light Ivory with the 1-1/4-inch brush. Let dry, and repeat if necessary.
Step Four: Dry the stencil completely, then flip it over and line it up with the first half of the image. Tape it in place and repeat step three. Touch up the center area, where the two sides come together. Let paint dry.
Step Five: Leaving the stencil in place, shade around the outer edge of the plate with Dark Burnt Umber. Dry the stencil, and reposition on the other side. Shade again with Dark Burnt Umber.
Shade around the outer edge of the plate.
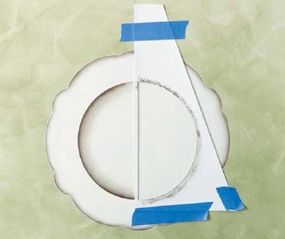
Step Six: To find the center of the plate, measure and make a small pencil mark in the middle. Align the center plate stencil with this mark, and tape it in place. Shade just the edge of this inner section with Dark Burnt Umber. Dry the stencil, then reposition it on the other side of the plate and repeat.
Shade the edge of the inner sectionwith Dark Burnt Umber.
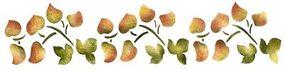
Step Seven: Center the fruit design stencil on the plate, and tape in place. Base-coat the leaves and stems Hauser Medium Green, and shade them with Black Green. Stencil the fruits and berries Poppy Orange with the 5/8-inch brush. Shade the edges of the fruits and berries Tomato Spice.
Stencil Variations
Create a collection of stenciled plates by varying the central designs for a set of faux dishes. You can even create your own one-of-a-kind table settings. Look at these stencil design variations for inspiration:
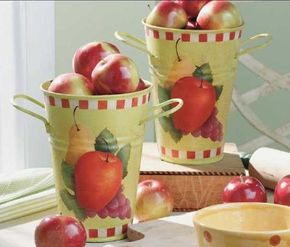
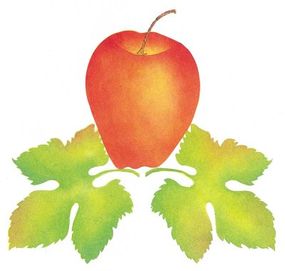
Farmers' market charm brings these beautiful buckets to life to make a lovely addition to a kitchen or pantry. Learn how to create this wonderful stencil project with our easy-to-follow directions.
Step One: To prepare the bucket for painting, wash it with detergent or a household cleaner. Let dry. Lightly sand the surface with fine-grade sandpaper. Apply an even coat of metal primer with a foam brush, and let dry.
Step Two: Base-coat the bucket Apple Green. Let dry, and repeat.
Step Three: Use spray adhesive to adhere the checkerboard stencil to the top rim of the bucket. Swirl Tomato Spice into the squares, then move the stencil over and repeat the squares all the way around the top. Let dry. Now position the stencil so that the red squares are covered, and stencil the remaining spaces Light Ivory. Repeat to finish the border.
Step Four: Repeat step three to create a checkerboard at the bottom of the bucket.
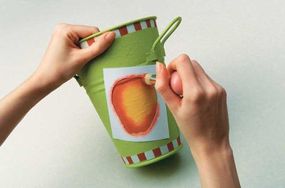
Step Five: Use spray adhesive to adhere the apple stencil to the front of the bucket, centering the bottom of the image between the two handles. Base-coat the apple Calypso Orange. Let dry, and then apply Tomato Spice around the perimeter of the apple. The red will be just an outline of color at this point.
Spray adhesive adheres the apple stencil to the bucket.
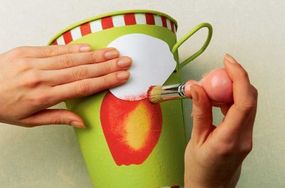
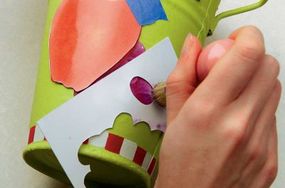
Step Six: Before extending red into the center of the apple, flip the dropout of the apple upside down and position it on the bucket so the top curve of the apple covers the section that will become the stem cavity. Hold the dropout in place rather than taping it down.
Continue swirling Tomato Spice around the apple and along the bottom edge of the dropout, keeping the center of the apple quite light. Remove the dropout and work the paint onto the top edge of the apple, leaving a strong Calypso Orange highlight to create the stem cavity. Blend the color along the edges. Let dry.
Blend the color along the edges.
Step Seven: Cover the apple with its dropout to protect it while you stencil the grapes. Base-coat the grapes Calypso Orange. Let dry, then swirl Grape paint onto the entire cluster of grapes. Don't worry at this point about making each individual grape distinct. Repeat with a second coat of Grape. It's OK if some of the orange shows through.
Step Eight: Using the brush that already has Grape on it, pick up a little Light Ivory from your palette. Hold the individual grape stencil in place, and touch highlights onto the right side and around the bottom of each individual grape.
Don't strive to make each grape exactly the same; subtle differences and nuances add interest. Using a toothpick, dot Light Ivory highlights on the right side of each grape. Finally, load Medium Foliage Green on the same brush, and lightly add shading between the grapes and the apple.
Touch highlights onto the right side and around thebottom of each individual grape.
Step Nine: With the apple dropout still in place, position the leaf stencil and base-coat the leaf Calypso Orange. Let dry, then swirl Medium Foliage Green onto the leaf. Shade with Dark Foliage Green near the apple, and add a very thin coat of Tomato Spice over the darkest areas of the leaf. Repeat for the second leaf.
Step Ten: Position the pear stencil over the top of the apple dropout, and base-coat the pear Calypso Orange. Let dry, then brush a very soft blush of Tomato Spice, blending it softly into the base-coat. Repeat with Medium Foliage Green to add a tint of green behind the leaves. Remove the apple dropout.
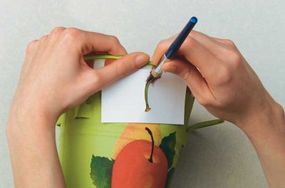
Step Eleven: Position the stem stencil so it fits into the stem cavity highlight on the apple, and adhere. Stencil the stem Brown Iron Oxide. Flip the stencil over, adhere it to the top of the pear, and repeat.
Position the stem stencil so it fits into the cavity on the apple.
Step Twelve: To protect the bucket, spray the surface with at least two coats of varnish. Let dry between coats.
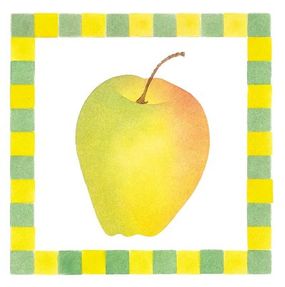
Stencil Variations
This project is the perfect place to experiment with color and shading. Try a monochromatic color scheme for a subtle look, or turn that red delicious apple into a golden delicious treat. These stencil design variations will spark your creativity:
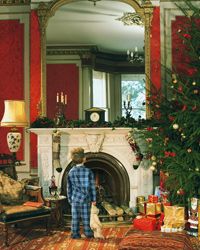
Elegant details and beautiful color make the French Country Kitchen stencil project a gorgeous way to change your kitchen. Learn how to complete this stencil project in the next section.
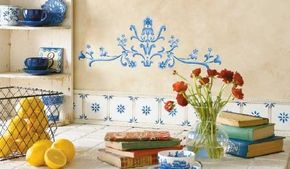
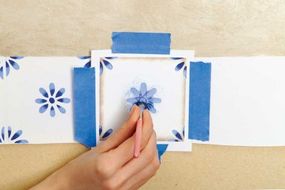
Behind the warmth of a French country kitchen lies a brilliant surprise…the blue tiles, as well as the dramatic swag, are faux treatments. Follow our step-by-step instructions below to begin working on this lovely stencil project.
Step One: Determine where the swag will be painted on the wall, then measure and mark a vertical line where the center will be. Use a plumb line or level to make sure the line is straight.
Step Two: The swag stencil provided is only half the image. Line up the stencil along one side of the guideline, and tape it in place.
Step Three: Base-coat the entire stencil in Periwinkle Blue with a 5/8-inch brush, then shade with Blue Ink using a 3/8-inch brush. Let dry.
Shade with blue ink using a 3/8-inch brush.
Step Four: Flip the stencil over and line it up with the first half of the image. Tape the stencil in place, masking your previous work on the center edge. Repeat step three.
Flip the stencil over and line it up with the first half of the image.
Faux Tiles
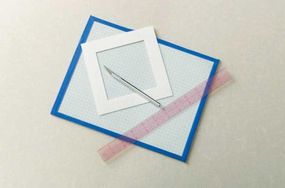
Step One: To create a tile stencil, measure and mark a 4x4-inch square on heavy paper or card-stock, leaving at least one inch as a border around all four edges. Cut out the square with a craft knife.
Measure and mark a 4x4-inch squareon heavy paper or cardstock.
Step Two: Position the homemade tile stencil on the wall just above the counter-top. Base-coat the tile White with a one-inch brush, then shade around the tile's edges with Light Ivory on a 5/8-inch brush, brushing in about 1/2-inch on all four sides. Let dry completely, and remove the stencil.
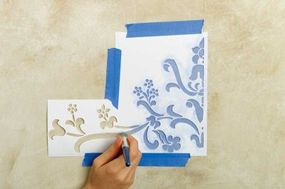
Step Three: Position the floral design stencil on the tile, and tape it in place. Base-coat the design Periwinkle Blue with a 5/8-inch brush, and use a 3/8-inch brush to shade the "insides" of the flowers with Blue Ink (see photo for the detail). Let dry.
Use a 3/8-inch brush to shade the "insides" of the flowers.
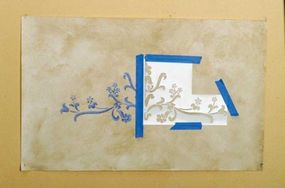
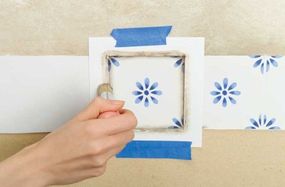
Step Four: Reposition and tape down the square tile stencil. For a dimensional effect, lightly shade just the edges of the tile with Dark Burnt Umber using a 3/8-inch brush, shading over the blue flower petals in the corners.
Lightly shade just the edges of the tile using a 3/8-inch brush.
Step Five: Reposition the tile stencil 1/8 inch from the first tile. This will create the illusion of a grout line.
Step Six: Repeat steps two to five for each faux tile.
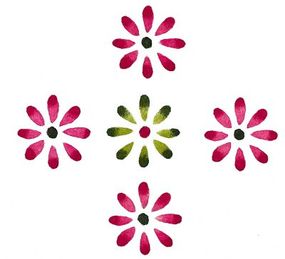
Stencil Variations
This elegant swag can be the focal point of any room. Add flourishes and flowers to further embellish the design, or subtract any of the elements for a more restrained look. With a simple change of color, you have a brand-new swag. Adding faux tiles is a stylish way to dress up a room. Vary the look by dropping out some of the center designs, using different patterns and colors, or changing the color of the background grout. These stencil design variations will help you get started:
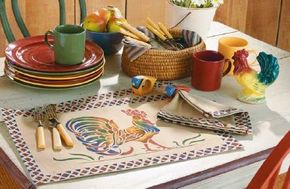
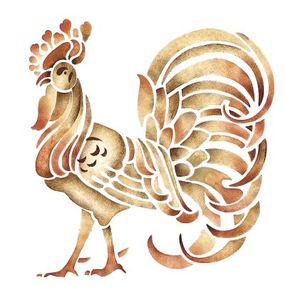
Bring farm life charm to your kitchen with the Rooster Table Linens stencil project. Keep reading to learn how to complete this wonderful kitchen stencil project.
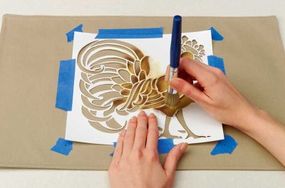
Set your table with country sentiment and vibrant style. These delightful rooster table linnens will give you something to crow about at every meal. The step-by-step instructions below will help you get started on this great stencil project.
Step One: Before stenciling, follow the manufacturer's instructions to add fabric medium to the acrylic paint.
Step Two: Position the large rooster stencil in the center of the place mat. Tape it in place. Mark the corner registration points on pieces of tape on the mat.
Step Three: Base-coat the rooster's body and the base of the tail feathers (where the feathers attach to the body) Maple Sugar Tan with the 3/4-inch brush. Let dry, then shade with Brown Iron Oxide on a 5/8-inch brush.
Shade the rooster with Brown Iron Oxide on a 5/8-inch brush.
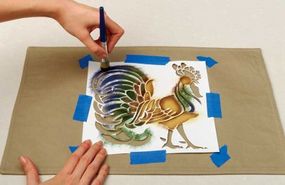
Step Four: Beginning at the base of the tail feathers and working along the length of the feathers, stencil the colors in the following order on 5/8-inch brushes: Brown Iron Oxide, Hauser Dark Green, Blue Ink, and Burgundy Rose. Slightly overlap the colors where they meet each other. Stencil the neck feathers from the head down in the same order, leaving out the Burgundy Rose at the end.
Slightly overlap the colors where they meet each other.
Step Five: Base-coat the rooster's legs, feet, comb, beak, and wattle Burgundy Rose. Remove the first overlay, and let dry.
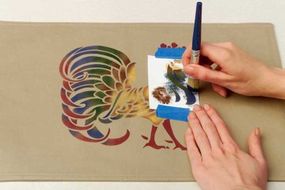
Step Six: Tape the second overlay in place. Repeat step four to stencil the additional neck feathers. Stipple Brown Iron Oxide on the eye and feather detail. Remove the overlay.
Tape the second overlay in place.
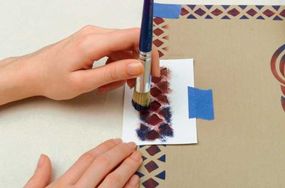
Step Seven: To stencil the border, line up the stencil along a short edge of the place mat. Tape in place. Stencil the center row of the border Burgundy Rose, letting the paint overlap onto the outer rows of triangles as well. Stencil the outer triangles Blue Ink, slightly blending the two colors. Move the stencil along the edge of the place mat, and repeat until the border covers the entire edge. Repeat for the other short edge.
Stencil the center row of the border Burgundy Rose.
Step Eight: Once the short edges are complete, use tape to mask off the corners of the short edges, and repeat step seven to stencil the border on the long edges of the place mat.
Step Nine: When the paint is completely dry, place a soft, clean cloth over the design and run an iron over the cloth to heat-set the paint.
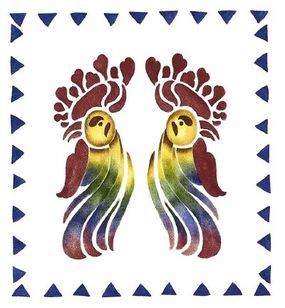
Stencil Variations
Center the rooster as a stand-alone design on a chair seat or serving tray. Alter the colors to fit in with any decorating scheme. Add the geometric border (in any color combination, of course) to back-splash tiles to extend the motif into the rest of the room, or accent candlesticks and napkin rings with a bit of border detail to complete the table scene. These stencil design variations will help inspire your own ideas:
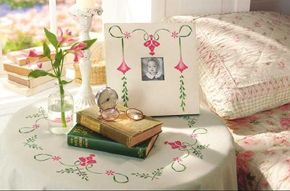
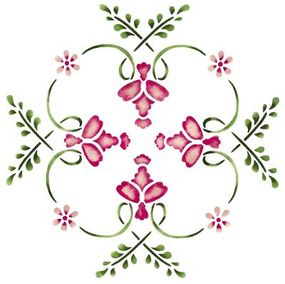
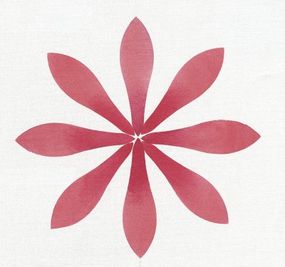
Delicately pretty, the Vintage Floral Table Cloth stencil project looks lovely on any table. Learn how to complete this kitchen stencil project in the next section.
A trailing garland of flowers and foliage adds country nostalgia to a charming bedside table. Learn how to create these delightful floral designs with this lovely stencil.
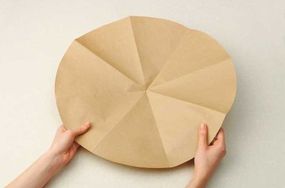
Step One: Because your table may be a different size than the table shown here, follow these directions for adapting the stencil design to your needs. First, make a paper template of the tabletop. Fold the template in half, then in half again to create quarters. Then fold it in half once again. Unfold. You will have 8 equal pie-shape sections. Set aside until Step Three.
Make a paper template of the tabletop.
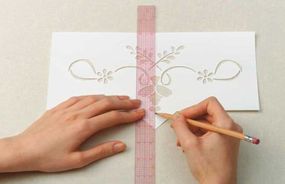
Step Two: Measure and mark the center of the stencil. Draw a pencil mark at this point to divide the design in half.
Measure and mark the center of the stencil.
Step Three: To get an idea of how the design will translate onto your tabletop, practice on the paper template instead of proceeding directly to the fabric. Position the stencil on the edge of the paper template, aligning the pencil line with a fold line on the template. Tape the stencil in place, with the flower toward the center of the template.
Step Four: When planning the spacing, first trace the entire stencil on every other fold line. After seeing how much space there is between each stencil design, you can determine which part or parts of the design you wish to use to fill the space attractively. Here, the stencil has been turned upside down, with only the ferns at the bottom traced onto the remaining fold lines.
Step Five: Now fold the tablecloth as you did the template. This time, use an iron to lightly press each fold to create the eight equal sections. Or, lightly mark each fold line with a disappearing marking pen or a chalk pencil.
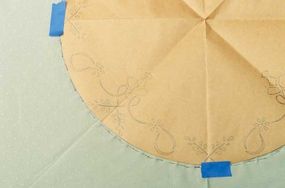
Step Six: Center the paper template on the fabric, and tape it in place. Outline the edge of the circle with either a chalk pencil or straight pins. Remove the tape and the template.
Outline the edge of the circlewith a chalk pencil or straight pins.
Step Seven: Mist a piece of cardboard with re-positionable stencil adhesive. Lay the fabric on the cardboard, and smooth it onto the sticky surface to keep it from slipping while you stencil.
Step Eight: Before you begin stenciling, mix each of the paint colors with a fabric medium according to the manufacturer's directions.
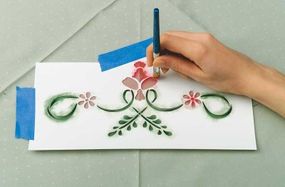
Step Nine: Center the stencil at the edge of the circle on one of the fold lines, and tape in place. Stencil the leaves and stems Green Sea and the flowers Sachet Pink. Shade the green areas with Hauser Dark Green; use Berry Red for shading the pink areas.
Use Berry Red for shading the pink areas.
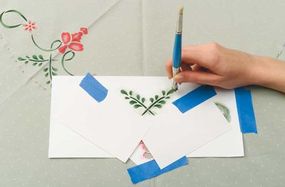
Step Ten: Place the stencil upside-down in the center of the next fold. Tape in place. Use index cards or tape to mask off everything but the ferns at the bottom of the stencil. Stencil the leaves and stems Green Sea, and shade with Hauser Dark Green.
Use index cards or tape to mask off everything but the ferns.
Step Eleven: Repeat steps nine and ten until all eight fold lines have been stenciled.
Step Twelve: Allow the paint to dry thoroughly, then remove the cardboard from the back of the fabric. When the paint is completely dry, place a soft, clean cloth over the design and run an iron over the cloth to heat-set the paint.
Stencil Variations
While soft greens and pinks bespeak romance, a change of colors is all that's required to alter the feel of this design. Try country blue and dusty rose to invoke a warm, peaceful aura. Experiment by rearranging the stylish elements of this stencil to add a coordinated touch throughout the room. Frame your headboard, trim a picture frame, place a ring of flowers around the ceiling fixture: Your choices are endless, and the look is ageless. Start exploring with these stencil variations:
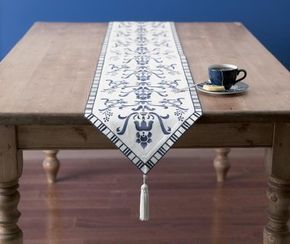
Dress your table with this bold, graphic design, which makes a stunning focal point. Learn how to stencil a grand table runner for eye-catching results.
Step One: Before you begin, follow the manufacturer's instructions to add fabric medium to the acrylic paint.
Step Two: Start at one end of the runner, positioning the stencil so the straight edge is centered. Tape off any excess pattern that does not fit into the point or sides. Stencil, working toward the middle of the runner. Stop before you reach the middle. Let the paint dry completely, and then flip the stencil over and align it to stencil the mirror image of the design.
Step Three: Repeat this process on the opposite end of the runner. When you reach the same place on both sides, determine how much or which parts of the pattern would make a pleasing look in the center. Mask the rest of the stencil, and stencil only the parts you want.
Step Four: For the border, position the set of two long stripes so the outer stripe is directly on the edge of the runner. Stencil both stripes all the way around the runner.
Next, mask off the runner inside the inner stripe while you stencil the perpendicular stripes. Start on a short edge of the runner, and position the stencil so it best fits the space. If necessary, use a piece of tape to create the miter at the point.
Adjust the fit of the stripes where they meet. (The registration of the stripe stencil is accomplished by aligning the first stripe of the stencil with the last stripe stenciled.)
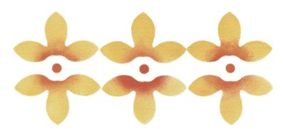
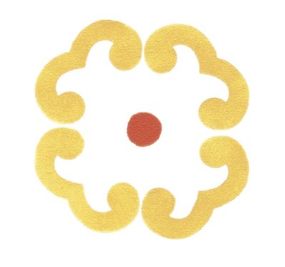
Stencil Variations
You can change the look of your table runner by varying your use of color, and also by incorporating different shapes and patterns. These stencil variations will help spark your creativity:
Your kitchen can be the busiest room in your home. With these stencil projects, it can also be the most lovely. Whether you add a few small, personal touches or incorporate an overall theme, stencils provide a simple way to personalize and beautify your kitchen.