Craving one-of-a-kind furniture? With stencils, you can turn a chair, cabinet, footstool -- just about anything -- into a unique piece of furniture that reflects you and your style.
These stencil projects are simple to do. Add your own special touch by playing with color, shapes, and pattern. With stencils, the sky is the limit.
Advertisement
The following pages take you to simple stencil projects you can do to transform your furniture. Each article includes simple step-by-step instructions, colorful photos, and a stencil design you can download and print.
Stretch your creativity and explore these stencil projects.
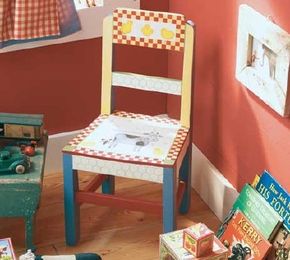
Cows, chicken, and a checkerboard border -- the Barnyard Animals Chair has got it all. Learn how to create this furniture stencil project in the next section.
What child wouldn't welcome the opportunity to read a book or tell a story while perched on this charming little chair? It's a treasure they'll save forever. Our simple, step-by-step instructions will help you complete this great stencil project.
Step One: Prepare the wood for painting by lightly sanding it with fine-grade sandpaper, applying a wood sealer, and base-coating as follows: Paint seat, seat apron, and backrest slats Light Ivory; top edges of backrest slats and one-inch squares on front corners of seat Light Foliage Green; front of vertical rails and one-inch stripe around seat one coat Mello Yellow followed by a thin coat of Crocus Yellow; rungs of legs and 1/4-inch stripe on front edge of seat Tomato Spice; and chair legs Cape Cod Blue. Let dry.
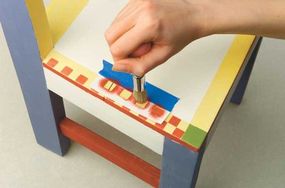
Step Two: To make the seat border, tape the checkerboard stencil to the edge of the seat. Using Tomato Spice and a 1/4-inch brush, stencil the first row of checks along the edge of the seat. Lift the stencil and move it one row to the right and one row in to stencil the inside row of checks. Be sure the corners of the checks touch. Repeat around the entire seat border, except for the green corner squares.
To make the border, tape thecheckerboard stencil to the edge.
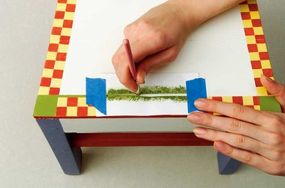
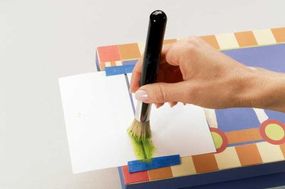
Step Three: To add a stripe between the checkerboard border and the seat, tape two index cards together, 1/8 inch apart. The space between them will be the stripe. Position the stripe so it touches the edge of the checkerboard border. Tape in place, and stencil the stripe Light Foliage Green. Repeat around the seat so the entire checkerboard is edged in green.
The space between two index cardsmakes the border's stripe.
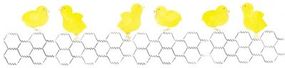
Step Four: Tape the chicken wire stencil to the small backrest slat, and swirl Garden Green into the openings of the stencil. Move the stencil over, and repeat until the chicken wire covers the backrest slat, front and back. Repeat on the seat apron.
Step Five: Tape the cow stencil onto the seat, and mark the registration points. Base-coat the cow Cottage Blue using a 1/2-inch brush, and shade with Basic Black. Stencil the horns, tail hair, and hooves Basic Black. Stencil the bow on the cow's tail Tomato Spice. Remove the stencil.
Step Six: Position the cow overlay, and tape it in place. Stencil the nostrils, eyes, and body markings Basic Black. Let dry.
Step Seven: Tape chick stencil "C" to the left corner of the seat. Using a 1/2-inch brush, stencil the chick Sunflower Yellow. Add shading with Yellow Ochre, and stencil the chick's feet and beak Warm Brown. Use a toothpick and Basic Black to add a small dot for the chick's eye.
Step Eight: Repeat step seven to stencil chick "B" in the seat's right corner.
Step Nine: Before stenciling the chicks' tracks onto the seat, use a pencil to mark where they will go. Once you're happy with the placement, tape down the stencil and stencil the tracks Basic Black with a 1/4-inch brush.
Step Ten: To stencil the top slat on the backrest, follow the instructions in Step Seven to stencil three chicks onto the backrest, referring to the photo for placement. Use the face overlay for the middle chick, and stencil the beak Warm Brown and the eyes Basic Black. Mask off the chick on the left, then stencil a checkerboard border around the slat (see Step Two). Repeat the design on the back of the slat.
Stencil three chicks onto the chair's backrest.
Step Eleven: Mist the entire surface of the chair with at least two coats of spray varnish, letting it dry between coats. Let this dry several days, and then brush on two smooth coats of varnish for more protection from the hands and feet of little ones.
Stencil variations
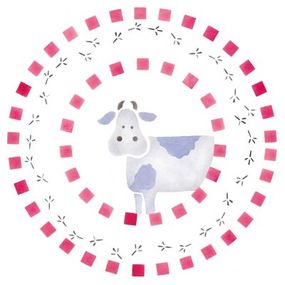
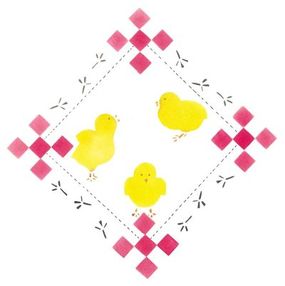
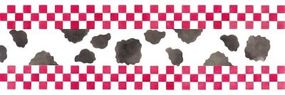
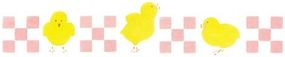
Count your chicks -- they're likely to hatch everywhere once you begin this easy design. Change the color of the checkerboard to coordinate with your décor, and stencil a fun wrap-around border. Mix and match your favorite barnyard elements to enliven different areas of the playroom for a down-on-the-farm look. These stencil variations will inspire you:
You'll love displaying your dishes in the lovely Country Cupboard in the next section. Keep reading to learn how to create this furniture stencil project.
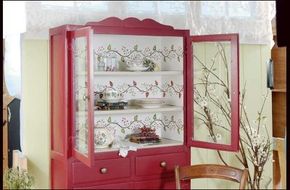
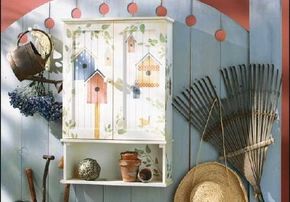
Display your collectibles against a picture-perfect backdrop. Your precious finds sparkle on the stage of this charming decoratively stenciled country cupboard. The easy-to-follow directions below will help you get started on this wonderful stencil project.
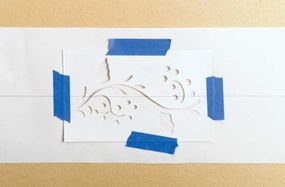
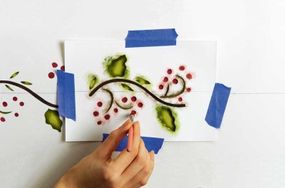
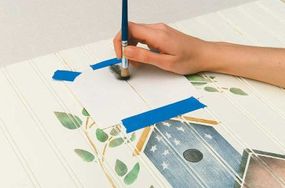
Step One: Measure and make a light pencil line on the wood behind the shelf. Mark the horizontal center of each stencil as well, and then line up stencil A with the pencil line on the wood. Position and tape down the stencil.
Position and tape down the stencil.
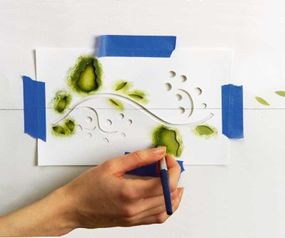
Step Two: Base-coat the leaves Jade Green with the 5/8-inch brush, and shade the leaves with Gamal Green on a 3/8-inch brush. Stencil the berry stems Gamal Green with a 3/8-inch brush. Stencil the vine branch Dark Burnt Umber and the berries Berry Red, also with 3/8-inch brushes. Remove the stencil, and let dry completely.
Use green paint for the leaves.
Step Three: Line up stencil "B" at the end of stencil "A", and repeat Step Two. Let dry.
Use berry-red paint for the stencil's berries.
Step Four: Repeat Steps Two and Three to stencil the vine-and-berry design across the width of the shelf.
Step Five: Repeat Steps One-Four for each shelf area. For contrast, on the middle shelf base-coat the leaves with Burgundy Rose and shade them with Dark Burnt Umber. Then paint the berries Jade Green, and use Gamal Green for shading. The vine branch remains Dark Burnt Umber.
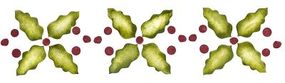
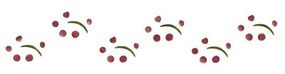
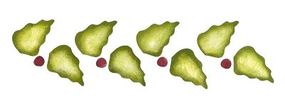
Stencil Variations
Add a hint of country loveliness with this winding vine of leaves and delicate berry sprays. Carry the look across the kitchen soffit, around a china saucer, or along a creamy linen tea towel. Change the stencil placement to twist the vine into a wreath or curve over an arched doorway. Alter the colors to suggest a variety of berries. The stencil variations below will help you explore these possibilities, and create your own:
Step One: Begin by stenciling the leafy branches, referring to the photo to determine placement. Secure the stencil with tape, and swirl Garden Green on the leaves, varying the intensity of the color. Shade with Basic Black, and tint with a tiny bit of Dark Barn Red. Use Amber on the stems. Reposition until all the branches have been stenciled on the front and sides of the cabinet.
Step Two: Refer to the photo to determine placement of the birdhouses as well. Secure the large birdhouse stencil on the left door of the cabinet, and stencil with Dark Barn Red. Shade around the edges with Basic Black, and apply Basic Black to the roof and the circular opening.
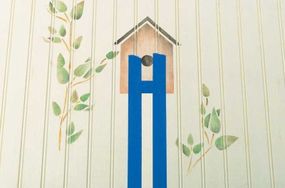
Step Three: To make the post, place two pieces of low-adhesive tape about an inch apart directly under the black circle, extending from the birdhouse to the bottom of the cabinet. Stencil the post Amber, making the edges darker than the middle. Add some additional shading with Basic Black under the birdhouse and along the edges.
Secure the stencil with tape.
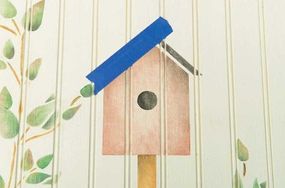
Step Four: Before you re-position the large birdhouse stencil "behind" the red house, use low-adhesive tape to mask off the top of the red birdhouse. Stencil the second house Navy Blue, and shade around the edges with Basic Black. Also stencil the opening Basic Black. Stencil the roof Amber. Let dry.
Shade around the edges of the house with black paint.
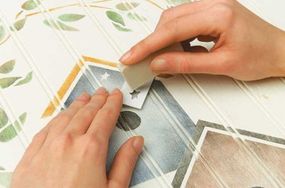
Step Five: Hold down the star stencil on the blue house, and erase the paint within the stars with the art gum eraser. Repeat until you're pleased with the star design. (Note: This technique works only with paint crème, not acrylics.)
Erase the paint within the stars with an art gum eraser.
Step Six: "Hang" the blue house from a branch by creating a stripe stencil. Tape two index cards 1/8-inch apart. Drag Basic Black over stripe.
Paint basic black over the stripe.
Step Seven: Tape the small birdhouse stencil to the right of the blue birdhouse, and stencil it Amber. Shade with Basic Black. Stencil the roof Navy Blue and the opening Basic Black. Repeat step six to create a "wire."
Step Eight: Stencil the next small house in the same manner, using Dark Barn Red and Basic Black.
Step Nine: Stencil the big birdhouse on the right Amber, and shade with Basic Black. Stencil the roof Navy Blue and the opening Basic Black. While the stencil is still in place, tape down the checkerboard stencil at the top of the birdhouse sides.
Stencil the checks Dark Barn Red, then reposition the stencil to paint the second and fourth rows of checks. Be sure the corners of the checks touch. Repeat the checkerboard at the bottom edge of the birdhouse, but stencil only three rows of checks here. Repeat Step Six to "hang" this birdhouse from the branch above it.
Step Ten: Cover the checkered hanging house with its dropout to protect it, and stencil a small house below it Navy Blue. Shade with Basic Black, and use Dark Barn Red for the roof and Basic Black for the opening. Repeat Step Six to "hang" this birdhouse from the checkered house.
Step Eleven: To stencil the wren, position the body overlay in the branches at the bottom right of the cabinet, mark the registration points, and stencil with Amber. Add shading with Basic Black. Position the second overlay, and stencil with Basic Black.
Step Twelve: Mist the entire surface with at least two coats of spray varnish. Let dry between coats. Then lightly load a brush with Amber and offload on a paper towel. Brush color lightly along the edges of the cabinet. Wipe away excess paint with a paper towel. Apply two more coats of spray varnish. Let dry.
Stencil Variations
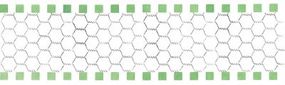
Bring the outdoors in with your own engaging birdhouse variations. Add them to room dividers, sisal mats, or cupboards to brighten an all-season sun-room. Stretch your style and stencil checkerboards, leaves, and wrens wherever they are inclined to perch. Mix-and-match for color and style. Antique them to add an aged look. Get started with these stencil variations:
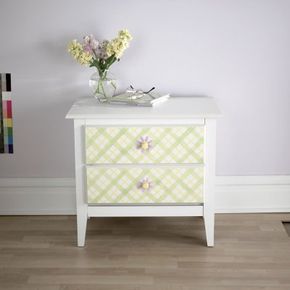
A plain bedside table takes on new life when given a fresh coat of paint and a lovely plaid pattern. This stencil design may look simple, but it goes a long way. Follow the steps below to start your own nightstand makeover.
Step One: Before you begin, remove the drawer-pulls or hardware. You may want to paint them to match the stencil design before replacing them.
Step Two: Sand and tack the drawers. Apply a thick, even coat of all-purpose sealer with a foam brush, and let dry. If the surface is exceptionally slick, use a bonding sealer instead of an all-purpose sealer.
Step Three: For added design attraction, we tilted the plaid stencil 45 degrees and stenciled it on a diagonal. Finish all of the stripes in one direction across the drawer before rotating the stencil to complete the plaid. (When you do rotate the stencil, the lines should bisect each other at a 90-degree angle.) Apply paint sparingly to keep the stripes light and translucent.
Step Four: Using the daisy stencil from the article, How to Stencil Pillows, base-coat the flower petals white to mask the plaid. Stencil and shade the daisy in the colors of your choice.
Step Five: Seal the drawers with two or three coats of satin-finish varnish to protect your work.
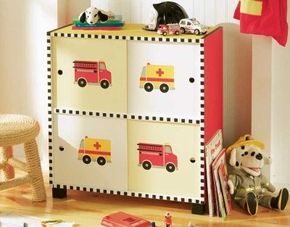
Kids will love the Rescue Vehicle Cabinet and its speedy fire trucks. Keep reading to learn how to create this furniture stencil project.
Bold checks and speedy emergency vehicles zip across this storage cabinet. Our easy-to-follow instructions below make this rescue vehicle cabinet stencil project a breeze. Staying organized has never been this much fun.
Step One: Sand and prime all surfaces. Using two-inch foam brushes, paint the top of the cabinet School Bus Yellow and the sides Lipstick Red, leaving the front edges white. Paint the top trim and the cabinet legs Licorice. Paint the two front panels Lemonade, and paint the other two front panels Titanium White. Apply a second coat of paint to all surfaces. Let dry completely.
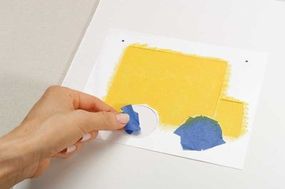
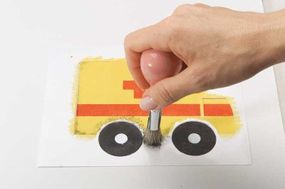
Step Two: Center the large ambulance stencil in the middle of a white panel; mark registration points. Before stenciling, mask off the wheels with painter's tape.
Stencil the ambulance School Bus Yellow using a 1/2-inch brush. Let dry to touch; remove tape that masks wheels. Stencil wheels Licorice with a 3/8-inch brush. Don't worry if some of the black paint gets on the body of the ambulance -- the edges will be shaded with Licorice later. Remove stencil.
Before stenciling, mask off the wheelswith painter's tape.
Step Three: Align the ambulance overlay. Stencil the window, hubcaps, and fenders Shimmering Silver with a 1/2-inch brush. Stencil all other areas Lipstick Red with a 1/2-inch brush. Shade around the edges of these shapes with a tiny bit of Licorice. Remove stencil.
Step Four: Reposition the large ambulance stencil, and apply a tiny bit of Licorice shading around the edges with an almost-dry brush and an extremely light touch.
Apply shading with an almost-dry brush and a light touch.
Step Five: Repeat steps two through four on the other white panel.
Step Six: Center the large fire truck stencil in the middle of a yellow panel; mark registration points. Before stenciling, mask off the wheels with painter's tape. Stencil the fire truck Lipstick Red using a 1/2-inch brush. Let dry to touch; remove tape that masks wheels. Stencil wheels Licorice with a 3/8-inch brush. Shade around the edges of the fire truck with Licorice on an almost-dry brush. Remove stencil.
Step Seven: Align the fire truck overlay. Stencil the window, hose, door handle, hubcaps, and fenders Shimmering Silver. Shade the edges lightly with Licorice. Stencil the ladder Licorice. Stencil the siren School Bus Yellow with a 1/2-inch brush, shading with a tiny bit of Lipstick Red. Remove stencil.
Stencil the window, hose, door handle,hubcaps, and fenders Shimmering Silver.
Step Eight: Repeat Steps Six and Seven on the other yellow panel.
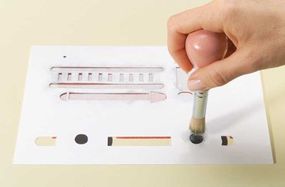
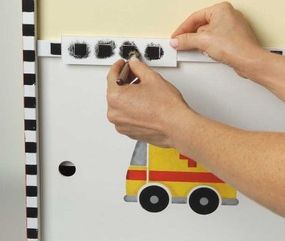
Step Nine: Position the squares stencil on the edge of the cabinet; stencil Licorice with a 3/8-inch brush. Repeat around the front edges of the cabinet, aligning the first square of the stencil with the last square painted.
Position the squares stencil on the edge of the cabinet.
Step Ten: Let dry 24 hours. To protect your work, mist the entire cabinet with at least three coats of spray varnish, letting dry between coats.
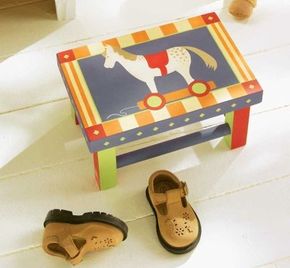
You'd never imagine a simple step-stool could almost be as fun a toy, but the Pony Pull-Toy Step Stool comes close. Learn how to make this stencil furniture project in the next section.
Enliven an ordinary step stool with a horse of a different color. This whimsical design will have children steppin' up in style. The easy-to-follow instructions below will help you get started on this fun stencil project.
Step One: Sand and tack the surface of the stool. Apply a thick, even coat of all-purpose sealer with a foam brush. Let dry.
Step Two: Use one-inch-wide painter's tape to mask off a one-inch border around the top of the stool.
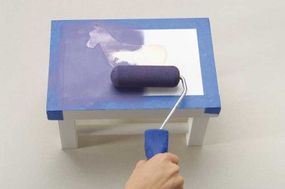
Step Three: Before painting the stool, mist the back of the horse dropout (the piece that drops out of the stencil) with stencil spray adhesive, and center it on the stool. Use the foam roller to basecoat the top of the stool Purple Dusk. Let dry.
Use a foam roller to paint the top of the stool Purple Dusk.
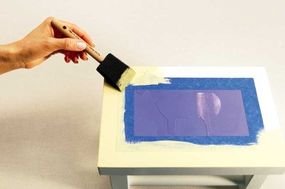
Step Four: Leaving the horse dropout in place, remove the tape from Step Two. Mask the inside edge of the border, then paint the border Mello Yellow with a foam brush. Let dry. Remove all tape and the dropout.
Paint the border Mello Yellow with a foam brush.
Step Five: Using a different foam brush for each color, paint the rungs and edging of the stool Purple Dusk, then paint the legs so opposite sides are Adobe Red and Apple Green.
Step Six: Align the large horse stencil with the horse shape created by the dropout in Step Three; mark registration points. Stencil the horse's body Light Ivory with a 5/8-inch brush. Stencil the pull-toy base Dark Goldenrod with a 3/8-inch brush. Lightly shade around the edges of the horse with a tiny bit of Trail Tan on a 3/8-inch brush. (If the shading looks too heavy, gently stipple over it with Light Ivory to soften it up.) Remove the stencil.
Stencil the horse's body with a 5/8-inch brush.
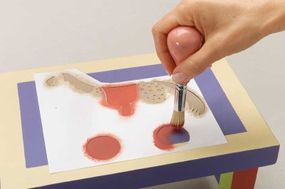
Step Seven: Align the horse overlay, and stencil the horse's spots, mane, tail, and eye Trail Tan with a 3/8-inch brush. Stencil the wheels and saddle Adobe Red with a 3/8-inch brush, applying as many coats as needed. Let dry; remove the stencil.
Stencil the wheels and saddle Adobe Red.
Step Eight: Center the circle stencil on each wheel, and stencil the inside of the wheels Apple Green with a 3/8-inch brush.
Step Nine: Using a Number-one liner brush and Light Ivory, freehand a looping string for the pull toy. (You may choose to draw a pencil line first to follow when painting this line.)
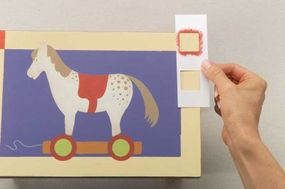
Step Ten: Working on one corner of the stool at a time, place a square from the checkered border in each corner, and stencil the square Adobe Red with a 3/8-inch brush.
Work on one corner of the stool at a time.
Step Eleven: Before stenciling the rest of the border, cover the horse and the wheels with their dropouts. Then stencil squares onto the top and bottom borders with Dark Goldenrod. Use Dark Goldenrod and the stripe stencil to stencil the side borders.
Step Twelve: To define the edge between the border and the rest of the stool top, make a 1/8-inch stripe stencil by placing two index cards parallel to each-other and taping them at the top and at the bottom so they are 1/8-inch apart. Position this stripe on the inside of the border, and stencil it Apple Green. Repeat around the entire border.
Position the stripe on the inside of the border.
Step Thirteen: Remove the dropouts from the horse and wheels.
Step Fourteen: Again working on one corner of the stool at a time, center the diamond stencil in each corner square; stencil Apple Green. Next, center the diamond stencil vertically on the stool apron. Stencil Apple Green diamonds around the entire apron.
Step Fifteen: To protect your work, mist the entire stool with at least three coats of satin-finish spray varnish, letting dry between coats.
Furniture doesn't have to be plain. With the help of stencils, any piece of furniture can be turned into a delightfully colorful, beautiful, one-of-a-kind object.