Halloween Image Gallery 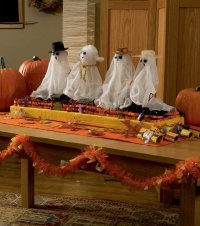 is easy to make. See more Halloween pictures. |
Simple step-by-step instructions and helpful photos guide you through each project. Whether you’re planning a big Halloween bash or just want to get into the Halloween spirit at home or work, these decorations are sure to delight -- and fright -- monsters of all ages.
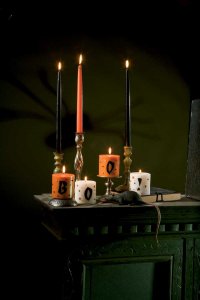
- Ghoulish Glow Candles
One of the best ways to set a Halloween mood is with candles. Using everyday craft supplies, you can make ordinary pillar candles that cast a ghastly glow. Get the step-by-step instructions in this article.
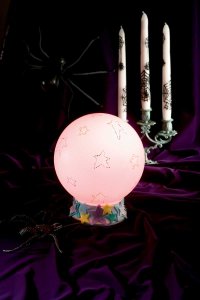
- Crystal Ball
A glowing crystal ball is the perfect creepy centerpiece for your Halloween party table. Delight the would-be fortune tellers at your party with this simple project.
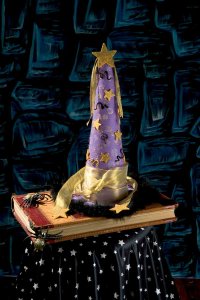
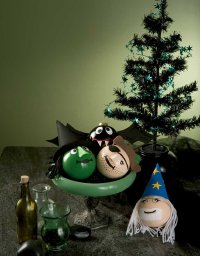
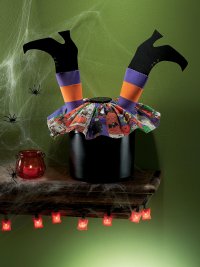
- Hats Off to Wizards Centerpiece
A wizard theme can set a mystical mood for your Halloween festivities. What better than a wizard’s hat centerpiece to start the magic? Find out how to make one.
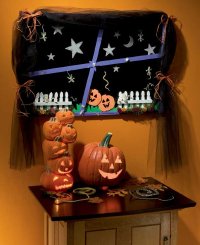
- Glowing Window Panes
This glow-in-the-dark wall hanging is sure to impress young ghouls and older goblins alike. Learn how to transform an ordinary chalkboard into a monster-piece.
- Wacky Halloween Ornaments
Not just for Christmas, glass ball ornaments can easily be transformed into your favorite Halloween characters. This article will show you how to make bats, witches, wizards, and more. Or use these ideas to create your own wacky monster.
- Spooky Sparkly Door Charm
This sparkly decoration for your door will greet trick-or-treaters with glitz. Easy-to-follow directions and a materials list give you everything you need to trick out your door.
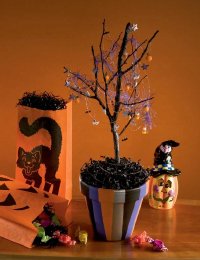
- Bewitching Branch
Make your house haunted with this spooky Halloween tree. We’ll show you how to turn a simple tree branch into a frightful sight.
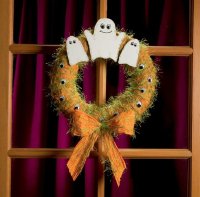
- Fuzzy Fun Wreath
Green, orange, and full of ghosts -- this wreath is ghastly! Learn how to make it yourself in less than ten steps.
- There’s a Party in the Graveyard Centerpiece
Use your imagination to customize this creepy centerpiece with your favorite graveyard frights, like ghosts, bats, spiders, tombstones, and more. Get the detailed instructions and learn what materials you’ll need.
- Boo Pillow Pattern
This decoration will BOOst anyone’s Halloween spirit. Use the pattern and how-tos in this article to make a colorful pillow for your favorite ghost.
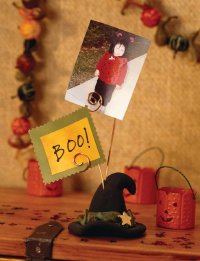
- Haunted Hat Snapshot Holder
Looking for a place to put your ghastly Halloween photos? This black hat does the trick. And it’s a treat to make with the simple directions we provide.
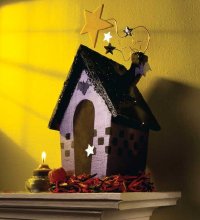
- Spooky House Centerpiece
Use your Halloween powers (and our directions) to transform a plain wooden birdhouse into a spook house centerpiece complete with bats and other horrors.
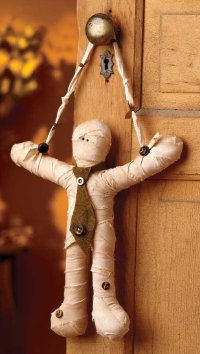
- My Little Mummy Door Hanger
Greet trick-or-treaters and other Halloween visitors by hanging this friendly homemade mummy on your front door. We'll show you how to make him look his age.
- Falling Leaf Garland
To create a festive fall atmosphere, drape colorful garlands of fall leaves around your house or office. Get the details on this autumn project. - Jumping Jack-o'-Lantern Decoration
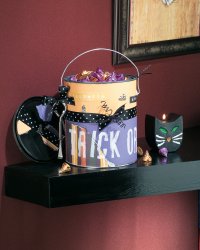
Kids of all ages will adore this Jumping Jack decoration that "dances." And it's easy to make with the patterns and instructions provided. - Tricks or Treats Paint Can
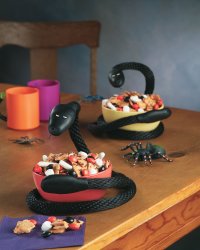
Start with an empty paint can, and end up with a unique container for Halloween goodies. How, you ask? Just following the simple directions here. - Slinky Snake
See if your Halloween guests recoil in fright -- or delight -- when they see this slinky snake wrapped around the treats container. You can make this decoration in just five steps. - Boo! Pots
Make a ghostly greeting using beads and clay pots. This decoration will surely BOOst your Halloween gathering. - Witch's Brew of Surprises
A witch has crash-landed right into the Halloween goodies container! This fun decoration is surprisingly easy to brew up if you follow our helpful directions and photos.
- Heads on a Platter
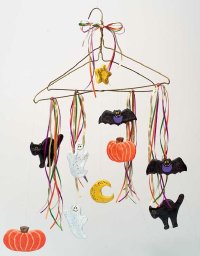
Stun Halloween guests by bringing out a gruesome platter of shrunken heads. Or place them where they're least expected for a howling good scare. Learn how to transform apples or vegetables into this unique decoration. - High Spirits Mobile
For a spirited twist on mobiles, make a Halloween-style one with ghosts, witches, moons, stars, and bats. We'll show you how to make the characters from clay and string them up for a scare. - Night Lights
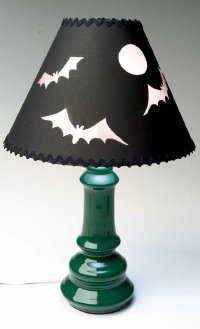
Frightening lighting is a great way to set a Halloween mood. Discover how to make a lampshade that casts an eerie glow. - Creepy Candles
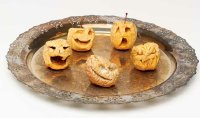
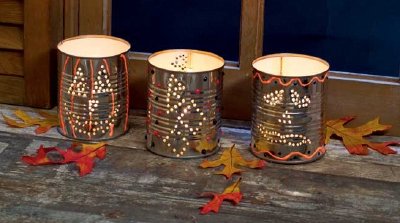
There's no need to buy Halloween candles -- just make your own out of empty food cans. You can adorn them with scary faces or other designs. Light them up for a true fright! - Haunted House
Turn your home into a haunted house by strategically placing decorations like rats, spiders, ghosts, and even black lights. We've got a number of ways to trick out your house, Halloween-style.
- Hex House
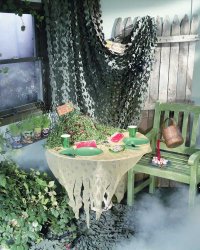
Feeling superstitious? Then turn your Halloween gathering into a hex-cellent adventure with black cats, bats, an umbrella and more. You'll be lucky you did. - Rustic Halloween Decorations
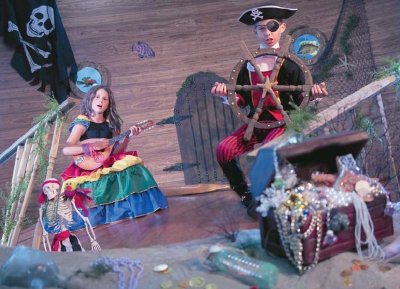
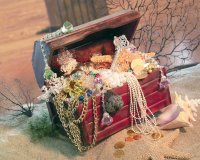
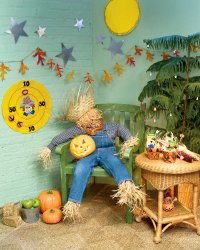
Get back to basics with do-it-yourself decorations like haystacks, scarecrows, and a centerpiece made from twigs and flowers. We'll show you how to revisit the Halloween of long ago. - Pirate Ship Halloween Decorations
Put some "arghh!" into your Halloween with a pirate ship theme. Find a treasure chest of seaworthy decoration ideas, including skulls and crossbones, of course. - Haunted Garden Decorations
Man-eating plants, spiders, fog -- they all add up to a ghastly Halloween garden. Get great tips on making a haunted indoor landscape. - Fall Decorations
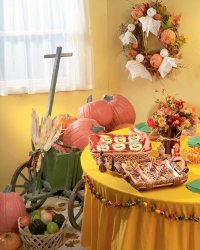
Fall decorations are synonymous with Halloween. Find out how to use raffia and even dried leaves from your yard to make striking Fall decor.
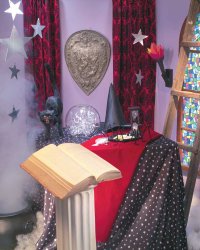
A magic castle theme is sure to enchant all Halloween revelers. Create an ethereal atmosphere with purple streamers, shiny stars, an assortment of balloons, a crystal ball, and more. We'll show you how.
This sweetly witchy doll is a welcoming sight for trick-or-treaters or party guests. Follow our step-by-step instructions, which even include a pattern, to make this friendly lady on your own.
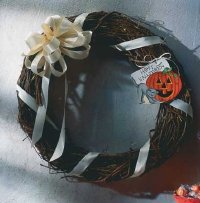
- Halloween Wreath
A fun and festive Halloween wreath signals your seasonal spirit from the moment visitors get to your door. A plain grapevine wreath is totally transformed with just a little paper and paints.
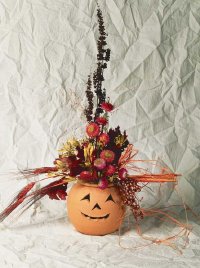
- Floral Jack-O'-Lantern
Create a Halloween decoration that kids and adults will enjoy when the elegance of dried flowers joins with the fun of a jack-o'-lantern. Everybody wins!
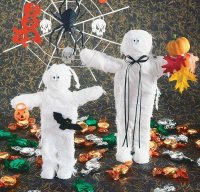
- Junior and His Mummy
This Halloween family is perfect for your family to make together. With just a few supplies and several minutes of wrapping, these soft mummy dolls will be ready to win you over.
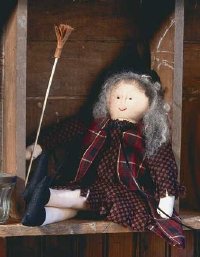
- Henrietta Witch
This little witch will soon win your heart with her warm and personable ways -- and she's perfect for showing trick-or-treaters where to go.
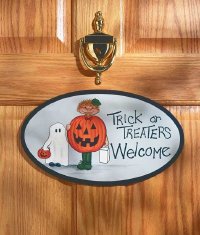
- Halloween Welcome Sign
Hand-painted and full of adorable details, this welcoming wooden plaque sets the party mood off right. But beware, you may gather trick-or-treaters from miles around!
- Halloween Mobile
Add overhead interest to a corner with this colorful foam-and-ribbon Halloween decoration, which is guaranteed to be more appealing than a cobweb.
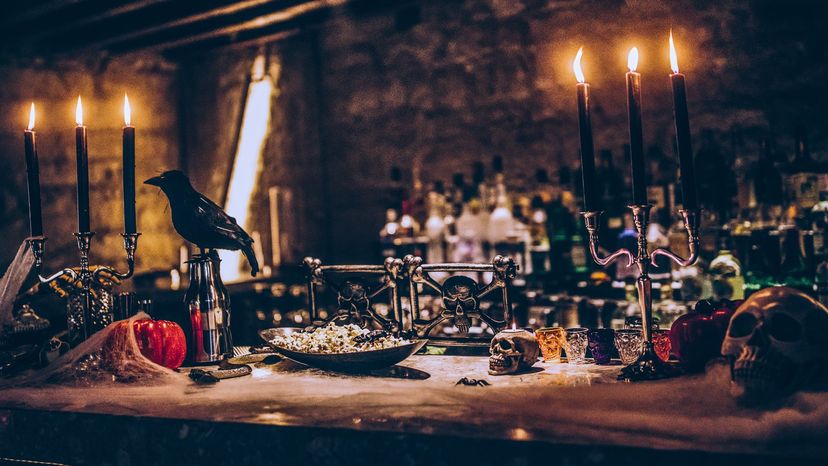
Let the Halloween decorating begin! On the next page, learn how to make a delightful candle display.
Want to scare up more fun Halloween ideas? Try these:
- Halloween Crafts: Not done being creative? These are great do-it-yourself projects for Halloween, from trick-or-treat boxes to candy jewelry.
- Kids' Halloween Costumes: Try on our unique costume ideas for your ghosts and goblins.
- Halloween Masks: Want an easy way to dress up for Halloween? Try a mask instead of a costume. Check out our selection of monstrous masks.
- Halloween Games: Play more than 20 spooktacular games to entertain kids and adults alike.
- Halloween Recipes: Learn how to make dozens of bewitching Halloween treats.
- How Halloween Works: Traces the popular holiday’s Celtic roots to American traditions celebrated today.
Advertisement