Build a Solar Power Generator for Under $300

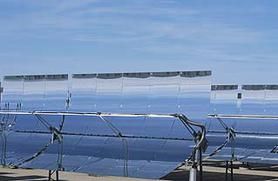
solar power generator photo
Tom Brakefield/Getty Images

To most of us, solar power still seems like a thing of the future. Yeah, we know some people live off the grid with them, and some folks can afford to line their roofs and heat their pools with them. Not most of us.

But it turns out that you can generate real, usable solar power in your very own home (or wherever), and it'll cost you less than $300. What's the catch? Oh, nothing. You just have to build the generator yourself.

Advertisement

And however am I supposed to do that, you might ask? Well, by following this handy 8 step guide from rain.org, of course.

Get ready for solar power.

Building Your Very Own Solar Power Generator in 8 Easy Steps

From Rain.org

Advertisement
1. Buy Yourself a Small Solar Panel

For about $100 you should be able to get one rated at 12 volts or better (look for 16 volts) at an RV or marine supplies store or from Greenbatteries Store.

Advertisement

2. Buy Yourself a Battery

We recommend rechargeable batteries from these green companies: Greenbatteries Store and Batteries.com. Get any size deep cycle 12 volt lead/acid or gel battery. You need the deep cycle battery for continuous use. The kind in your car is a cranking battery—just for starting an engine. Look for bargains, the cheapest ones should cost about $50-60.

Advertisement

3. Get a battery box to put it in for $10.

(This is good for covering up the exposed terminals in case there are children about If you going to install the system in a pump shed, cabin, or boat, skip this.) Buy a 12 volt DC meter. Radio Shack has them for about $25.

Advertisement

4. Buy a DC input.

I like the triple inlet model which you can find at a car parts store in the cigarette lighter parts section for about $10. This is enough to power DC appliances, and there are many commercially available, like fans, one-pint water boilers, lights, hair dryers, baby bottle warmers, and vacuum cleaners. Many cassette players, answering machines, and other electrical appliances are DC already and with the right cable will run straight off the box.

Advertisement

5. Invest in an Inverter.

If you want to run AC appliances, you will have to invest in an inverter. This will convert the stored DC power in the battery into AC power for most of your household appliances. I bought a 115 volt 140 watt inverter made by Power-to-Go at Pep Boys for $50. Count up the number of watts you'll be using (e.g., a small color television(=60 watts) with a VCR(=22 watts), you'll need 82 watts). A variety of cheap inverters from 100 watts to 3000 watts can be had from Lane's Professional Car Products. Type "inverters" into his search bar.

Advertisement

6. Attach meter and DC input.

Use a drill to attach the meter and DC input to the top of the box.

Advertisement

7. Use insulated Wire to Attach the Meter to the Wingnut Terminals on the Battery.

Connect the negative (-) pole first. Only handle one wire at a time. Connect the DC inlet to the battery in the same way. Connect the solar panel to the battery in the same way.

Advertisement

8. Close the Lid

I use a bungee cord to keep it tight. Put the solar panel in the sun. It takes 5-8 hours to charge a dead battery; 1-3 hours to top off a weak one. It will run radios, fans, and small wattage lights all night, or give you about 5 hours of continuous use at 115 volt AC, or about an hour boiling water. This system may be added on to with larger panels, inverters, and batteries.

That's quite a project that'll kill an idle Sunday afternoon—and power a good deal of your electrical equipment. And save you a bunch of money. Happy solar building.

Advertisement

For more info on specifics, and how best to operate the system, head over to Rain.org.

Advertisement

Loading...