How Clothes Dryers Work

By: Karim Nice  | 
dryer
How much do you know about clothes dryers? Kirill Rudenko / Getty Images
Key Takeaways
  • Clothes dryers draw in air through openings, heat it and then pass it through the tumbler where the clothes are. It picks up moisture in the process, which it expels through an exhaust duct.
  • The process involves several key components: the heating element that heats the air, the tumbler that holds the clothes, and the fan that moves the air through the system.
  • Proper maintenance, such as cleaning the lint screen and ensuring the exhaust duct is not obstructed, is essential for efficient operation and fire prevention.

A clothes dryer can be found in just about every house in the United States, and millions more of them are manufactured each year. They are very reliable, and very cheap to build. You'll be surprised at how simple this common machine is. Clothes dryers have:

  • A rotating tumbler that holds the clothes.
  • An electric or gas powered heater that heats the air that is drawn through the clothes as they tumble, which in turn heats up the clothes and the water in them.
  • An exhaust vent that passes out of the dryer and out of the house -- this is how the water exits the dryer in the form of steam.

In this edition of How Stuff Works, we'll take apart a clothes dryer and explore how each system works. We'll start by following the air through the machine, then see how the tumbler and fan turn, and finally we'll look at the controls.­

Advertisement
­

Advertisement
Air Circulation

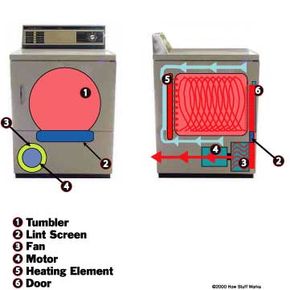
Dryer airflow diagram

You may know that the warm, moist air leaves the dryer through a hole in the back, which is usually hooked up by a pipe to a vent on your house. But where does the air enter the dryer?

Let's follow the path of the air through the dryer. The air is sucked into the dryer through openings in the outside of the machine. One fan drives all of the air through the dryer, but the fan is actually the last step in the process.

Advertisement
In brief, this is how the air makes its way through the dryer:

  1. It enters the body of the dryer through a large hole in the front of the dryer.
  2. It is sucked past the heating element and into the tumbler.
  3. It enters the door and is directed down through the lint screen.
  4. It passes through a duct in the front of the dryer and into the fan.
  5. The fan forces it into the duct leading out the back of the dryer, at which point it exits your house.

The first thing that the air hits is the heating element. After the air enters the body of dryer, it is sucked through the heating element, and then into the clothing tumbler.

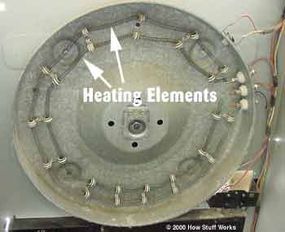
Heating element

This is a standard nichrome-wire heating element, just like the heating element in a toaster (see How Toasters Work for details on nichrome wire). This heating element consumes lots of power -- 4,000 to 6,000 watts on most dryers.

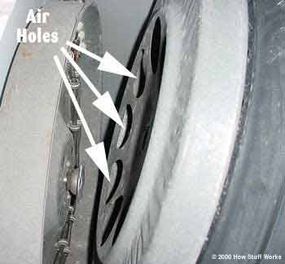
The air is drawn through the heating element and into the holes in the back of the tumbler.

Metal stamping and heating element

The metal stamping on the right, with the big holes in it, makes sure that air can enter the tumbler only after it has gone through the heating element.

Tumbler and door

The hot air now makes its way through the clothes in the tumbler, and then into the holes in the door.

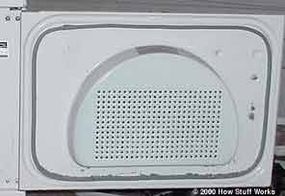
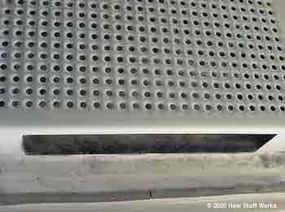
Door holes and slot

The air passes through the holes in the door, and out through the big slot in the bottom of the door which leads to the lint screen.

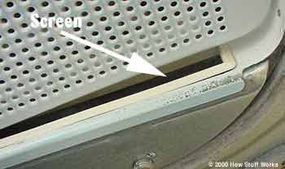
Lint screen and duct

The air is drawn through the lint screen and down a duct in the front of the dryer, where it enters the fan.

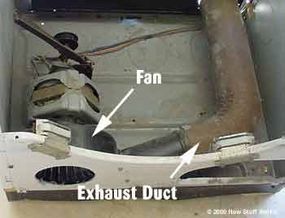
Fan and exhaust duct

The fan is a centrifugal type of device -- as it spins, it flings the air to the outside, sucking air from the center and forcing it out the duct at the back of the dryer. In the next section we'll see what makes the tumbler spin.

Advertisement

Spin

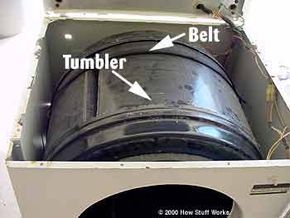
Belt and tumbler

If you open up a dryer, one surprising thing is the lack of any gears on the tumbler. It turns out that the tumbler is one giant gear (or actually a pulley), and the motor drives a tiny pulley. Because of the ratio between the huge tumbler diameter and the tiny motor pulley diameter, no other gears are needed!

You can see the thin belt wrapped around the tumbler in the picture above.

Advertisement

Motor and pulleys

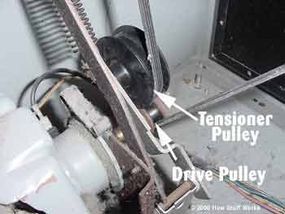
A motor drives the small silver pulley that is visible beneath the black pulley in the picture above. The belt loops through the silver pulley, through the black pulley and then around the tumbler. The black pulley provides tension -- when the belt is hooked up, the pulley is drawn off center, and the spring tries to pull it back. This gives the belt its tension.

The same electric motor drives both the fan and the tumbler. The pulley for the tumbler belt is hooked up to one output of the motor, and the fan is hooked to the other.

Advertisement

Tumbler

Flange and bushing

Another funny thing about most dryers is that the tumbler has no bearings to help it spin smoothly. So what supports the weight of the clothes?

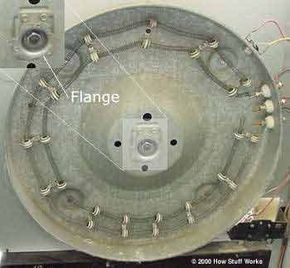
At the back of the tumbler is a flange, connected to a simple bushing that allows the flange to spin. The back of the tumbler bolts to this flange.

Advertisement

Plastic pads

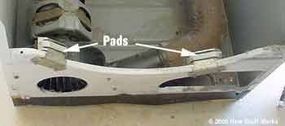
The front of the tumbler rides on two white plastic pads that are mounted to the top of the support structure.

Advertisement

Controls

Cycle switch, front view

This dryer has no electronics in it at all. Instead, a system of gears, cams, electrical contacts and motors forms a sort of mechanical computer. Let's start by looking at the cycle control knob.

Cycle Switch

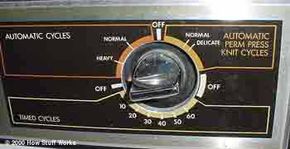
By turning this knob to various positions, you can control both the type of cycle and the length of time it runs. Let's take a look at what is inside this switch.

Advertisement

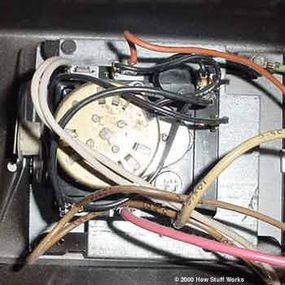
Cycle switch, back view

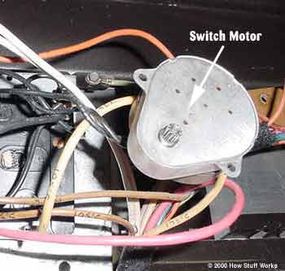
Here is a view of the back of the cycle switch. Attached to the back is a little motor. The picture below shows the motor unscrewed from the switch.

Cycle switch motor

The tiny gear on the motor turns very slowly; and it engages a bigger gear inside the switch that makes the switch turn even slower.

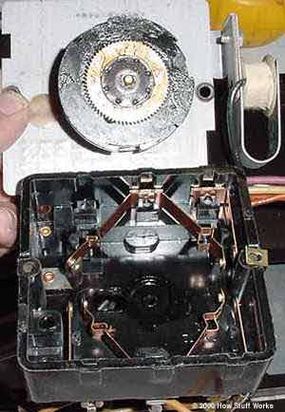
Inside the cycle switch

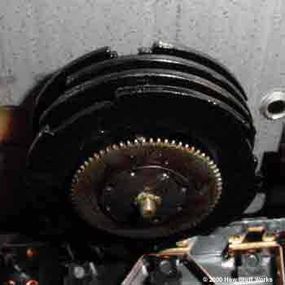
The motor turns the gear on the dial, which is connected to a set of four cams stacked on top of each other. Each of the cams engages one of the four contacts in the switch.

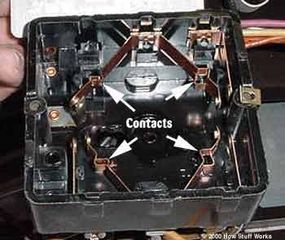
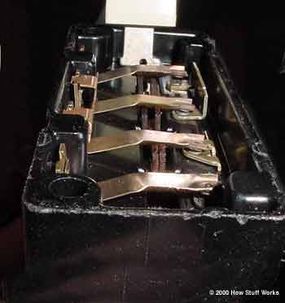
Inside the cycle switch box

Each of the four contacts has a bend in it, and each bend is located at a different height inside the box. Starting with the bottom left contact, the heights increase in a counterclockwise manner; the bottom left contact is the lowest, the top left contact is the highest. A different cam engages each of these contacts. In the pictures below, you can see the four cam layers; each of these layers corresponds in height to one of the contacts.

Cycle switch cam

The cycle switch determines how long the elements stay on. In conjunction with the heat setting buttons, it also controls which heating elements are on at a given time. If none of the heating elements are on, only cool air blows through the clothes; if one is on, the air is warm; and if both are on, the air is hot.

Advertisement

Heat-Setting Buttons

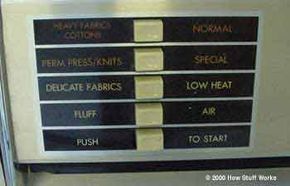
Heat-setting switch, front view

This set of buttons controls the heat settings for the timed dryer cycles.

If you press any of the top four buttons, they stay depressed. If you then press a different button, the first one pops up, and the new button stays pressed in. A really neat set of plates that work like the tumblers in a lock make this feature possible, and also control which heating elements are engaged.

Advertisement

Inside the heat-setting switch

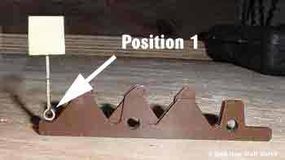
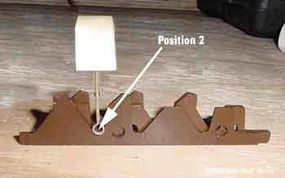
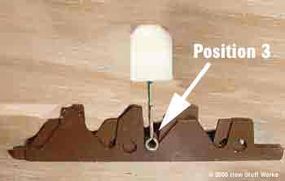
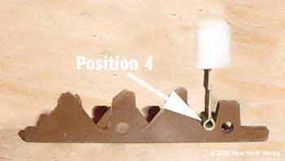
Inside the switch are a set of four contacts. Depending on which button is pressed in, the plates open or close various combinations of the contacts. The following set of pictures illustrates how pressing the buttons causes the plates to line up in different ways, raising or lowering the bars that make the contacts.

Heat setting cams
Heat setting cams
Heat setting cams
Heat setting cams

Advertisement

Safety Systems

Front temperature sensor

The dryer also has a couple of safety features that help to prevent overheating. There are two temperature shut-off switches. When these switches reach certain preset temperatures, they break contact, which shuts the dryer off. The first switch is located near the lint screen.

The picture above shows the front of the dryer, with the front panel partially removed. The first temperature sensor is on the right. And to the left, you can see a set of six holes in the outer edge of the tumbler. These holes are only there to blow hot air on the sensor every time they go by. If the temperature in the tumbler gets too hot, this sensor cuts the power, shutting the dryer off.

Advertisement

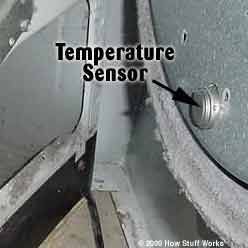
But what happens if the belt breaks and the holes don't happen to be in front of the temperature sensor? Or if the fan gets clogged and no air is coming out of the tumbler? This is where the second temperature switch comes in.

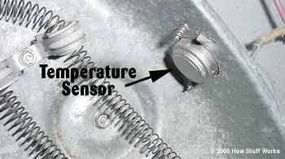
Heating element temperature sensor

The second sensor is located close to the heating elements. If airflow is shut off for any reason, the air near this sensor will quickly heat up to the temperature that triggers this sensor, and the sensor will shut off power.

Advertisement

Frequently Asked Questions

How often should you clean the lint screen to ensure optimal dryer performance?
You should clean the lint screen after every load to maintain airflow and efficiency, and to prevent potential fire hazards.
Can a dryer operate efficiently with a blocked or obstructed exhaust duct?
No, a blocked exhaust duct can lead to decreased efficiency, longer drying times and a significant risk of overheating or fire.

Advertisement

Loading...