How to Laminate a Countertop
Covering a kitchen counter or a vanity with plastic laminate is painstaking, but not really demanding. With care and patience, you can lay a plastic laminate sheet on any clean, well-supported 3/4-inch plywood or particle board base.
Tools:
- Measuring rule
- Hammer
- Nail set
- Putty knife
- Belt sander
- Pencil
- Straightedge
- Carpenters' square
- Safety goggles
- Saber, circular, or table saw with fine-toothed carbide-tipped blade
- Nylon paintbrush or notched spreader
- Roller or rolling pin
- Router with edge-trimming bit for plastic laminates
- Fine-toothed flat file
Materials:
- Plastic wood or wood putty
- Medium- and medium-fine-grit sanding belts
- Rags
- Tack cloth
- Precut plastic laminate edge strips
- Sheet plastic laminate
- Nonflammable contact cement
- Brown paper or wax paper
- Solvent for cement
Time: About 4 to 6 hours for a plain countertop
Advertisement
Tips on Buying Materials
Buy a sheet of plastic laminate big enough to cover the countertop completely, with a slight overhang on all sides; buy precut laminate edge strips to finish the sides of the countertop. Choose a nonflammable, water-solvent contact cement, or use the adhesive recommended by the laminate manufacturer. Rent a router with an edge-trimming bit for plastic laminates; if you don't have one, rent a saber or circular saw with a fine-toothed carbide-tipped blade. At least 48 hours ahead of time, set the plastic laminate in the room where it will be used to bring it to the correct temperature and humidity.
Preparing the Counter Surface
Prepare the counter surface carefully. Sink any protruding nails with a hammer and a nail set; fill cracks and cover railheads with plastic wood or wood putty. Sand the surface with a belt sander and a medium-grit sanding belt to smooth and level it thoroughly. If you're covering an old countertop, remove the old finish completely; sand down to clean, bare wood to provide a good base for the laminate. Wipe off all dust and sanding debris and then go over the entire counter surface with a tack cloth.
Measuring and Cutting the Laminate
Carefully measure and mark the sheet of plastic laminate to the approximate size of the countertop; it should be large enough to overhang the counter 1/8 to 1/4 inch on all sides. Use a carpenters' square and a straightedge to make sure the marks are accurate. Plastic laminates are very brittle; wear safety goggles to trim the laminate sheet. Support the laminate sheet firmly as close to the cutting line as possible; hold it down firmly to prevent shattering and chipping. Carefully and slowly cut the sheet as marked with a saber saw, a circular saw, or a table saw with a fine-toothed carbide-tipped blade. Cut the laminate face down with a saber saw or circular saw, face up with a table saw.
Applying the Edge Strips
Before laying the top sheet, cover the edges of the countertop with precut laminate edge strips, carefully butted together at the corners. Measure and cut the front and side edge strips to the correct length. Apply contact cement to the back of each edge strip and to the edges of the countertop as directed by the manufacturer, using a nylon paintbrush or a notched spreader. Let the adhesive cure and test for bonding readiness as directed.
Carefully press each edge strip into place over the cemented counter edge, first side strips and then front. The bottom of the strip should be flush with the bottom of the edge; let the top of the edge strip stick up above the countertop. You must align the edge strip perfectly as you press it down; once it makes contact with the cemented edge, it can't be moved. Butt the strips firmly together at the corners of the counter, front strip over sides. After applying each strip, go over it firmly with a roller or a rolling pin to bond it firmly to the counter edge.
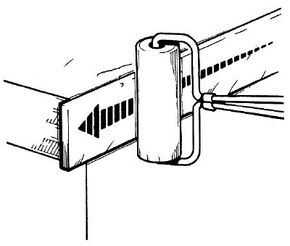
Wearing safety goggles, trim the protruding upper edges of the edge strips with a router and an edge-trimming bit for plastic laminates. With a belt sander and a medium-fine-grit sanding belt, sand the cut edges carefully to bring them exactly flush with the counter surface. If the edge strip sticks up only a little, router trimming is unnecessary; use the belt sander to bring the edges flush. Use a fine-toothed flat file to smooth the edge in tight spots.
Applying the Countertop Surface
Wipe the countertop clean and go over it with a tack cloth. Following the manufacturer's instructions, apply contact cement to the entire counter surface and to the entire back of the laminate sheet; let the adhesive cure as directed. When the cement is dry, cover the entire countertop surface with brown paper or sheets of wax paper, laid back to front; make sure all the cemented surface is covered. The paper will not stick to the cemented surface.
Set the laminate sheet carefully into place on the countertop; make sure you don't disarrange the paper. Align the laminate sheet exactly on the countertop, butted firmly against the wall behind the counter, if any, and overhanging the counter slightly on all open sides. Keeping the laminate exactly in position, carefully slide out the brown paper or wax paper strips along the counter, pressing the laminate to bond it in place as you go; be careful not to let air bubbles form between the laminate and the countertop. If the countertop is a long one, you'll need an assistant to hold the laminate in place as you remove the paper.
To bond the sheet of laminate firmly and evenly in place, go over the entire counter surface with a roller or a rolling pin. Be sure to press out any air bubbles left between the laminate and the countertop.
To complete the countertop, carefully trim off the overhanging laminate edges with a router and an edge-trimming bit for plastic laminates; wear safety goggles as you work. Use a fine-toothed flat file to trim tight spots. Trim the edge of the top laminate sheet exactly flush with the outside face of the edge strip. Finally, bevel the cut edge of the top sheet slightly with a fine-toothed flat file.
Cleaning Up
Remove excess cement from the completed counter with water or the cement solvent; use water or solvent sparingly so it doesn't seep into the joints of the countertop. Scrape off large blobs of cement with a scrap of laminate; do not use a metal scraper. Clean the countertop according to the manufacturer's instructions.
If you wanted to know how to make space in your kitchen, the next section on how to build a pantry behind a door may be just what you’re looking for.
For more information on making improvements to your kitchen, try the following links:
- If you're interested in planning a new kitchen, see our article on How to Design a Kitchen.
- For ideas on what types of materials can enhance your kitchen, see A Guide to Kitchen Remodeling Materials.
- If you want to save money on repairing your appliances, check out the instructions in How to Repair Kitchen Equipment.
- Make sure no one gets hurt when you're working on your kitchen using our Home-Repair Safety Tips.