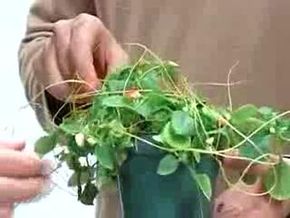
How to Water Plants

By: C. Colston Burrell
­­ ­
Watering Plants
Watering plants is essential for healthy growth, but too much water can harm your plants.­

Without water, plants wilt and die. But too much water can be as bad for plants as not enough. If land plants are submerged in water for too long, even if just their roots are submerged, they may rot or drown from lack of oxygen.

­ Balancing plants' water needs is like having a healthful diet. Everything should be consumed in moderation. Provide your plants with enough water for good health, but don't flood them with it.

­

Watering Guidelines

Watering your plants involves a bit more than just throwing a sprinkler on them every other day -- although this is better than not watering them at all! Use the following tips to get the maximum benefit out of your watering efforts.

  • Apply water in the cool of the morning or evening when the wind is calm and water loss through evaporation is minimal.
  • Avoid watering disease-susceptible plants at night. If water sits on plant foliage for hours, it can encourage fungal diseases to attack leaves, buds, flowers, and fruit. Plants susceptible to leaf spots, fruit rots, and flower blights are best watered in the morning, when the warming sun will quickly dry the leaves and discourage fungus development.
  • Provide an inch of water a week for many plants and lawn grasses. The idea is to keep the soil lightly moist and to prevent it from drying out completely, whic­h would be damaging to most plants. But because plants don't always follow the rules, there are exceptions to this general guideline:
  • ­
  • More water may be necessary if you have hot­ weather, dry sandy soil, or crowded intensive plantings or containers.
  • When the weather is cool, the plants are widely spaced, or the soil is heavy and moisture-
    retentive, less water may be required.
  • Young or new plantings require more moisture
    at the soil surface to help their roots get established. You should water more often to accommodate their needs.
  • Mature plantings with large root systems can
    be watered heavily and less often than younger plants. The moisture soaks deep into the soil and encourages the roots to thrive. ­
  • Set a rain gauge in an open area of the garden to learn how much water the garden receives each week. You can purchase an inexpensive one at a garden center. After each rainfall, check the depth of the rain inside. A commercial rain gauge is calibrated and easy to read. Judge the need for supplemental irrigation accordingly.

Rain gauges a­re also helpful when trying to determine when you have watered enough with an overhead sprinkler. Since some sprinklers apply water unevenly (more up close and less farther out), you could set several rain gauges around the garden and compare the amount of moisture each one collects. If the readings vary widely, move the sprinkler more frequently or invest in a more efficient model.

Hoses are an important tool in watering your garden and yard. Learn tips and techniques for using this equipment in the next section.
­­

Advertisement

Using Hoses

­­­­­­
­ Water Plants
Hoses are great for outdoor watering if you know the right way to use them. Make sure your plants get the right amount of water with these hose techniques.

­Hoses are a versatile tool in dealing with your lawn and garden. The following tips will help you ensure that your grass and garden are getting the right amount of irrigation.

Stretch soaker hoses through the garden to provide water directly to plant roots. Soaker hoses are made of water-permeable fabrics, perforated recycled rubber, or ­other porous materials.

When attached to a hose with the water turned on low or medium, moisture droplets weep out along the length of the hose. Very little evaporates and none sprays on plant foliage, helping discourage diseases. But it may take an hour or more depending on your soil. Soaker hoses require a little special attention in order to work properly. Here are some hints: ­

  • Soaker hoses work best at low pressure (10 psi). If you have high pressure, consider a pressure regulator or flow reducer for optimal performance.
  • Run soaker hoses straight through the garden. If set to turn or curve too sharply, they will kink and won't fill with water.
  • Expect more water to be released from the far end of the faucet and less to be released from the closest end.
  • If the hose is moistening only one side of a plant root system, move the hose to water the dry side before you consider the job done.
  • To determine if the soil has been watered enough, dig
    into the soil beside the hose. If the water has seeped 12 inches down, it's about time to turn off the hose. Remember how long this took for the next time around.
  • For faster results, look for flat hoses that are peppered with small holes. Of course there's a trade-off: These hoses do provide water more quickly, but they are not as gentle on the soil.
  • If you like soaker hose results, you can upgrade to permanent or semipermanent drip irrigation systems. Although more expensive, these systems are custom-designed for varying soil types and individual plant water needs. They also don't require shuffling around the garden.
  • Plants to Water in the Morning
    The following plants absorb nourishing water best in the morning:

    ­Wheel hose carts around the yard instead of dragging armloads of hoses and causing wear and tear on your back. Hose carts consist of a reel with a crank that you can use to neatly coil the hose, eliminating tangles, knots, and kinks. This reel is set on a two- or four-wheeled base with a handle for easy pulling. Look for large-wheeled types if you're rolling the cart over the lawn or rough ground. Smaller wheels are fine on a paved path or patio.

  • ­Pla­ce hose guides at the edges of garden beds to keep the hose from crushing nearby plants when you pull it taut. Hose guides, such as a wooden stake pounded into the ground at an outward angle, prevent the hose from sliding into the garden. Decorative hose guides (stakes carved like animals, elves, or flowers) can be found at some garden centers, mail-order garden suppliers, or craft shows. You could also improvise by using things like plastic pink flamingos, garden statues, or birdbaths.
  • Use a water breaker on the end of your hose to change heavy water flow into a gentle sprinkle. This helps prevent soil compaction and spreads the water more evenly across planting areas. Put an adjustable spray nozzle on the end of the hose, watering only with the setting that produces fine droplets in a gentle spray and wide arc. Save the strong blasts for washing the car.

    ­ Or, look for spray heads developed specifically for garden use. Some are set on angled bases, making it easy to reach in between plants. Others are on long poles for watering hanging baskets.

Water breakers should be put on watering cans, too, especially when watering young plants such as seedlings, which can be broken or uprooted with a strong drenching.

­Water is a valuable commodity. Learn easy methods of conserving this precious element on the next page of this article.
­­

Advertisement

Conserving Water

­Conserving water not only saves money, it saves the environment. These tips will help you in this dual endeavor.

  • Use gray water on potted plants or small gardens to reduce water use. Gray water is the leftover tap water from activities such as rinsing vegetables at the kitchen sink. Be sure to avoid water contaminated with water-softener salts, harsh detergents, fats, oils, or other extras that would harm plants.

    Moisture-Loving Plants
    The following plants will drink up as much water as you can provide! Be sure to keep them moist, and they'll do their best to thrive.

    Gray water has been used successfully in arid parts of the United States and is well worth using anywhere. It helps prevent stress on wells during drought and lowers utility bills for people with municipal water lines.
    Capture gray water in a basin stored close to the sink, where it will be handy to pull out and use. Transfer the gray water to a watering can before watering potted plants or new plantings. A little moisture in a time of need will make a big difference.

  • Catch water from a downspout into a container. This unfluoridated, unchlorinated water is ideal for watering plants. It comes at an ambient temperature, not shockingly cold from the tap, which is hard on warmth-
    loving plants. And perhaps best of all, at least from the gardener's perspective, it's free!

    The easiest way to collect downspout runoff is to put a container at the bottom of the downspout. A topless bucket or barrel with a sturdy spigot at the bottom can be set in place permanently. Simply drain the water from the spigot into your watering can. To handle larger quantities of water, look for a 30- to 50-gallon barrel or drum. It's helpful to keep a large cup or other dipper on hand for transferring the water into a watering can.

    You can tap every downspout around your house for maximum water yield or, if you prefer, just use the downspouts in the private parts of the landscape, the back and side yards. Be sure to cap containers so that birds, small mammals, and reptiles do not fall in and drown.

  • Another option is to redirect runoff from downspouts into flower beds or lawn. Flexible tubing can be connected to the end of the downspout and directed into nearby plantings around the foundation of the house or to flower or vegetable gardens. For maximum benefits, shape beds like a shallow bowl to collect the water and give it time to soak in. Or, as an alternative, the garden could be made fairly level with lower moisture-gathering saucers made around newly planted trees or shrubs or plants with high moisture needs.

    In dry climates, the tubing can be covered with soil or mulch and kept connected all the time. In climates with periods of overly wet weather, the tubing should be disconnected during soggy seasons to prevent oversaturation of the soil, which may cause plants to rot, unless you are growing water-loving plants like Siberian iris and primrose.
  • Drop the soil level in the boulevard strip, the row of grass between the sidewalk and the street, so it will collect runoff rainwater that otherwise would be lost to street sewers or roadside ditches. A small 1- to 2-inch drop in soil level will be enough to do the job. If planting sod, make the soil level even lower to account for the extra height of sod roots. In cold climates, you may have to remove sand or grit that can accumulate after winter snowplowing to maintain an appropriate height.
With these helpful watering guidelines, you can sprout your own green thumb and never have to worry about dry, brown foliage again.

©Publications International, Ltd.

Advertisement

Lots More Information

Advertisement

Loading...