Painting a room can be a task that takes a couple of hours, a half day, or more. It all depends on what and how much you decide to paint. You can freshen up a room by giving a door or cabinet a new coat of paint in just a few hours. Or you can break it into smaller jobs and spread them out over a week or more. Whatever the size of the job you decide to tackle, the painting techniques remain the same.
In this article, we'll take you all the way through the process of painting a room. From prepping to cleaning up, we have the job -- and your room -- covered. We'll start at square one, with how you should use your painting equipment.
Advertisement
Brushes
When you embark on an interior painting job, you'll soon discover how easy it is to use brushes and rollers competently. Even so, there are a few techniques that will help postpone fatigue and provide a neater job.
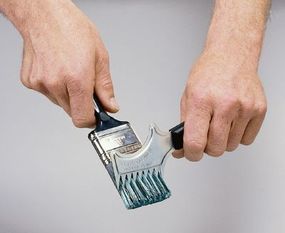
The grip you use depends on the brush you've chosen. Trim and sash brushes with pencil handles are grasped much as you would a pencil, with the thumb and the first two fingers of the hand. This technique gives you excellent control for intricate painting. With beaver-tail handles on larger brushes, you'll need a stronger grip because the brushes are wider and heavier. Hold the handle with the entire hand, letting the handle span the width of your palm as you would hold a tennis racket. This technique works best when you're painting large, flat surfaces.
The goal of loading a brush is to get as much paint on the wall as possible without dribbling it all over the floor and yourself in the process. It will take you only a few minutes to be able to gauge accurately how much paint your brush will hold along the way. Meanwhile, start the job by dampening the bristles of the brush (with water for latex or the appropriate thinner for other types of paint) to condition them and make them more efficient. Remove excess moisture by gently striking the metal band around the handle's base against the edge of your palm and into a sink or bucket.
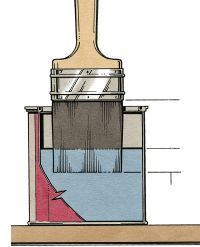
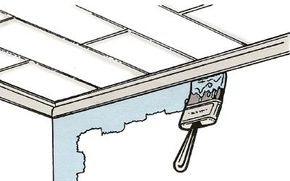
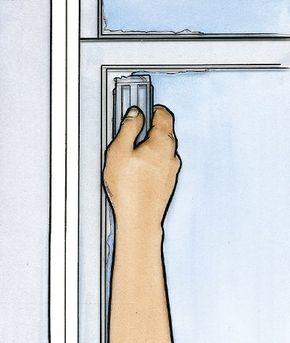
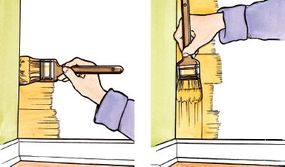
With the first dip, move the brush around a bit in the paint to open the bristles and let the brush fill completely. It will be easier to pick up a full load if you jab the brush gently into the paint with each dip. With most latex paints, you can simply dip the brush and let the excess drip off for a few seconds before moving the brush to the wall. With thinner coatings, however, you may have to gently slap the brush against the inside of the paint can or lightly drag it across the inside edge of the lip to remove excess paint.To neatly paint up to a line where two edges or colors meet, called "cutting in," use a trim brush with beveled bristles (the end of the brush resembles a chisel). Paint five or six strokes perpendicular to the edge of the ceiling or the wall. Next, smooth over these strokes with a single, long stroke, painting out from the corner first, then vertically. Where the wall and ceiling come together, use downward strokes on the wall first followed by smooth horizontal strokes.
On the ceiling itself, cut in strokes toward the center of the room, away from the wall. Then paint a smooth horizontal stroke on the ceiling that follows the direction of the wall. Even if you're using the same color of paint on adjoining surfaces, follow this method of cutting in with 2-inch-wide borders rather than just plopping a loaded brush directly into a corner. This will prevent drips, sags, and runs.
Another cutting-in approach, beading, can practically eliminate the need to use masking tape to protect one painted area from another. Use a beveled trim brush with nice long bristles. Hold the brush so that your thumb is on one side of the metal ferrule and your fingers on the other. Press the brush lightly against the surface, then, as you move the brush, add just enough pressure to make the bristles bend away from the direction of your brushstroke. Keep the brush about 1/16 inch away from the other colored surface. The bent bristles and the pressure will release a fine bead of paint that will spread into the gap.
With both methods of cutting in, but especially when you're dealing with two colors, it's better to have a brush that's too dry than one that's too wet. This is detail work. To do it effectively, go slowly and cut in 4 or 5 inches at a time. It will seem tedious at first, but your speed and accuracy will improve with practice, and even one ordinary-size room will give you lots of practice.
Rollers
Working with a roller is even less exacting than working with a brush. Even a novice painter can get the feel of it in just a few minutes.
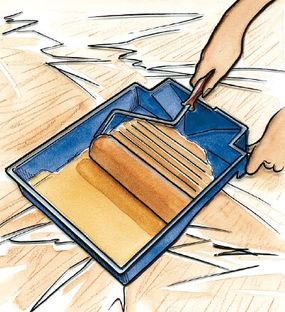
As with brushes, moisten the roller first with water for latex paint or the appropriate thinner for other types of paint. Roll out the excess moisture on a piece of scrap lumber or kraft paper or even on a paper grocery bag. Don't use newspaper because the roller may pick up the ink. Fill the well of the roller pan about half full, and set the roller into the middle of the well. Lift the roller and roll it down the slope of the pan, stopping just short of the well. Do this two or three times to allow the paint to work into the roller. Then, dip the roller into the well once more, and roll it on the slope until the pile is well saturated. You'll know immediately when you've overloaded the roller. It will drip en route to the wall and have a tendency to slide and smear instead of roll across the surface.
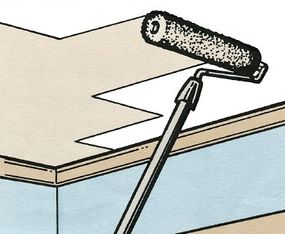
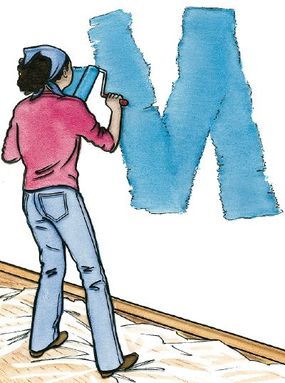
The most effective method of painting with a roller is to paint 2-or 3-square-foot areas at a time. Roll the paint on in a zigzag pattern without lifting the roller from the wall, as if you're painting a large M, W, or backward N. Then, still without lifting the roller, fill in the blanks of the letters with more horizontal or vertical zigzag strokes. Finish the area with light strokes that start in the unpainted area and roll into the paint. At the end of the stroke, raise the roller slowly so it does not leave a mark. Go to the next unpainted area, and repeat the zigzag technique, ending it just below or next to the first painted patch. Finally, smooth the new application, and blend it into the previously finished area.
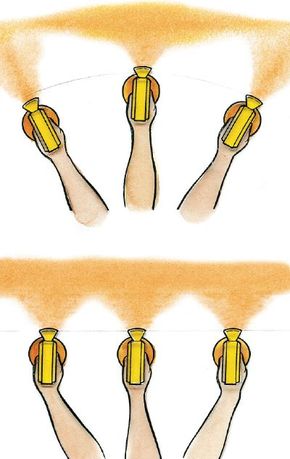
Professional painters also suggest starting with a roller stroke that moves away from you. On walls, that means the first stroke should be up. If you roll down on the first stroke, the paint may puddle under the roller and run down the wall. In addition, be careful not to run the roller so rapidly across the wall that centrifugal force causes it to spray.
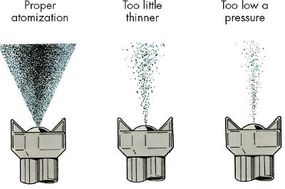
If you have a large indoor painting job, an airless sprayer is the best tool to use. We'll take a look at airless sprayers and how to use them safely in the next section.
Advertisement