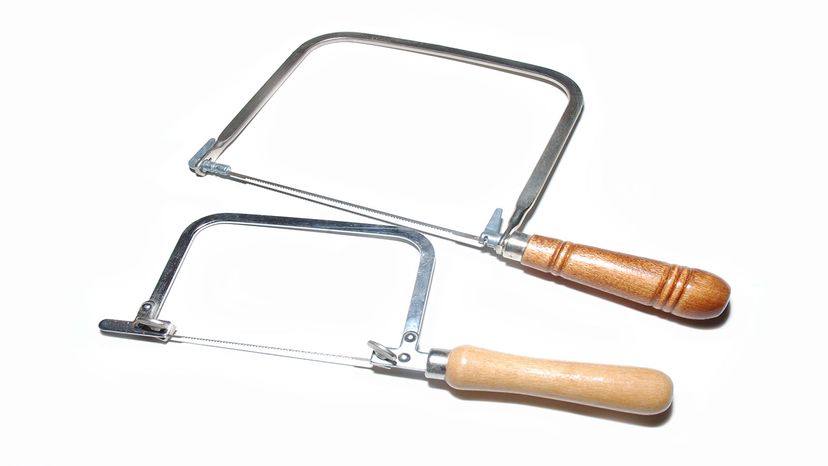
How to Use a Coping Saw

By: Talon Homer  | 
coping saw
The handle of the coping saw allows the user to make turning cuts. Jeffrey B. Banke/Shutterstock

The coping saw is named after a particular carpentry technique known as the cope, in which two pieces of wood trim are joined on the inside wall of a building. In order to mount together securely and maintain a flush appearance, the materials must first be cut at a curve.

Advertisement

What Is a Coping Saw?

Coping saws are hand saws with a distinct U shape that are useful for making curved cuts on thinner materials around the home and shop.

A coping saw uses a very thin steel or tungsten metal blade stretched on a metal frame to make turning cuts on wood, plastic or metal depending on the blade selected. Its appearance is similar to a common hacksaw, but with a larger gap, known as "the throat," between its blade and carrier. The U-shaped frame has a swiveling spigot (clip) at each end to hold the ends of the blade. A hardwood or plastic handle allows the user to turn the blade during the cut. Many saw handles have an adjustment mechanism that lets the user set the tension of the blade by twisting. Some coping saws also allow the angle of the blade to be adjusted relative to its frame. These characteristics make the saw perfect for more intricate curved cuts, like those required to make a joint in crown molding.

Advertisement

Most coping saw blades have around 12 to 15 teeth per inch, though coarser and finer blades are available for specialized jobs. Blade lengths come in either 6 3/8 (16 centimeters) or 6 1/2 inches (16.51 centimeters). Throat width is typically between 4 and 6 inches (10.16 and 15.24 centimeters). Like other hand saws, you should be able to find one for purchase at any local hardware store.

Other useful handsaws include the crosscut saw, ripsaw, backsaw, keyhole saw, and hacksaw. In addition, electric jigsaws can be used for some coping saw projects.

But here, we focus on the coping saw.

Advertisement

How to Safely Use a Coping Saw

To install a blade, set the frame's front edge on a bench and hold the handle so it is pointing up. Attach one end of the blade to the spigot farthest from the handle. Then press down on the handle to compress the frame so the other end of the blade can be attached. Release tension and adjust the spigot as needed. Before starting the cutting process, be sure that the blade is tensioned correctly within the frame, and won't have a chance of coming loose. Overtightening is also dangerous, and can cause the blade to break during use. If cutting into the center of a material, you may also need to remove the blade, thread it through a pilot hole in your material, then reattach it to the saw frame.

To safely use the coping saw, firmly hold the material in a vise or with clamps. Drawing the intended design onto the material with a carpentry pencil will also give a visual reference in making a precise cut. Place the saw's central teeth on the line to be cut and push the saw in a short stroke away from yourself to start the cut. Continue the cut, turning the handle and frame as needed to follow the cut line. For wood and other soft materials, you will likely want to follow the cope up with some sanding in order to achieve a smooth and flush edge.

Advertisement

For safety, keep appendages, hands and other objects away from the sharp teeth. Never apply more force onto the saw than you could using your bare hands. As with any other bladed tools, the user should wear long sleeves, padded work gloves and safety glasses to prevent bodily contact with the blade or cutting debris. Long hair should also be tied up and out of the way so as not to interfere with the cutting process.

Advertisement

How to Maintain a Coping Saw

Like just about any hand tool, a coping saw is best kept in a dry environment to prevent corrosion. If rust starts showing up on your saw frame, especially at the tensioners, it's best to scrap it and get a new one. Dull or corroded blades should also be replaced before use.

After several cuts, the saw blade will likely dull and make work more difficult. The typical saw blade is made to be easily removed and changed by the user. Replacement coping saw blades are available at most hardware stores. Make sure you select the appropriate blade as indicated by the number of teeth per inch. Wooden fixtures can usually be cut with coarse blades of around 15 teeth per inch. Tougher materials will require finer blades, and more elbow grease.

Advertisement

Types of Coping Saw Blades

When using a coping saw, proper blade selection is just as important as making the cut itself. Replacement blades come in a handful of varieties, based on the type of material they're intended to cut.

  • Wood Cutting Blade — The most common type. Wood blades are made of steel and range around 15 to 18 blades per inch for a combination of quick and precise cuts. Less teeth will slice through wood quicker, while a finer blade allows for more control, but a slower cut.
  • Plastic Cutting Blade — Use helical teeth that spiral similarly to a drill bit. This allows the blade to cut through soft materials like plastic or clay without damaging their edges. Minimal force should also be applied when using this blade.
  • Metal Cutting Blade — Made of strong high-carbon steel to cut through thin sheet metal. Thicker metal components likely demand a power saw for safe cutting.
  • Tile Cutting Blade — Uses a tough tungsten carbide wire to cut through hard material like ceramics.

Advertisement

Advertisement

Loading...