10 Power Tools that Need Maintenance

A few simple steps can leave your tools in great shape. See more pictures of power tools.
©iStockphoto.com/Difydave

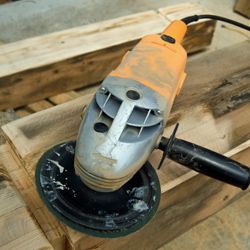
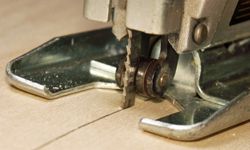
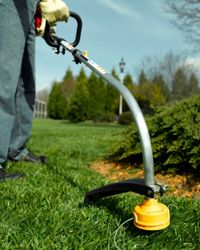
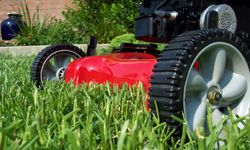
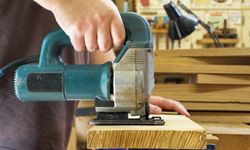
Plug 'em in, gas 'em up or pop in some batteries. Power tools make home improvements, repairs and maintenance that much easier. You use them for all kinds of projects, from quick fixes indoors to seasonal work in your garden. While they're relatively easy to operate, power tools still require regular maintenance. Are you giving your power tools the care and attention they need to last you a lifetime? You might be surprised at how easy it is to protect them against wear and tear, so they'll last you longer than one season. It'll save you money in the long run, too.

Advertisement

10: Electric Hand Drill

The electric hand drill may very well be the most overworked of all tools. It doesn't just drill holes; attachments allow it to also polish, sand and grind. Due to its frequent usage, maintenance is especially important. Drill bits should always be sharp. So, either sharpen or replace them when required. If you're using the drill for extended periods of time, allow it to cool down every so often to avoid overheating. Other ways to prevent this problem include keeping the air vents and the motor clean by blowing compressed air on them. Use a toothbrush to remove stubborn, dirty patches from the engine's fan. When you're done using it, wipe down the drill with a clean cloth dampened with a household detergent. Also, you should coat metal surfaces with a light film of oil using a soft cloth to keep these areas clean. If your hand drill is cordless, remember to recharge the batteries when necessary so it's ready when you need it next.

Advertisement

9: Power Sander

Sand and dust can add up quickly.
©iStockphoto.com/microstocker

There are a couple kinds of power sanders. Whichever one you have, follow these maintenance tips to ensure your tool stays in great shape for a long time. Sanders accumulate dust quickly. When grime gunks up internal mechanisms or builds up on the fan, your sander can overheat and stop working. To prevent this, regularly clean the fan and remove dust from the air openings using a brush, compressed air or simply filling your lungs with air and blowing on those areas. To prevent filth from accumulating and obstructing the fan, always use the dust bag and empty it often before it's full. After each use, clean the sander by first removing the sandpaper, then blowing compressed air over it and out of vents and openings. Gently scrub stubborn dirty spots with an old toothbrush. Always ensure the sandpaper is aligned correctly; if it's off, sparks may fly from the platen assembly, or the sandpaper might veer to one side or slide off. And of course, clean and replace sandpaper as needed.

Advertisement

8: Drill Press

Unlike the power sanders we just discussed, drill presses come in many sizes that represent hand-held, bench and floor models. They all benefit from the same kind of care. To prevent rusting, wipe down the table and all metal areas with oil or a relatively thin, moisture-resistant sealant called paste wax. Also, apply paste wax to stationary surfaces. If you use a drill press often, check the front bearings once a month and the motor oil cups twice a year in order to find problems when they're nascent, rather than full-blown, bigger headaches. Drip No. 20 SAE oil into bearing slots.

Advertisement

7: Saber Saw

A healthy saber saw will give you a better cut.
©iStockphoto.com/JSABBOTT

The saber saw, also called a jig saw, is most recognized for its ability to maneuver tight corners and cut curves in wood. But it can cut through other materials, too, such as metal, drywall, rubber, leather and asphalt. Most problems people have with this machine are caused by their misuse of it. Poor practices often make it overheat and eventually burn out prematurely. Let the motor reach maximum speed before engaging the blade in the work piece. Adjust the speed according to your material: faster for softer surfaces, slower for hard mediums. If you notice spots with wood burns, it's time to sharpen the blade. If you don't have the right tools, hire a pro to sharpen it for you. Sharp blades are important. Dull ones can cause the motor to overheat, lose power or stop working altogether. Blunted blades also can make the saw rattle excessively or bend, break or jam. Eventually, when sharpening a blade doesn't make it sharp enough, just replace it. Unplug the saw after each use, and use a toothbrush to clean the roller, collar and base of the blade shaft assembly. Using compressed air, blow air through vents. Remember to service the blade shaft assembly annually.

Advertisement

6: Chain Saw

Ideal for felling trees or chopping logs, the chain saw is supremely helpful for strenuous projects. It can do a lot if you take care of it. Keep key areas free and clear of debris and dirt particles to ensure the chain saw doesn't lose power, run erratically, overheat or stop working. Specifically, clear blocked fuel cap vents with a toothpick. Clean a paper air filter by tapping it against a hard surface to knock dirt loose. If the filter's made of mesh or other materials, use a screwdriver to disassemble sections of it. Then, wash it with water and a household detergent. Let pieces dry completely before screwing it back together. If the muffler isn't kept clean, it'll also clog. In this case, disconnect the spark plug, drain the fuel tank and unscrew the muffler cover. Replace damaged parts and make sure interior screws are tight. Remove debris with a wire brush, a tool that you can also use to clean engine cooling fins to prevent overheating. Lastly, check your carburetor to make sure it stays calibrated correctly. Otherwise, your chain saw won't start. Check the chain for correct tension and sharpen it as needed so it cuts evenly.

Advertisement

5: Hedge Trimmer

Your hedge trimmer will have your yard looking better than the Jones'. Take care of it.
©iStockphoto.com/belknap

Able to cut twigs and small branches with a multi-toothed blade, the hedge trimmer is designed to trim shrubbery. Each time before you use it (or before storing it for the season), take a clean cloth dampened with machine oil and wipe down the blades. The cutting blade should always be kept sharp. Simply use a smooth, metal file for this. Inspect the brush assemblies located on each side of the commutator. Use long-nosed pliers to lift out each brush assembly and press each one to test its spring. Replace if necessary. Every so often, check on the motor and lubricate the bearings. Just use a toothbrush or something similar to brush off dust from the motor and its fan. Clean and lubricate blades (and bearings), to prevent dull or dirty blades. Remember, never use a hedge trimmer in damp conditions.

Advertisement

4: String Trimmer

If you keep your garden's borders well-groomed, chances are, you're well-acquainted with the string trimmer. A string trimmer either runs on gasoline or electricity. Both styles drive a cutting head that holds a spool of nylon filament string. The string rotates quickly, so it's vital to wear protective clothing like gloves, safety goggles and sturdy boots to operate it safely. Before you start it, clean off dirt and clippings from the deflector using a stick or stiff brush. Drain any remaining fuel into a metal container at least 10 feet away (about 3 meters) from your work area before storing or repairing your string trimmer.

Advertisement

3: Lawnmower

Keep your lawn mower looking shiny and new.
©iStockphoto.com/travelpixpro

Your lawnmower should last a lifetime with good care and regular maintenance. Regularly check the oil's level and quality. If you have a four-stroke engine, drain the crankcase and refill it after every 25 hours of use. There should always be fresh fuel in the tank (gasoline that sits in the engine too long can become contaminated). Pay attention to engine controls, and follow your manufacturer's care manual. This includes calibrating your carburetor according to code. Keep the air filter and fuel filter clean so that your lawnmower doesn't lose power, run erratically or fail to start. Get rid of clumps of grass clippings on the lawnmower after your done mowing.

Advertisement

2: Motorized Garden Tiller

Garden tillers relieve you from manually planting, breaking new ground or introducing new materials to your soil. But the machine is vulnerable to the dirty conditions where it's operated. Consult your owner's manual for specific directions for proper care. Always wipe down the machine after each use. Clean the fuel tank and air filter regularly so your tiller doesn't stall or run erratically. Tap paper filters against a hard surface to dislodge dirt. Other filter styles can be washed with mild household detergent and water. Let it dry before reinstalling. Also, clear any blocked areas on the fuel tank cap vents, otherwise, the garden tiller could run infrequently. As with other power tools we discussed, adjust the carburetor to ideal conditions based on your manual's directions.

Advertisement

1: Snow Blower

Don't leave yourself buried in snow because the blower is broken.
©iStockphoto.com/Lisay

If you live in a region that gets a lot of snowfall during winter, you're probably familiar with this next tool. The snow blower efficiently clears walkways by shooting the snow underfoot into another direction. If you take care if it, you shouldn't ever have to replace it. Adjust the carburetor according to your owner's manual. Fill the tank only with clean fuel. Always maintain proper oil levels. If your snow blower has a four-cycle engine, check the oil level often, and drain and refill the crankcase after every 25 hours of use. Keeping the machine's many components clean is important for preventative care, including the fuel filter, fuel tank cap vents and engine cooling fins. When you're done using this tool, turn it off, disconnect the spark plug and brush away snow from the discharge chute, auger assembly and housing. You want to store it dry, so restart it and let it run for awhile so that any remaining snow melts and evaporates. Turn it off, disconnect the spark plug, close the fuel shutoff valve and remove the key. Leave it in a clean, dry place.

Lots More Information

Related Articles

  • Davidson, Homer L. "Troubleshooting and Repairing Power Tools." Tab Books. 1990.
  • Schultz, Mort. "Repairing and Maintaining Yard Equipment and Power Tools." Wiley. 1994.
  • Time-Life Books. "Do it Yourself: Power Tools and Equipment." Time Life Books. 1989.

Advertisement

Loading...