How to Rewire a Lamp in 9 Steps

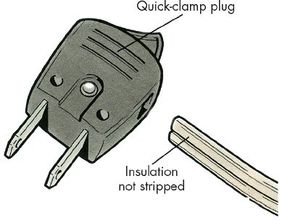
Repairing household lamps that don't work properly is easily done. Available at any well-stocked hardware or electrical store, the plug and cord are simple and inexpensive to replace. Installing a light socket is just as easy. Replacement sockets come in various finishes so you should be able to find a socket that is similar to the color tone of the existing socket.

Lamp cord is known as Type SPT, or zip cord. The #18 size is satisfactory for most lamp applications. Zip cord is available in many colors, the most common being black, brown, white, and transparent. Match the cord color to the lamp stand or the wall that holds the receptacle. The customary length is 6 feet, but you can use as much cord as you need to reach from the lamp to the receptacle.

Advertisement

To figure out how much cord to buy, calculate the length of the cord (including cord that is hidden in the lamp), and add 1 foot for attachments to socket and plug and for slack. In terms of safety and appearance, it's better to have an adequate length of cord than to compensate for a short one with an extension cord.

Check out the next page for the first step.

1. Disconnect the Power

Pull plug out of wall socket. You should never do any work while lamp is connected.

Next, we'll work on taking out the bulb.

Advertisement

2. Remove the Bulb

Remove shade, unscrew bulb, and squeeze socket shell at switch to separate shell and cardboard insulator from socket cap. If you plan to reuse socket, do not use screwdriver to pry socket apart. Pull socket out of shell as far as attached wire permits. If this doesn't give you enough wire to work with, push cord up from bottom of lamp for additional slack.

Next, we'll work on removing the socket.

Advertisement

3. Remove the Socket

Loosen socket's terminal screws, and remove cord wires from under them. If lamp is small and cord goes through in straight path, slide old wire out, and feed new wire through from either end to the other. If old cord offers any resistance at all, don't tug on it. Check to see if you can disassemble lamp to make removal easier. Also, make sure cord is tied in knot to keep it from being pulled out at its base.

Advertisement

4. Cut the Power Cord

To remove tight cord, cut wire off about 12 inches from lamp's base, slit cord's two conductors apart, and strip about an inch of insulation off ends. Do the same to one end of new length of cord.

Twist bare new and old conductor ends together, and fold twists flat along cord. Wrap electrical tape around splice. Pull on old cord from top of fixture, and work new cord through; at same time, push on new cord from bottom. When you have sufficient length of new cord through top, clip off old cord.

Advertisement

5. Remove the Insulation

Once you pass new cord through lamp, split end so you have about 3 inches of separated conductors. Use wire stripper tool to strip about 3/4 inch of insulation from end of each conductor, then twist strands of each together. Be careful not to nick strands when you strip insulation.

Advertisement

6. Connect Wires to the Terminal

Bend twisted end of each wire into clockwise loop, and place each loop under terminal screw on socket with loop curled clockwise around screw. Tighten terminal screws. As each screw is tightened, clockwise loop will pull wire tighter under screw head. (A counterclockwise loop would tend to loosen wire.)

Clip off excess bare wire with diagonal cutters. All uninsulated wire must be under screw heads, with no loose strands or exposed bare wire. If bare wire is visible beyond screw heads, unscrew terminals, remove wires, and make connection again.

Advertisement

7. Attach the Insulator

Slide socket shell over insulator, and slip shell and insulator over socket. Then snap shell and socket into cap.

Advertisement

8. Attach the Plug

A quick-clamp plug is very easy to install.

Install quick-clamp plug on other end of cord. Stick end of cord into slot on side of plug, and push down on lever at top. Metal prongs inside plug will bite through cord's insulation, piercing copper wires to make electrical connection. If you use screw-type plug, prepare wire ends just as you did when making socket screw connections, then knot them together. Loop each wire around prong of plug before tightening bare end under screw head. Knots and loops keep wires from accidentally touching each other and also make it more difficult to loosen connections by pulling on cord.

Next, we'll finish our project.

Advertisement

9. Reasseble the Lamp

Tighten wires under screw heads, and clip off any excess uninsulated conductor before you plug in lamp.

Now that you know how to rewire a lamp, we'll shed some light in the next section on how to replace an incandescent fixture.

Advertisement

Rewire Lamp FAQ

How much does it cost to rewire a lamp?
The cost of repairing or rewiring a lamp is based on the components present inside the lamp. Most table lamps happen to have a single socket process and can be rewired for $14.
Can I rewire a lamp myself?
You can rewire a lamp easily by yourself. The process is simple and requires you to cut the old cord from the root and replace it with a new one. The replacement process shouldn't take long.
How much does it cost to rewire a floor lamp?
The rewiring of floor lamps is based on a number of factors. The rates also tend to vary based on the output generated. The costs can go from $35 to $70 and up.
What happens if you rewire a lamp incorrectly?
Rewiring your lamp at home by yourself comes with one catch: If you mess up the process, you will end up making errors such as energizing the tab inside the socket.
Is it difficult to rewire a lamp?
The process for rewiring a lamp is not difficult, but you should be aware of following the right placement for the different ends of the wire. Wrong placement can affect polarity.

Advertisement

Loading...