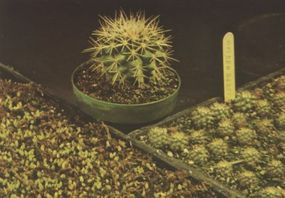
Propagating Cactus Plants
You can easily reproduce your cacti and succulent collection through the process of propagation.
There are a variety of ways to propagate your plant, including division, cutting, starting from seeds, and grafting.
Advertisement
The best method of propagating depends on your plant type. This section will explain the different types of propagation.
Cacti and other succulents are easy to propagate. Any encouragement you can give them will start new growth. Remember that they are accustomed to growing on the dry side and too much water or humidity will cause them to rot.
For successful propagation of any kind you will need to:
- Develop mechanical and technical skills. Train the hand and eye. Many times the head will know how, but the hand can't do it. Skills improve with practice, and fortunately these plants are quite tolerant.
- Know the plants' structures and how they grow. You can learn this by working with plants -- let them teach you -- or you can read, take formal courses, or a combination of these. If you understand how plants grow, you will have an easier time propagating them and be better able to cope with the unexpected.
- Know the different kinds of plants and the methods by which they can be propagated. The form of propagation used depends on the plant and your circumstances.
Division
Division is the easiest form of multiplication. It is not only easy on you but also on the plant. Division is ideal when you want only a few plants, or you can use it when the plant starts crowding in on itself.
Division is not an extreme form of reproduction. Done gently, it's an operation that is only slightly more traumatic than transplanting.
There is trauma, since the root ball is being separated and a part rather than the whole plant is being potted up; but you have roots, a stem, and leaves (if not the leaves, at least the shoots to produce them). All you need to do is encourage each part to keep on growing and protect it until it gets over the effects of the separation.
Some plants divide easily while others require the eye of a diamond cutter to make the most of the possibilities.
Division of indoor plants can take place at any time, but it is especially successful from the plant's point of view if done during the winter when the plant is resting -- indoor gardeners are less busy then, too.
Dividing plants in the winter is frustrating from the indoor gardener's point of view because the plants will just sit there and do nothing until it is time for them to come out of their dormancy and start growing with enthusiasm.
Many succulents, especially those with thick mats of sprawling growth, can be divided very easily. They do very well, particularly if the division takes place at the beginning of their growing season.
What You Will Need
Before beginning to divide a plant, collect everything you will need:
- The plant to be operated on.
- Newspapers.
- Bucket of warm water.
- Clean pots.
- Fresh, clean soil.
- Drainage aids.
- Sterile knife.
- Plenty of time.
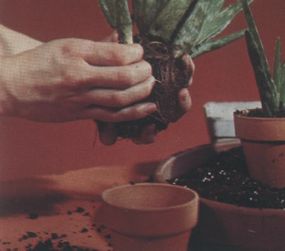
How to Divide Plants
1. Spread the newspapers out carefully. Often the hardest part of dividing a plant is cleaning up the mess afterwards.
2. Remove the plant from its pot. Do this gently: break the pot if necessary.
3. Decide how many plants the division is to produce.
4. Separate the root ball gently. If the roots are damaged or torn off, you will have a large cutting rather than a plant division and growth will be slowed. At times, a clean sharp knife or a hatchet is necessary to divide the root ball with the least amount of bruising.
A clean cut is better than a torn and mangled mess caused by pulling and yanking. If you are not sure how the plant is structured under the soil line, put the root ball into a bucket of warm water and gently tease the parts of the plant apart.
There will be some damage to some of the roots, but you will be able to see where the main divisions are. If you are gentle and repot carefully this can be a useful method, especially when working with plants that have become extremely rootbound.
5. Be sure that each division has roots, a stem, and leaves (or shoots), and pot it in a clean, proper-sized pot with good drainage.
Good drainage is very important because the roots have been disturbed and damaged roots are more susceptible to rot.
6. Use fresh, sterile, or at least uninhabited soil. Unless there is a good reason for doing otherwise, place the division in the center of the pot.
7. Plant each division as deep as it was growing before. Press the soil firmly around the plant and water with warm water. Roll up all the debris in the newspaper and clean the operating area.
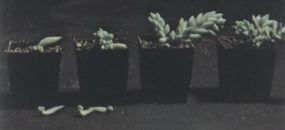
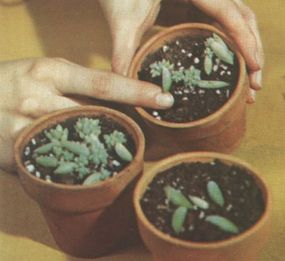
Put the separated plants in a protected location (out of full sun and drafts) for a few days. In a relatively short time the plants will have adjusted themselves to their new conditions and they will be full-fledged members of your collection or ready to join someone else's indoor garden.
Cuttings
Most succulents root easily from a piece of the plant or from leaves. It is important to let the piece dry out a bit before planting.

Fleshy leaves taken off of succulents can be put where they are warm and dry, and they will start sending out roots. That is the time to pot them up. High humidity is not necessary and possibly harmful, but bottom heat is a big help.
In propagating plants by cuttings, a piece of root, stem, or leaf is taken from the plant, kept under favorable conditions, and encouraged to grow. This produces a new plant which is usually, but not always, identical to the original (a variegated Sansevieria cutting will grow plain green).
For plants that can be easily propagated this way, there are a number of advantages. It is inexpensive, relatively fast, and doesn't require a lot of know-how except on the part of the plant.
Home is not always the ideal place to propagate plants, but with some plants the percentage of success is so great that one keeps wanting to start more.
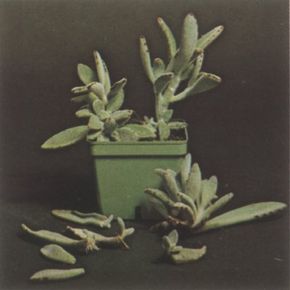
For succulent leaf cuttings such as hens and chickens, burro tails, etc., choose mature leaves that are not in the process of dying. If you remove them with a sideways pull there is less chance of damage to the plant and a better chance that there will be a tiny piece of stem attached (having a bit of stem attached often means that you will get a new plant and not just a well-rooted leaf).
Once the leaf has been removed, you can lay it on some potting soil or mix, or put it in a cardboard box on top of the refrigerator or any other convenient place. In either case, don't water until the roots appear.
After the roots and young plant start showing, the mix can be kept moist. (Pot up the ones you had in the box over the refrigerator when the roots and new plant appear.) The leaves may rot if you water them before this. When the new plantlets start growing, put them in a brighter light.
For Sansevieria cuttings, take a leaf and cut it into sections three to four inches long. Mark the top of each section by cutting a small notch out of the top. Plant the notch side up.
From Seed
Starting plants from seeds can be especially gratifying. The greatest satisfaction comes from growing plants from seed you have hybridized yourself.
Each seed is a combination of the heredity characteristics of its parents. For this reason plants grown from seeds can vary tremendously. Many succulents grow very easily from seed if the seed is fresh, but they may take a long time to germinate.
Also, since succulents are very cautious plants, they may germinate only a few seeds at a time. Some seeds start germinating in two days and others may take two years.
Seeds vary considerably in terms of their longevity and viability; many may not have enough vitality to survive beyond germination.
Start seeds in a well drained, sterile mix. Water sparingly but do not allow the seedlings to dry out. Seeds can not germinate until moisture has penetrated the hard seed coat. The taking up of moisture and swelling is a physical thing that may happen even with dead seed.
Because of the problems of seeds dying in the soil or seedlings dying just after they germinate, it is usually best to start seedlings in an artificial mix.
Grafting
Grafting is used:
- To speed up the propagation of known varieties.
- To provide plants with a stronger root system. Many attractive plants grow faster or do not rot as easily if they are grown on plain but sturdy roots.
- To maintain "sports" or monsters that would not be able to survive on their own, such as a brightly colored cactus that contains no chlorophyll and is unable to feed itself.
Grafting can also be used to produce a shape or effect that would not have been possible with one plant alone. Dwarfed plants can be produced by using a dwarfing root stock or by inserting a dwarfing section in a stem.
Weeping, tree-like effects can be produced by grafting vining or sprawling plants on top of a tall, upright base.
The principles are simple but success takes a keen eye, a steady hand, and lots of practice. Failure is reduced by working quickly and keeping the plant parts, tools (knives or razor blades), and hands as aseptic (clean) as possible.
Grafting is done with compatible plants. Compatibility generally, but not always, means plants in the same species, genus, or family -- plants that are somewhat similar in structure.
Since the plants are the final judge of compatibility, grafting is very often a trial and error process -- with the possibilities of some exciting surprises.
If the diameter of one piece to be grafted is larger than the other, you will have to move the two pieces around so that as many of their actively growing cells as possible are in contact.
The easiest graft to make is a flat graft where both the stock (the part with the roots) and the scion (the part to be added) are the same size and their vascular bundles (tubes that provide support and conduct water and nutrients) match.
A cleft or wedge graft is used when the scion is very narrow or flat. A one-inch slit or wedge is cut into the top of the stock, the scion is trimmed on both sides, and is inserted into the split.
A side graft is sometimes used. In a side graft, a slanting or diagonal cut is made on both the stock and scion. This cut often produces more surface area and a better chance for the graft to take.
When grafting cacti and other succulents, lightweight rubber bands can be used to keep the pieces together, or large spines can be used to pin them on.
Grafting is more successful when the plants are in their active growing period -- usually in the spring through the fall. It is important that the stock plant is in good health and not neglected while the graft is taking.
After grafting, keep the plants in a shaded spot for a while to keep the cuts from drying too quickly.
Keep water off the cuts to help guard against disease.
Keep the contact firm between the stock and scion, and do not remove the rubber bands or spines until a month after the graft appears to have taken.
In grafting, practice makes perfect. For greater success, as well as better looking results, keep your plants, tools, and fingers hospital clean.
As your indoor cacti or succulent garden grows, you might want to think about how to arrange your plants so they flourish. In the next section, learn everything you need to know about how to successfully arrange your plants.