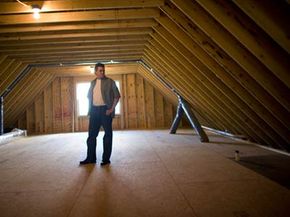
Your house is uncomfortably hot in the summer. And energy costs seem sky high and climbing. What can you do to beat the heat and ease spending? You may want to consider installing an attic vent. An attic vent will allow trapped air out, reducing the amount of warm air and excess moisture that usually gets bottled up in the highest level of your home. It can also provide an efficient way to cut down on your cooling costs and can help prolong the life of your shingles [source: Preble].
With the idea of saving money in mind, you're considering installing the vent yourself. You're in luck -- the basic installation process is pretty simple. It consists of determining where your vent should go, cutting a hole, placing the vent within that hole and securing the vent in place. Of course, there are several different types of vents and some require more work than others to install. Read below for some general directions on how to install several common household vents. This will give you a basic idea of what to expect, but be sure to read any specific manufacturers instructions that accompany your vent.
Advertisement
For a gable vent, you start by removing the siding and sheathing in your determined area with a circular saw, avoiding any unnecessary contact to the gable studs. After creating a space for the vent, line the hole with caulk and place the vent inside. Simply secure the vent into place with screws and your vent is complete.
Set your circular saw at 1/8 inch (0.4 cm) greater than the thickness of your roof's soffit when installing an intake vent. Then cut out your desired location and screw the vent directly into the soffit. Make sure you play close attention to the insulation, which should leave a gap between itself and the vent. If it doesn't, it may block the vent, preventing it from working.
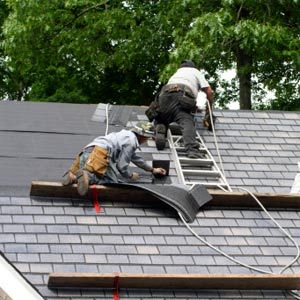
If you're installing a ridge vent, you'll want to pay close attention to the directions laid out by the vent manufacturer since specifics may vary. Basically, what you'll be doing goes something like this: remove the necessary shingles, usually found near the end of the ridge, near the roof intersection or the chimney. Remove all the felt paper, staples and nails in the area. Then place a chalk line down the roof sheathing on both sides of the ridge. Cut the sheathing out along that line and place your vent in your hole, over the peak. Finish by securing it in place.
When working with a roofline or turbine vent, remove any shingles or felt paper between the two rafters where you'll be installing the vent. Cut a hole that equals the size of your vent's throat. Use plastic roof cement to smooth the vent base, and then place the base over the hole. Slip the top end of the flashing above the shingles directly over your hole allowing it to lap over the area below the hole. Using roofing nails, secure the base and seal the nails with roof cement [source: Do It Yourself].
Be sure to check on local and state codes before getting your installation process underway, and make sure to take adequate safety precautions. And remember to read the manufacturer's instructions that accompany your vent -- as directions that are more specific may be necessary to understand the installation process.
Looking for more home improvement information? Check out the links on the next page.
Advertisement