How to Replace Baseboard Molding
Cracked or chipped baseboard molding is ugly, but not irreparable. Replacing the damaged molding takes time, but it isn't difficult.
Tools:
- Measuring rule
- Putty knife
- Pry bar
- Wood wedges
- Hammer
- Pencil
- Miter box
- Backsaw
- Coping saw
- Magnetic stud finder
- Nail set
- Chisel
- Paintbrushes
Materials:
- Replacement molding
- Replacement quarter-round or shoe molding
- 2-penny finishing nails
- Coarse-, medium-, and fine-grit sandpaper
- Plastic wood
- Touchup paint or varnish
Time: 3 to 5 hours
Advertisement
Buying the New Molding
Measure the length of the molding to be replaced, and its height and thickness; take these measurements to the lumberyard when you buy the replacement molding. If you're replacing only one section of a long molding, remove the damaged section and bring it with you to be sure you get an exact match.
Molding is sold in pieces 3 to 20 feet long. The shorter pieces are less expensive, but harder to work with; buy pieces that can be installed with as few joints as possible. Choose the molding carefully so you don't get cracked or gouged pieces, and buy a few feet extra to allow for mistakes.
Removing the Old Molding
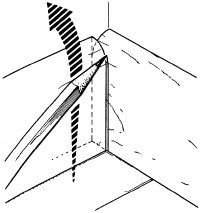
Remove the old molding carefully; if it isn't already broken, don't break it. Insert a putty knife between the quarter-round or shoe molding and the baseboard molding and pry gently to loosen the shoe molding, working along the entire length of the molding. When the shoe molding is loose, use a pry bar or a chisel to finish prying it off. Loosen the molding gradually, working along its entire length so that the entire piece of molding comes loose at the same rate; leave the nails in the molding. When the quarter-round or shoe molding is completely loosened, remove it.
Pry the baseboard molding away from the wall, being careful not to damage either the molding or the wall. Work from one end of the molding to the other, loosening the molding gradually along its entire length. When you can pry the molding far enough out from the wall, insert wood wedges between the molding and the wall, wedging from one end to the other as you work, until the entire piece of molding is wedged. Pull the loosened molding carefully away from the wall, leaving the nails in it. Remove any nails left in the wall with a hammer.

Measuring and Cutting the New Baseboard Molding
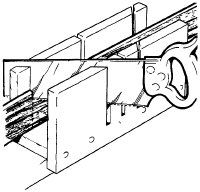
Using the old baseboard molding as a pattern, measure and mark the new molding to size. Mark outside, mitered corners exactly on the new molding and cut the miters with a miter box and a backsaw; be careful to hold the molding steady while you cut it.
Making Coped Joints
Inside corners must be joined in a coped joint, with one side of the molding overlapping and curving exactly around the other side. To make a coped joint, blunt-cut a piece of molding to fit tightly into the corner along one wall. Hold the blunt-cut molding in place in the corner, or fasten it lightly with a 2-penny finishing nail driven partway in. Hold a second blunt-cut piece of baseboard -- a scrap will do -- along the other wall, butted against the corner-fitted piece. Trace the outline of the second piece of molding carefully onto the side of the fastened piece, keeping the pencil at a constant angle so the traced outline is exact.

Unfasten the corner-fitted molding and cut it slowly and carefully along the traced line with a coping saw, following the outline on the molding exactly. To complete the coped joint, install a blunt-cut piece of molding along the wall you traced from; then set the traced and trimmed piece into place against it, jigsaw-puzzle fashion.
Attaching the New Molding
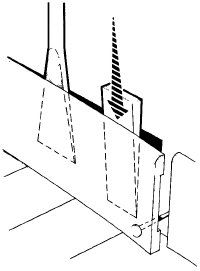
Attach the new molding to the wall at the wall studs; use a magnetic stud finder to locate the studs. If the old molding was properly installed, the nail holes left when you removed it will be at the studs. Set the new molding into place against the wall and join mitered or coped ends. Holding the molding firmly, nail it into place with two 2-penny finishing nails at each stud, one near the top of the molding and one near the bottom. Sink all nails with a nail set.
Replacing Quarter-Round or Shoe Molding
Measure and cut the new quarter-round or shoe molding, using the old shoe molding as a pattern. Mark and cut mitered and coped corners as above. Where quarter-round or shoe molding stops at a door frame, trim the exposed blunt end of the molding with a chisel to form a curve away from the door. Sand the chiseled edge to a smooth curve before nailing the molding into place.
Nail the shoe molding into place with 2-penny finishing nails driven through the molding into the floor; set nails about 12 inches apart. Sink all nails with a nail set. Fill all nail holes in both shoe molding and baseboard molding with plastic wood, and let dry.
Completing the Molding
To complete the job, paint or varnish the newly installed molding as desired.
On the next page, you will learn how to repair parquet flooring.
