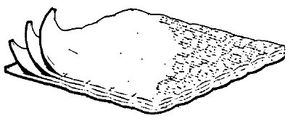
How to Make Pot Holders
To get the last mile of use from old towels and washcloths, turn them into pot holders. Your salvage will stand up better than most store-boughts.
Tools:
- Tape measure
- Straightedge
- Pencil
- Scissors
- Sewing machine
- 8-inch plate
- Straight pins
Materials:
- Worn towels or washcloths
- Scraps of cotton fabric
- Thread
- Prefolded bias tape
Time: 1/2 to 1 hour per pot holder
Advertisement
Measure and cut squares from the good parts of worn towels -- 8 inches is a good size, but make them larger if you prefer. Use at least two squares for each pot holder; if the towels are very thin, use three or more squares. Use worn washcloths as is. For strictly utilitarian pot holders, leave the towel layers uncovered; for fancier ones, cut cover squares the same size from scraps or new pieces of cotton fabric.
For each pot holder, stack two or more towel squares together; set a square of cotton fabric on the top and one on the bottom, right sides out. Quilt the stacked layers together on a sewing machine, making parallel rows of straight stitching about 1 inch apart, all across the square. Turn the stitched-together square 90 degrees and quilt again at right angles to the first lines of stitching, forming an all-over quilted square pattern. Or, if desired, stitch diagonally to make quilted diamond shapes, or use any free-form pattern.
When the square is completely quilted, trim the edges as necessary; use a straightedge and a pencil to get them square. Or, if you want a round pot holder, center an 8-inch plate on the quilted square and trace around it; carefully cut off the marked corners.
Finish the edges of the pot holder with prefolded bias tape. Starting at a corner, place the slightly wider side of the bias tape along the bottom edge of the pot holder, and bring the narrower side up over the raw edges of the fabric. Carefully miter the tape at the corners of the pot holder or ease it around curves; make sure you don't stretch the tape around corners or curves. Pin or baste the tape into place as you go. At the end of the pot holder, leave 21/2 inches of extra tape.
Beginning at the starting corner of the bias tape, stitch carefully over the folded-down bias tape, as close to the inside edge as possible. If your sewing machine has a zigzag stitch, use it. At the end of the pot holder, use the extra 21/2 inches of bias tape to make a loop for hanging the holder. Continue your stitching with a straight stitch all along the extra tape; then double the tape back and stitch its end to the edge of the pot holder with back-and-forth stitches. The loop should lie at the corner of the pot holder.
For more information on do-it-yourself kitchen improvement projects, try the following links:
- To create a whole new kitchen, see our article on How to Design a Kitchen.
- If you're shopping for ideas, you might find some good ones in A Guide to Kitchen Remodeling Materials.
- For suggestions on ways to enhance an existing kitchen, see our article on How to Build Kitchen Improvements.
