How to Install Laminate Flooring

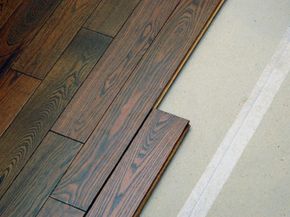
A hardwood floor installation in progress.
Laminate flooring is cheaper than wood, doesn’t need to be nailed, sanded, stained or finished, and is quite resistant to scratches, denting, fading and stains.
­iStockphoto/Jeffrey Zavitski

­Do you suppose trees rejoiced when Pergo came up with laminate flooring? Designed to look like wood flooring, laminate is cheaper, doesn't need to be nailed, sanded, stained or finished, and is quite resistant to scratches, denting, fading and stains.

Available in a slew of colors and styles, some laminate flooring is designed to mimic various wood grains; others look like ceramic tiles. In the 30 years since it was created, laminate flooring has become a mainstay in the home decorating industry. Because it can be put right on top of an old floor, laminate is considered a great choice for people looking to update or upgrade their old floors [source: Pergo].

Advertisement

­While there's still a little bit of tree in a plank of laminate flooring, it consists of four layers that have been bonded together with the use of heat and pressure. On top is a clear sheet of aluminum oxide, which is stain-resistant and helps to protect the underlayers. The next level is the decorative resin-based combination of melamine and aluminum oxide. That lies on top of the wood composition based core, usually high-density fiberboard that's been saturated in resins to help resist moisture. Finally, the core sits on top of a stabilizing backing that's also saturated with resins.

Because laminate flooring is made from natural cellulose fibers, the material will expand and contract with changes in humidity. Designed with interlocking tongue-and-groove connections, laminate flooring is not meant to be attached to the subfloor. Instead, it sits on top of it, enabling it to move with changes in the humidity.

For that same reason, laminate flooring is not considered a good choice in areas that are subject to high levels of humidity, such as bathrooms, saunas and laundry rooms.

Read on to find out what kind of tools and materials you'll need to install laminate flooring.

Advertisement
Tools and Materials to Install Laminate Flooring

While the tools and materials can vary depending on your existing floor as well as your new floor -- not to mention the scope of the project -- there are some general items you will most likely need.

Some basic materials will include:

Advertisement

  • flooring
  • underlayer
  • barrier sheeting
  • laminate glue
  • adhesive
  • polyethylene tape
  • quarter-round molding, baseboard or wall base
  • end molding, threshold and other transitions
  • stair nose, flush or over-the-top
  • plastic sheeting to cover furniture or close off adjacent room [source: Armstrong, Do It Yourself, Couvreur].

Here are some of the tools you'll need:

  • tapping block
  • pull bar
  • spacers
  • safety goggles
  • gloves
  • utility knife
  • hammer
  • pencil
  • tape measure
  • carpenter's square
  • router
  • drill
  • saws: table, miter, circular, hand, jigsaw
  • dividers
  • chalk line
  • laminate floor cleaner
  • white vinegar
  • pocket plane [source: Armstrong, Do It Yourself, Couvreur].

Laminate flooring installation kits are available for about $20 and include tools like spacers, pull bars and a tapping block to help lock the planks together.

Read on to learn important preparation steps to take before installing laminate flooring.

Advertisement

Preparing to Install Laminate Flooring

Before you begin the actual installation of your new laminate floor, you have to prep the existi­ng floor. First off, the subfloor should be flat. If it's made of concrete, grind off any high spots. Low spots should be filled with leveling compound. All carpeting and carpet padding should be removed unless the carpeting is a quarter-inch (6 mm) thick or less. Make sure to remove any remaining debris or adhesive residue. You want a clean, flat surface to work with so your new floor can look its best.

Next, remove trim and doors. Baseboard removal is optional. Keep in mind that you'll need to install new quarter round molding at the end of the job to cover the expansion zone around the perimeter. If the drywall doesn't meet the floor in any spots, create a solid wall surface with a 2- to 3-inch-wide (5 to 7 cm) facing strip of quarter-inch (6 mm) plywood at the stud.

Advertisement

The appropriate underlayer material will depend upon what type of subfloor you're setting the laminate on. Some laminate flooring products have the underlayer attached to the planks. Because laminate is noisier and harder than wood, the underlayer cushions the floor and helps reduce noise.

Measure the area you want to cover and add 10 percent for waste. To avoid ending up with an unusually narrow board at the finish wall, measure the distance between the starting and ending walls. Divide by the width of the board. To balance the room, add the amount left over to the plank width and divide by two.

If the room's relative humidity is between 45 and 65 percent, a minimum quarter- to half-inch (6 to 13 mm) gap or expansion zone between the laminate flooring and walls must be left around the perimeter of the room and any fixed vertical surfaces such as pipes, cabinets or staircases.

Undercut door trims and door jambs. This allows the floor to move. Check the height of the new floor against all doors that open into the room as it may be necessary to trim the door to accommodate the change in the floor's height.

Some laminate flooring products need to be acclimated to the room for several days before installation. Manufacturers will recommend that the room be kept at a minimum temperature, around 65 degrees Fahrenheit (18 degrees Celsius), for two days before, during and two days after the installation.

Now that you've prepped your room like a master painter preps a canvas, you're ready for the actual install. Read on to learn how to make it the smoothest installation possible.

Advertisement

Directions for Installing Laminate Flooring

Your exact installation of your laminate flooring may vary. The following install instructions focus on the most popular type of laminate flooring -- board-style planks with tongue-and-groove construction.

Start on the left side of the room and work to the right. Place spacers along each wall to set up the expansion zone. Set the first plank down, and add another piece of the flooring to the right, lining up the short ends and locking them into place.

Advertisement

When you get to the end of the first row and you need to cut the last piece, measure the distance between the last piece and the wall. Subtract a quarter-inch (6 mm) before cutting. When cutting the laminate with a handsaw or carbon-tipped blade power tool, the decorative side of the board should be facing up to minimize chipping. Use a pull bar to get the last piece of the row in and ensure the joints between planks are tight. Don't forget to put the spacer between the wall and the laminate!

Use the leftover piece to start the next row, providing it isn't too short (less than 8 inches [20 cm]). Generally, end joints of boards should be staggered at least 8 inches (20cm). Angle the boards for the new row, lining up the short ends and locking them into place first. After this row is connected and the last piece cut, the entire length needs to be angled and pushed forward to connect with the groove of the first row. Continue installing row by row, walking or pressing the boards into the sub-floor.

The laminate flooring will probably need to be cut lengthwise for the last row. Line up the flooring pieces on top of the last row of installed planks. Use a plank and a spacer to trace the contour of the wall onto the board that will be cut.

Read on to discover how to finish up your laminate flooring installation.

Advertisement

Finishing Laminate Flooring Installations

Finishing up your laminate flooring can be difficult, as there are numerous small cuts and trims that have to be taken care of. Be sure to be patient and take your time -- you didn't go through all this work just to mess up the installation at the end.

If the installation required putting down an underlayer that extended several inches up along the walls, cut the underlayer even with the top of the floor. Then, remove all spacers. Install the wall base or quarter round molding. This will cover that a quarter-inch (.6 cm) expansion zone around the perimeter. It's very important that the trim is attached to the walls or the subfloor, not the laminate floor, so that the floor can move as humidity dictates.

Advertisement

Next, install the trim track on the subfloor where needed. You can glue or nail this to the subfloor, and it serves the purpose of holding trim and transition elements in place. Then, install trim pieces that will finish the transitions to other rooms. T-molding is used to cover the space where two floors meet in a doorway. Manufacturers will also offer finishing pieces that are designed to transitions the laminate flooring to another floor, say tiled or carpeted floor. End molding finishes the laminate flooring at sliding doors or other areas.

Lastly, use a vacuum or damp mop to clean up the area. If the installation involved glue and tape, buff with a dry towel to remove any film left from the glue or tape.

Now you're ready to enjoy your brand-new floor. To learn more, visit the links on the following page.

Advertisement

Lots More Information

Related HowStuffWorks Articles

Sources

  • Armstrong. "Laminate Flooring." Armstrong Company Corporation. (Accessed 02/19/2009) http://www.armstrong.com/content2/resam/files/32613.pdf
  • Armstrong. "Laminate Flooring Installation Instructions." Lowes link. (Accessed 03/02/2009) www.loweslink.com/pubdocuments/Armstrong%20Laminate%20Flooring%20Installation.pdf
  • Book of Knowledge. "New Zealand." The New Book of Knowledge. Published 1994, Grolier.
  • Couvreur, Julien. "Laminate Floor Installation 101." Curiosity is Bliss Blog. (Accessed 02/19/2009) http://blog.monstuff.com/archives/000219.html
  • Do It Yourself. "Laminate Flooring Construction Information." Do it Yourself.com. (Accessed 02/19/2009)http://www.doityourself.com/stry/laminatefloorconstru
  • Flooring and Carpets. "How to Install Laminate Flooring." Flooring and Carpets.com (Accessed 02/19/2009). http://www.flooringandcarpets.com/how-to-install-laminate-flooring.html
  • Pergo. "Pergo Installationg Essentials Guide For Laminate Flooring." Pergo LLC. (Accessed 02/23/2009) http://na.pergo.com/Images/how_to/Install_Essentials_Guide.pdf
  • Quick-Step. "Quick-Step Laminate Floors." Quick-Step Product Brochure. Published 2005 by Unilin Flooring. http://www.quick-step.com

Advertisement

Loading...