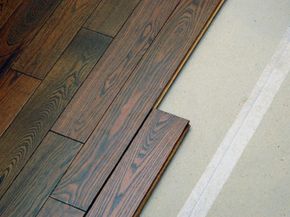
Do you suppose trees rejoiced when Pergo came up with laminate flooring? Designed to look like wood flooring, laminate is cheaper, doesn't need to be nailed, sanded, stained or finished, and is quite resistant to scratches, denting, fading and stains.
Available in a slew of colors and styles, some laminate flooring is designed to mimic various wood grains; others look like ceramic tiles. In the 30 years since it was created, laminate flooring has become a mainstay in the home decorating industry. Because it can be put right on top of an old floor, laminate is considered a great choice for people looking to update or upgrade their old floors [source: Pergo].
Advertisement
While there's still a little bit of tree in a plank of laminate flooring, it consists of four layers that have been bonded together with the use of heat and pressure. On top is a clear sheet of aluminum oxide, which is stain-resistant and helps to protect the underlayers. The next level is the decorative resin-based combination of melamine and aluminum oxide. That lies on top of the wood composition based core, usually high-density fiberboard that's been saturated in resins to help resist moisture. Finally, the core sits on top of a stabilizing backing that's also saturated with resins.
Because laminate flooring is made from natural cellulose fibers, the material will expand and contract with changes in humidity. Designed with interlocking tongue-and-groove connections, laminate flooring is not meant to be attached to the subfloor. Instead, it sits on top of it, enabling it to move with changes in the humidity.
For that same reason, laminate flooring is not considered a good choice in areas that are subject to high levels of humidity, such as bathrooms, saunas and laundry rooms.
Read on to find out what kind of tools and materials you'll need to install laminate flooring.
Advertisement


