10 Tricks for Painting Your Home's Exterior

By: Dave Roos
Even a little help is a good thing when you're painting the outside of your house. See pictures of home design.
romrodinka/iStock/Thinkstock

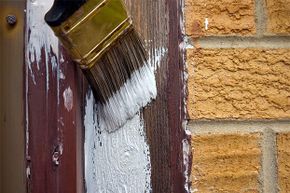
A fresh coat of exterior paint can transform even the most run-down "fixer-upper" into a stylish "classic," dramatically boosting curb appeal and adding thousands of dollars to your home's resale value. Even if you're not trying to sell your house, a professional-grade exterior paint job can protect it from the elements — wind, rain, mold and mildew — or at the very least, make your neighbors jealous.

Let's not delude ourselves, though. Painting over the outside of your home can be a huge investment of both time and money. Paying a professional can run into the tens of thousands of dollars. You can do it yourself for a fraction of that cost, but prepare to spend long days on high ladders scraping away at stubborn paint and inhaling primer fumes.

Advertisement

If you're up to the DIY challenge though, we've assembled 10 essential tricks for making your house-painting project go smoothly and look great. With any luck, it will last 25 years, at which point it's the next owner's problem.

Let's start with an unusual painting consideration: the calendar.

10: Check the Weather

You'll want a dry sunny week before you start your painting job.
George Doyle/Stockbyte/Thinkstock

Moisture is a painter's worst enemy. Waterlogged wood siding or concrete foundations will cause paint to bubble and crack only months after a fresh application. Save yourself the frustration (and cost) of repainting by waiting until all surfaces are moisture-free.

If you live in a region with long, snowy winters and wet springs, wait until at least June before starting an exterior paint project. If you live in a hot and humid region, plan on the cooler, drier weather of fall. Professional painters carry moisture meters and won't lay a brush on a piece of wood with moisture content higher than 12 percent [source: Lernley].

Advertisement

You can buy a meter for as little as $20 — or just keep tabs on the weather. Wait until the forecast calls for clear skies and warm nights for at least the next week. Rain can wash away fresh latex paint, and temperatures below 50 degrees Fahrenheit (10 degrees Celsius) can make it harder for paint to adhere to the surface and cure properly [source: Benjamin Moore].

9: Look Out for Lead

If your home was built before or around the time this pic was taken, chances are you've got lead paint to deal with.
Andre K.Davey/Stone/Getty Images

The first step in an exterior painting project is to remove all cracked, bubbling and otherwise nasty old paint. If your house was built before 1978, there's a very good chance that at least one of its many paint layers contains lead, a known neurotoxin that can seriously impair brain function and development, especially in children.

To test your paint for lead, consult this list of EPA-approved labs and call the nearest one to find out how to mail in a sample. If it comes back positive, you'll need to take special precautions when scraping off the old, damaged paint. The best solution is to rent a product called the PaintShaver — a motorized grinder that quickly strips paint from wood surfaces and sucks the dust and debris directly into a sealed vacuum bag [source: Hurst-Wajszczuk].

Advertisement

Even if you aren't dealing with lead paint, you'll still want to minimize mess and avoid inhaling paint dust. Buy yourself a nice painting respirator so you can breathe easy. Then invest in some canvas drop cloths like the pros use. Unlike the cheap plastic versions, they don't rip and you can reuse them over and over. Lay the drop cloths below your work area and drape them over shrubs and other landscaping to protect landscaping from falling paint chips [source: Hurst-Wajszczuk].

8: Patch Those Cracks

Fix any broken or cracked sections in your exterior, so they won’t come back to haunt you later.
Jeffrey Hamilton/Photodisc/Thinkstock

Painting the exterior of your house can be a painstakingly slow process, but it gives you an opportunity to inspect your home up close. While you're scraping away at the trim for hours, pay attention to the state of wood clapboards, window ledges and shutters. If you find any broken, cracked or rotted sections, fix them now so they won't come back to haunt you later.

If a piece of wood is rotted through, it needs to be removed and replaced. But if there are just a few cracks or holes, patch them using a professional-grade exterior patching compound. No mixing is necessary; just spackle the malleable putty right into the problem area; smooth it in the opposite direction, let it dry, and then sand the surface smooth. Rough sanding the edges of the hole itself will help the compound to adhere [source: Barhnart et al.].

Advertisement

To ensure a perfectly smooth finish, consider sanding down all wood surfaces. We know it's a huge pain, but at least you can rent or borrow a power sander to cover more surface area in less time. Pay particular attention to the places where bare wood meets existing paint. Use a fine 50- or 80-grit paper to really make those transitions seamless [source: Hurst-Wajszczuk].

7: Give It a Bath

If you're using a pressure washer to clean your house, be gentle if you have older wood.
Michael Courtney/E+/Getty Images

Remember when we told you that it's critically important to paint on a moisture-free surface? Forget that for a second. Once you've stripped off old paint and patched up busted siding, you need to attack another unsightly plague of old houses: mold and mildew. And the best way to do that is with an old-fashioned scrub and rinse.

Mold, mildew and other fungi can embed themselves deep in wood fibers far beyond the reach of a scraper or sander. The best weapon is to mix up a diluted solution of 1 cup (236 milliliters) each of bleach and trisodium phosphate to 2 gallons (7.5 liters) of water [source: Lernley]. Use a spray bottle to spritz problem areas and scrub deeply with a stiff-bristled brush.

Advertisement

Let the bleach solution do its work for a few hours before giving the entire house a gentle rinse to remove dust and paint debris. It's tempting to use a power washer, but that convenience can come at a price — high-powered streams of water can gouge softer woods. When in doubt, try a regular garden hose [source: Hurst-Wajszczuk].

OK, now you can remember our moisture advice. Wait a few sunny days after rinsing before proceeding with the painting project.

6: Prime for Action

Primer seals in any remaining moisture and provides a smooth, clean surface so the topcoat of paint will stick like glue.
Melinda Fawver/iStock/Thinkstock

On a big painting project, laying down a coat of primer can feel exhaustingly unnecessary. But primer will likely be the difference between a 5-year exterior paint job and a 25-year one. Primer serves two main functions: It seals in any remaining moisture (which prevents mildew) and provides a smooth, clean surface so the topcoat of paint will stick like glue. If you are lucky enough to start with a perfectly smooth and clean painted surface, priming isn't necessary, but few of us are so lucky [source: Paint Quality Institute].

Before you apply primer, you need to mask windows, gutters and any other unpainted surfaces with blue painter's tape. Then, spread the primer on with a sprayer or roller and follow up with a brush to work it into hard-to-reach corners [source: Lernley]. We'll talk more later about the pros and cons of using brushes, rollers and sprayers.

Advertisement

What about oil-based versus latex primer? Professional painters prefer latex primers and paints because they are water-based and clean up easily [source: Dawson]. But some choose oil-based primers that deeply penetrate wood surfaces [source: Lernley].

Do you need two coats of primer? Again, the smoother the painting surface, the better-looking the final paint job, but you need to consider how much time and money you want to invest in this project. Primer is cheaper than paint, but it's not free. A 5-gallon (19-liter) bucket of exterior primer starts at $60 to $70 and goes way up from there.

5: Get Out Your Gun

Caulk should be applied after the primer is on.
Polka Dot Images/Thinkstock

Caulking is one of those professional tricks that can really boost the longevity of your exterior painting project. Caulk is a glue-like substance that seals cracks and seams, like those between the siding and windows, or the siding and trim of your house. The enemy, as usual, is water, which can seep into those seams and cause your brand-new paint job to crack and bubble. Caulking is different from patching, because you will need to caulk even undamaged areas where water might seep through.

Caulk should be applied after the primer stage of an exterior painting project. The experts recommend using a siliconized acrylic caulk because paint will stick to it [source: Hurst-Wajszczuk]. If you are caulking an area between two different types of surfaces — wood and concrete, or concrete and metal — look for caulk that's compatible with both materials. Don't try to caulk cracks between clapboards, though. Moist air from inside the house needs a way to escape [source: Barhnart et al.].

Advertisement

To apply caulk, you need a caulking gun, which is an inexpensive metal applicator. Apply a thick line of caulk over the seam and run back over it with your forefinger to create a smooth, flat seal. If the seam is really wide, you might need to buy some backer rod, a foam-like tube that you insert into the seam before applying the caulk [source: Truini].

4: Treat Yourself to Good Paint

Good-quality paint is worth the splurge.
Wavebreakmedia Ltd./Thinkstock

As a consumer, it's not always clear if a more expensive product is necessarily a better product. Brand names generally cost more than generic, even though they may contain exactly the same ingredients.

However, with paint, the experts agree that you get what you pay for: More expensive paints have more pigments, giving them a deeper, richer, and longer-lasting color than cheaper alternatives. When you budget out your exterior painting project, plan on buying the best quality you can [source: Truini].

Advertisement

Acrylic latex paint is almost always a better choice than oil. Latex doesn't emit loads of volatile organic compounds (VOCs), which are bad for the environment and hard on the nose. It stays pliable and flexible over time, which means less cracking than oil-based paint, and dries faster too. You can clean up with soap and water instead of paint thinner. And finally, you can paint latex over any type of primer or existing paint, something oil can't handle [source: Hurst-Wajszczuk].

There are two specific painting situations where oil wins over latex:

  • High-traffic areas like wood steps and porches
  • Cast iron railings

3: Choose Your Weapon Wisely

Brush or roller? Both have their place in the house painting world.
Mel Yates/Taxi/Getty Images

After days — even weeks! — of prep work, you are finally ready to get down to business. You've chosen the perfect color, spent way too much money on gallons and gallons of quality paint, and now the only question that remains is: how do you get this stuff on the walls? Do you brush, roll or spray?

For the pros, the answer is "all of the above." Each paint application method has its pros and cons:

Advertisement

  • Brushes give you the most control, but are s...l...o...w. Use a brush to handle detail work along the edges of windows and other unpainted surfaces.
  • Rollers cover a lot more area than a brush, but are best on perfectly flat, broad spaces like wide clapboard siding, stucco or cinder block.
  • Paint sprayers give you the best coverage and the most flexibility, but they a) cost more than brushes or rollers; b) blow through a lot of paint very quickly; and c) require a certain level of skill and finesse that amateur painters rarely display [source: Mahoney].

If you feel confident with a paint sprayer, use the sprayer first to blast a large area, then follow with a brush — called "back brushing" — to ensure smooth and even coverage [source: Benjamin Moore].

2: Made in the Shade

Shade is good when painting a house.
TongRo Images/Thinkstock

Painters are like farmers: They love the sunshine unless they need rain, and they love the rain unless they need sunshine. Sunny, warm weather is great for evaporating moisture out of wood, but too much sun wreaks havoc with an in-progress paint job.

Here's the problem. When you're painting a large surface, like the exterior wall of a house, you have to work in sections, moving the ladder and drop cloths as you go. If the sun is glaring directly down on the wall, then the paint will dry faster than you can move your equipment. When you apply wet paint over dry paint, it ends up creating dark lap marks where the sections overlap [source: Benjamin Moore]. The result is uneven and splotchy color.

Advertisement

Ideally, you should time your paint job so that you are always actively painting on the shady side of the house. If that's not possible, try to paint on a cloudy day — but not a rainy one!

1: Work on Your Brushstrokes

Housepainting requires a certain technique and finesse to look professional.
Lisa F. Young/iStock/Thinkstock

There's more to painting than just slapping the color on the wall. Like most things, a certain technique is involved. First, start your exterior paint job from the top of the house and work your way down (it's harder to drip up, after all).

If you're using a brush, dip about 2 inches (5 centimeters) of bristles into the can and shake off the excess by slapping the brush against the sides of the container. Lay the paint on thick, quickly going back and forth about two or three times. Reload your paint and repeat until you've covered about 3 or 4 square feet (0.3 to 0.4 square meters). Finally, smooth out your work with your brush (this time, without adding any extra paint). Use long strokes and work from the unpainted area to the painted area [source: The Family Handyman].

For rollers, dip your roller into a 5-gallon (19-liter) bucket and shake the excess off on a roller screen, a metal grid that can hang in the bucket. Using moderate pressure, roll the paint on to your surface, reloading when the paint no longer flows easily. Cover 3 to 4 square feet. Follow up with your brush and paint in the crevices and siding [source: The Family Handyman].

If you're painting overlapping siding, paint the "butt" or bottom edge before working on the broad surface [source: Truini]. To minimize lap marks, paint a section of four or five boards all the way across before the paint has a chance to dry [source: Benjamin Moore].

Lots More Information

Author's Note: 10 Tricks for Painting Your Home's Exterio

I will never paint the exterior of my house for one reason: I am scared of climbing ladders. I'm not afraid of heights — it's the fall that gets me. My kids make fun of me relentlessly, pointing out each time my neighbor ascends a ladder to clean out his gutters or repair some aluminum siding. In my defense, my fears are perfectly grounded. Falls from ladders are the leading cause of injury and death among construction workers — 605 workers were killed in 2009 alone and more than 200,000 were seriously injured by falls from ladders [source: CDC]. And I've seen enough slapstick comedies to know that when the father climbs a tall ladder, painful hilarity ensues. Which brings me to the second reason I will never paint the exterior of my house: It's brick.

Related Articles

  • Barnhart, Roy; Carey, James; Carey, Morris; Hamilton, Gene; Hamilton, Katie; Prestly, Donald R.; and Strong, Jeff. "Caulking and Patching Your Home's Exterior Before Painting." Home Improvement All-in-One for Dummies. May 2004. (June 20, 2014) http://www.dummies.com/how-to/content/caulking-and-patching-your-homes-exterior-before-p.html
  • Benjamin Moore. "Exterior House Painting Supplies." (June 20, 2014) http://www.benjaminmoore.com/en-us/for-your-home/exterior-house-painting-supplies
  • Benjamin Moore. "How to Paint a House Exterior." (June 20, 2014) http://www.benjaminmoore.com/en-us/for-your-home/exterior-painting-tips
  • Dawson, Mike. "Exterior Wood Primers." PaintPRO. September 2006. (June 20, 2014) http://www.paintpro.net/Articles/PP804/PP804-Primers.cfm
  • Hurst-Wajszczuk, Joe. "How to Paint Your House's Exterior." This Old House. (June 20, 2014) http://www.thisoldhouse.com/toh/photos/0,,20180479,00.html
  • Lernley, Brad. "A Pro Confides His Best Tips for Painting Exteriors." This Old House. (June 20, 2014) http://www.thisoldhouse.com/toh/article/0,,202236,00.html
  • Mahoney, Doug. "Painting Tool Showdown: Brush & Roller vs. Paint Sprayer." Popular Mechanics. Dec. 4, 2009. (June 20, 2014) http://www.popularmechanics.com/home/reviews/4338823
  • Paint Quality Institute. "Hardboard." (June 20, 2014) http://www.paintquality.com/paint-professionals/paint-tools/prep-prime-paint/exterior/hardboard/paint-paint.html
  • Reader's Digest. "10 Ways to Increase Home Value with Exterior Paint." (June 20, 2014) http://www.rd.com/slideshows/10-ways-to-increase-home-value-with-exterior-paint/
  • Truini, Joe. "7 Smart Tips for Painting Your House." Popular Mechanics. (June 20, 2014) http://www.popularmechanics.com/home/improvement/outdoor-projects/7-smart-tips-for-painting-your-house#slide-2
  • Truini, Joe. "How to Caulk Wide Cracks." (June 20, 2014) http://www.todayshomeowner.com/video/how-to-caulk-wide-cracks/

Advertisement

Loading...