Installing a Floating Wood Floor
Preparation
Before you begin installing your hardwood floors, you must first read all the manufacturer's instructions. These instructions will tell you the exact method of preparing and laying the floor. Different wood floors may need different treatments, so make sure your read the instructions carefully.
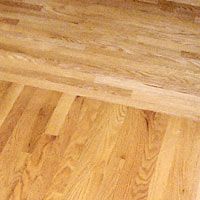
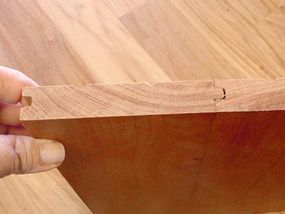
Because the hardwoods are not actually being attached to it, a floating hardwood floor can be installed over almost any kind of subfloor. Preparation of the subfloor is extremely important. First, the subfloor must be clean. Then, make sure the subfloor is level or even. You can test this by laying a plank of wood on its edge. Is there any space between the wood and the subfloor? If there is space of more than 3/4 of an inch, you will need to spread some self-leveling joint compound on the floor. Once it dries, your subfloor should be adequately level. Next, you'll want to decide in what direction you intend to lay the flooring. Many people will take into account where the light enters the room as well as the entrances and exits. Usually, floating floors can be laid in any direction. Pick the one that best suits your tastes and the environment. Now that the preparation is complete, let's take a look at the tools you'll need to complete the job.
Advertisement
Tools
In general, the tools you will need for this job are:
These tools can be purchased at any home improvement store. Don't forget to check the manufacturer's instructions to see if any additional tools are necessary.
Installation
The first three rows of the floor are the most important. They should be straight and the all the joints should fit snugly. Use clamps and straps to keep all the connections tight. Your goal is to prevent the installed planks from opening up as you tap the next planks into place.
The most common way of attaching planks of wood in a floating installation is to use an adhesive between the joints of the wood planks. To apply the glue, you will run a bead of glue along the joint or edge of the wood. You will then snap that piece into the first piece you set down.
Plan where you want the planks of wood before you begin gluing. Remember that the glue dries in seven to ten minutes, so you want to be clear on placement. Try not to use too much glue. You can wipe away any excess glue with a rag. You'll also have to make wood cuts during installation. It's a good idea to measure twice. You don't want to end up with a lot of useless scraps instead of adequate floor boards.
Insert the plank and knock the pieces together with a hammer and a tapping block (a small scrap of wood). A tapping block is used to protect the tongue or edge of the plank from damage. Never knock on the tongue without a tapping block and always hold the tapping block tightly pressed to the tongue. Knock very gently to close the gaps. It's better to knock often, but softly, than it is to knock a few times forcefully.
If the planks are not fitting together, check for something trapped underneath the floor, too much glue, or dirt in the grooves. There should be no space between the joints if the planks are installed correctly. If any tongue is visible between the planks, gently wiggle the planks free and check for problems. If the problem isn't evident, you may want to use a different plank. Re-glue before replacing the planks.
While knocking the planks together, drive in the direction of the joint that you are trying to close. Remember that it's virtually impossible to adjust the joints once the floor has set. So, you need to plan your work carefully.
Continue laying the floor by gluing planks together and gently tapping them into place. You must leave space around the edge of the room for the wood to expand and contract. Keep in mind that wood is a living thing and changes with time and temperature. Molding will usually cover this gap. The manufacturer's instructions can also give you tips about how much space to leave for expansion.
When you have most of the floor installed, you will run out of room for a tapping block. At this point, use a pulling iron and hammer to draw the planks together. Again, it's a good idea to use a small scrap of wood with a groove, in order to protect the wood.
To protect the floor's finish while you're completing the installation, make sure you have a towel or soft cloth available on which to set your tools and kneel.
After you've finished installation, it's time to add transitions, trim and base molding to cover all the expansion spaces. Then, let the floor set according to the manufacturer's instructions.