5 Ways to Garden in Winter

winter gardening
Just because it's cold outside doesn't mean you have to stop gardening. Jasmin Merdan/Getty Images

French existentialist writer and philosopher Albert Camus once said, "In the depths of winter I finally learned there was in me an invincible summer." Never is that more true than with gardening in winter.

One traditionally pictures a winter garden as stark and bleak, banked with snow and leaves. Just under the surface, however, a winter garden teems with life. Spring bulbs quietly await their blooming, sugar maples store up sap, and gardeners eagerly anticipate the more prosperous seasons ahead.

Advertisement

Even though winter is a quiet season, there's still plenty of work to be done. The cold months of December through March provide a perfect opportunity for building cloches, cold frames and even greenhouses, which enable gardeners to extend the harvest season. Also, winter is a great time to start early spring crops from seed. Finally, since winter reveals a garden's framework, it's an ideal time (frozen ground permitting) to dig new beds, lay paths, and gather sticks for staking beans and peas.


5. Give Your Garden a Good Frame

Start up a compost pile before winter arrives.
©iStockphoto.com/Ducky Cards

Look around. Take stock. Winter reveals a garden's framework. The quiet months of December through March are the perfect time to improve your garden's bones by adding new paths and beds.

Laying a garden path is labor-intensive, but ultimately very simple. First, decide what sort of surface you'd like to have. Slate, bluestone, brick, pea gravel and even hardwood mulch are fine choices. Next, mark your path with spray paint or string. Then, dig the length and width of your marked path down to the depth of your chosen surface material (plus an inch or two if you're using flat stones or bricks). Add a bed of sand to your trench to make the stone and brick paths easier to level. If you're using mulch or gravel, simply fill the trench with your material. Fill in any cracks, and you're done!

Advertisement

Adding new beds or enlarging existing ones is also easy; you can even skip the digging. Again, mark the boarders with spray paint or string. Then, spread newspaper with edges overlapping (about eight sheets thick) over the length and width of the new bed. Cover the newspapers with 4 inches of compost, and top the compost with 6 to 8 inches of shredded leaves or pine straw. By March, the mulch will have flattened out, and you need only to cut through the newspaper to add seedlings.

In the next section, we'll talk about another great way to garden in winter by starting seeds indoors.

4. Start Your Seeds

Start seeds early, and keep plants inside until they're ready to go outside.
©iStockphoto.com/red_moon_rise

Starting seeds indoors has a ton of advantages — starting from seed is cheaper than buying seedlings, you can harvest a plant's bounty earlier, and if you use uncontaminated soil, your seedlings can be stronger and healthier than factory-raised specimens. Plus, if you save your own seeds over the years, you can create one-of-a-kind varieties that will be the envy of heirloom gardeners the world over.

To get started, fill a clean container, such as an egg crate, seed starter box, peat pot or deep ice cube tray, with uncontaminated growing medium. The container must drain well, so punch holes if necessary. Plant the seeds according to package directions and place the container inside a large, loose, transparent plastic bag. The bag will raise the temperature and humidity of the growing atmosphere. If the seeds require sunlight to germinate (not all do), place them in a warm sunny spot and turn the container often to make sure stems grow straight. Check the soil frequently and ensure that it's moist (but not sopping wet). Add fertilizer once the seedling has four or more leaves. Cool season crops such as broccoli, cabbage, celery, leek and a variety of lettuces can all start indoors from seed in the winter months.

Advertisement

To give tender seedlings their best chance for survival, you'll need to harden them off in a cold frame or a cloche before planting in the ground. Learn how to create a cloche in the next section.

3. Create a Cloche

You can build a cloche with practically anything.
©iStockphoto.com/Anthony Jones

One great way to bring your harvest forward a few weeks is to shelter plants from wind and frost with a simple, inexpensive cloche. A cloche is simply a covering for protecting plants from cold temperatures. You can build your cloche anytime, as long as it will be ready to use when you move your seeds outdoors in February or March. The beauty of a cloche is that you can make one out of just about anything. It can be large or small, short or tall, fixed or mobile. Here are a few ways to build a cloche:

  • Recycle a cracked, transparent, 5-gallon water container into a cloche by cutting out the bottom and placing it, like a large bell, over tender young seedlings.
  • Fill a large bucket or small barrel with soil and place a stake in the center. Insert plant pots and cover the works with plastic sheeting. Finally, secure the plastic by weighing down the edges with bricks or by installing a locking ring around the top of the bucket.
  • Bend lengths of half-inch PVC pipe into hoops (similar to a croquet wicket). Cut the ends at an angle (forming a sharp point) and drive them into the ground. Create as many hoops as you need, and then cover them with painter's plastic to form an open-ended tunnel over your garden bed. Weigh down the plastic with gallon jugs or anchor it with garden stakes.

Similar to a cloche, a cold frame is yet another perfect winter gardening project.

Advertisement

2. Build a Cold Frame

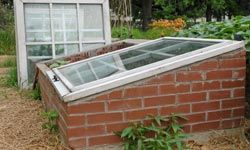
If you want to build a sturdier type of cloche, you might want to invest in a cold frame.
©iStockphoto.com/SkyF

Author Eliot Coleman begins his book "Four Season Harvest" with a story about how, as an April snow falls thickly over his New England garden, he throws on his coat and heads outside to his cold frame to pick a salad. The benefits are obvious. Like a miniature unheated greenhouse, a cold frame enables you to grow a variety of cool season crops, even in winter.

Building a cold frame is pretty simple. You'll need a saw, a drill, a couple of 12-inch boards and one 8-inch board, an old window, screws, and hinges. For simplicity's sake, your cold frame's length and width should match that of the window you'll be using as a lid. The longest 12-inch board will serve as the frame's back. Cut two more 12-inch boards diagonally so that they're 12 inches on one end, angling down to 8 inches on the other — these form the sides. Fasten the sides, back and front together, with wood screws to form a simple, open rectangle. For extra stability, screw L-shaped brackets inside the four corners of your cold frame. Finally, attach an old window to the top of your frame with rust-proof hinges. Use a simple stick to keep your cold frame propped open to let air circulate on sunny days.

Advertisement

Most gardeners can make due with a cold frame. However, the most avid winter gardeners covet the holy grail of winter gardening: a greenhouse. Learn about greenhouses in the next section.

1. Extend the Growing Season With a Greenhouse

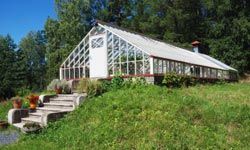
If you're serious about keeping a great garden during the winter, a greenhouse will take care of everything.
©iStockphoto.com/Mikhail Olykaynen

Avid gardeners dream of growing local, organic produce year-round. A greenhouse makes this possible. Known variously as a hothouse, cool house, potting shed, nursery or glass house, greenhouses come in all shapes and sizes. Tentlike, do-it-yourself versions sport PVC or metal pipe skeletons draped in UV-resistant greenhouse plastic. Garden supply stores offer greenhouse kits in every conceivable price range and style.

Like cloches and cold frames, greenhouses trap solar radiation to create a warm, humid microcosm where plants can thrive, bloom and grow past their natural, outdoor growing season. For maximum sun exposure, choose an open spot to locate your greenhouse — one where the structure will never be shaded, even when the sun is at its lowest point in the sky.

Advertisement

The two types of greenhouses most accessible to home gardeners are cold houses and cool houses. Cold houses provide warmth and protection, but in really cold conditions, temperatures inside can still dip below freezing. Cool houses maintain temperatures of at least 40 degrees Farenheit. A cool house will extend the growing season longer than a cold house, but both varieties offer much more harvest flexibility than the average outdoor garden bed.

Be sure to shake a fork at old man winter when you dive into the spoils from your winter garden. Cool and cold house crops that can grow between December and March include beets, broccoli, green onions, radishes and a various salad greens.

Lots More Information

Related Articles

  • Bubel, Nancy. "The New Seed Starter's Handbook." Rodale. 1988. (Nov. 29, 2010) http://www.amazon.com/New-Seed-Starters-Handbook/dp/0878577521/ref=sr_1_2?s=books&ie=UTF8&qid=1291405101&sr=1-2#reader_0878577521
  • Coleman, Elliot. "Four-Season Harvest: Organic Vegetables From Your Home Garden All Year Long." 1999. (Nov. 29, 2010) http://www.amazon.com/reader/1890132276?_encoding=UTF8&query=cold%20frame#reader_1890132276
  • Coleman, Elliot. "The Winter Harvest Handbook." Chelsea Green Publishing Company. 2009. (Nov. 29, 2010) http://www.amazon.com/Winter-Harvest-Handbook-Production-Greenhouses/dp/1603580816/ref=sr_1_2?s=books&ie=UTF8&qid=1291419100&sr=1-2#reader_1603580816
  • Rochester, Margot. Earthly Delights: Gardening by the Season the Easy Way. Taylor Trade Publishing. 2004.
  • Smith, Shane. "Greenhouse Gardener's Companion." Fulcrum Publishing. 2000. (Nov. 29, 2010) http://www.amazon.com/reader/1555914500?_encoding=UTF8&query=greenhouse%20seasons#reader_1555914500

Advertisement

Loading...