Gardening can reward you with beautiful, fragrant flowers or a bountiful vegetable, fruit, and herb harvest. No matter what you're growing, there are some essentials every garden needs. Sunshine, water, and good soil are the basic necessities, but if you really want to go the extra mile, you can coax your garden into producing prize-winning specimens with a little work and some gardening know-how.
Advertisement
Give your garden the special attention it needs, and it will reward you all season long. Learn all about gardening through these topics:
Vegetable Growing Tips
Learn the basics for getting a vegetable garden in the ground and growing, including working with the seasons, caring for seeds and seedlings, and laying out your vegetable garden. You'll also find some handy tips for growing tomatoes.
Herb Growing Tips
Read about planting an herb garden, with tips on harvesting your herbs and growing a culinary garden indoors. You'll also learn about using perennial plants in your herb garden.
Tips for Growing Fruits
Learn how to plant, grow, and care for fruit trees and berry plants. Fruit trees need special maintenance to keep the pests away -- find tips for keeping your fruit healthy and infestation-free.
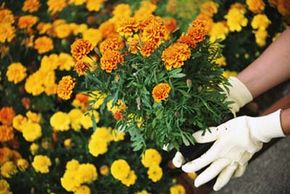
Tips for Growing Annuals and Biennials
Choose the right annuals and biennials for your climate and garden, and read our tips on laying out and caring for your flower garden. If cared for properly, annuals and biennials will give you a steady supply of flowers all season long.
Bulbs aren't as easy to grow as some flowering plants, but they'll reward your efforts with spectacular blooms from spring to late summer. Learn how to care for and display your bulb plants.
Tips for Growing Ground Covers and Vines
Ground covers can be a good alternative to grass when you need to cover a bare patch of soil. Learn about using vines and ground covers to enhance your garden.
Tips for Growing Perennials
Year after year, perennials brighten your garden with flowers and foliage. Read tips for choosing, planting, and caring for perennial plants.
Good garden soil is essential for healthy plants. Learn how to evaluate your soil and use a soil analysis to provide the right fertilizer for your plants.
Water Tips for Gardening
Sometimes rainfall just isn't enough. Plants rely on water to grow and flourish -- read about tracking precipitation in your garden and making sure your plants are getting adequate moisture.
Light Tips for Gardening
Without the sun, you don't have photosynthesis, and without photosynthesis, you don't have a garden. Learn how to get the most out of your garden in both shady and sunny conditions.
Garden Care Tips
The right tools make any job easier, even gardening. Read our tips about caring for your gardening gear, along with how to properly prune and mulch your garden.
Organic Gardening Tips
Many gardeners are finding success with chemical-free gardening practices, using only natural means to grow and protect their plants. Learn about composting, organic fertilizers, and natural pest control options.
Garden Propagation Tips
When you grow your plants from seeds, cuttings, or divisions, you can choose from a wider variety of plants -- and you save money. Read these propagation tips to learn about sowing seeds, growing plants from cuttings, and more propagation methods.
Tips for Preventing Garden Pests and Diseases
Diseases and infestations can invade your garden and damage or destroy your plants. Learn about keeping pests and diseases away from your flowers and vegetables.
Tips for Growing Roses
Rose gardens hold a special attraction for many gardeners. These plants need special care to thrive. Learn about caring for roses and protecting them from pests and diseases.
Tips for Growing Shrubs
Shrubs can serve as boundaries in any garden, and they can also add foliage and flowers to your landscape. Read these tips about planting and caring for garden shrubs.
Tips for Growing Flowering Trees
Flowering trees are ideal for small gardens -- they provide shade and beauty without taking up too much space. Learn all about planting and caring for flowering trees.
Tips for Growing Shade Trees and Evergreens
Planting shade trees and evergreens in your yard has many benefits, including sheltering your house and yard from the summer sun and adding some much needed color to a bleak winter landscape. Learn all about planting and caring for shade trees and evergreens.
Tips for Growing Container Plants
Container plants are perfect for spaces such as patios and decks, and they're a great way to get started with gardening. Read these tips to learn about selecting containers, preparing soil, and watering container plants.
Money- and Time-Saving Gardening Tips
A vegetable or flower garden doesn't have to take over your life -- or your budget. Read these tips to learn how to keep a garden that's inexpensive and easy to maintain.
Advertisement