9 Green Bathroom Cleaning Tips

By: the Editors of Publications International, Ltd.  | 
Clean your bathroom without those pesky fumes and toxins.
iStockphoto.com/Jim Jurica

Key Takeaways

  1. For fiberglass tubs or ceramic tiles, apply a paste of baking soda and dishwashing liquid with a sponge or nylon scrubber and then rinse it off.
  2. To remove soap scum, spray vinegar on the affected areas, let it dry, then spray again and wipe the area clean.
  3. For porcelain stains, apply lemon juice and alum powder. Let it sit (overnight for stubborn stains), then scrub and rinse it away. Remove nonskid appliques with warmed vinegar and a sponge.

The bathroom is a place where your primary cleaning MO might be about controlling germs, and rightly so. But again, dil­igence and a reasonable amount of care will keep your bathroom sanitary and sparkly without having to bring in the heavy guns -- disinfectants.

The process of disinfecting something is to destroy microorganisms living on it. The problem is, the products that disinfect are often hazardous. We know you want to be sure your bathrooms are free of microbes; after all, some of them can cause illnesses. But don't panic. The fact is, germs and microbes are everywhere, and they'll be there whether you clean them out or not. You may toil and scrub, but they always come back. It's just a part of life.

Advertisement

Enough talk, let's move into action! Now, to counteract these daily foes, we must focus on keeping our living spaces and ourselves at least moderately clean. For everyday cleaning in the bathroom, use baking soda liberally. Just sprinkle it on a damp sponge and wipe off dirty surfaces.
9. Shower and Sink Drains

­Just as with your kitchen sink, you should practice preventative maintenance with your bathroom sink and shower. Once a week, lift the drain cover in your tub and use a cotton swab to remove the hair that has accumulated there. Then pour 1/2 cup baking soda followed by 1 cup vinegar down the drain. Let this sit for 20 minutes, then flush the drain with very hot water. To help keep your tub drain unclogged, buy a plastic or rubber hair strainer; simply place it over your drain and let it do the icky work for you.

If your sink or shower has developed hard-water or mineral deposits, you can get rid of them by soaking paper towels in undiluted vinegar and placing the towels over the stained areas. Let them sit for one hour and then wipe the areas with a damp sponge.

Advertisement

­

8. Tubs and Shower Walls

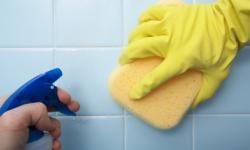
If your tub or shower is made of fiberglass, clean it by wiping on a paste of baking soda and dishwashing liquid with a sponge. Also, the same paste will attack hard-water and rust stains on ceramic tile. Use a nylon scrubber to clean it, then rinse.

Spraying the corners of your tub or your shower doors and walls with vinegar can loosen built-up soap scum. After spraying, allow it to dry. Then simply spray it down again and wipe clean.

Advertisement

Porcelain tubs and sinks can be among the trickiest for stain removal. Have you ever accidentally spilled an entire bottle of shampoo into your white tub and unwittingly let the mess sit there all day? That can certainly clean things up, but it's not really the recommended method. Instead, pour lemon juice over the stains, then sprinkle on alum powder (usually available in the spice aisle of the grocery store) and thoroughly work into the stain. If the stain doesn't come out immediately, let the mixture sit on the stain as long as overnight. The next morning, add more lemon juice, scrub again, and rinse.

Nonskid strips or appliques on your shower or tub floor can easily get stained and are often hard to remove. To clean, dampen the applique­s and sprinkle baking soda directly onto them. Let this sit for 20 minutes and then scrub and rinse. You can remove the appliques completely by saturating each decal with vinegar to loosen the glue. (For even better results, warm the vinegar in a microwave or on the stove for about three minutes.) Let the vinegar sit for a few minutes, then peel off the decals. You should be able to remove any leftover glue with a damp sponge.

A bathtub ring requires a strong solvent. Try soaking paper towels or your reusable cleaning cloths with undiluted vinegar and placing them on the ring. Let the paper towels or cloths dry out. Afterward, spray the areas again with vinegar, then scrub with a sponge.

­

7. Grout

Use a baking soda paste to remove mildew stains on the grout around your tub or shower. Apply the paste and then scrub it with an old toothbrush until the stain is gone. Remember to rinse the area well.

It's als a good idea to keep a bottle of the Baking Soda Blast multipurpose cleaner in your bathroom, ready for use.­

Advertisement

Baking Soda Blast:

  • 16 ounces baking soda­
  • 4 tablespoons liquid dish soap
  • 1 cup warm water

6. Shower Curtains

­Clean your shower curtain by sprinkling baking soda on a sponge and scrubbing. Rinse well. A mildew stain on the curtain can be tackled by briskly rubbing in a baking soda and water paste. When a shower curtain really needs help, remove it and wash on the delicate/cold cycle of your washing machine, adding vinegar and baking soda as the only detergent. Add a bath towel to help agitate the grime off. To prevent mildew from coming back, add another cup of vinegar to the final rinse cycle.

You can practice preventative maintenance here as well by keeping a spray bottle of vinegar and water in your shower. After each shower, spray down the shower curtain or doors to prevent scum and mineral buildup. Another old-fashioned tip for mildew prevention is to soak the curtains in salt water. This can be done right in the bathtub: Fill it with warm water and pour in 1/2 cup salt as it fills. Drop the curtains right into the tub to soak, then hang up to drip dry.­

Advertisement

­ ­

5. Toilets

Once a week, you should pour about a half cup vinegar into your toilets and let it sit for 30 minutes. Next, sprinkle baking soda on a toilet bowl brush and scour any remaining stained areas. Afterward, flush. You can also mix the vinegar and baking soda, swish the bowl, and allow it to sit for 20 minutes before scrubbing clean. If you have stubborn hard-water or rust stains, you can do the same thing, but scrub the surfaces with a bit of steel wool. Of course, never flush steel wool down the toilet. Instead, rinse it thoroughly, set aside to.

­

Advertisement

4. Floors

Clean a bathroom tile or no-wax floor by adding 1/2 cup baking soda to a bucket of warm water. Mop the floor with this solution and rinse. Adding lemon juice to the water will give it a nice fresh scent.

­

Advertisement

3. Trash Cans

Sprinkle baking soda in the bathroom trash can after each time you empty it. This will help with ongoing odor removal.

­­

Advertisement

2. Air Fresheners

It's possible to keep the bathroom smelling sweet without having to use an overwhelming aerosol air freshener. For a natural and perpetual air freshener, just keep baking soda in a pretty dish on the back of your toilet or on a shelf, and it will do the trick. For a different smell, you could add a spice like cinnamon to the baking soda. Change this mixture every three months.

To help keep unwanted pests at bay, you can also use cedar chips (found at most general purpose or bath and linen stores), lavender oil, or peppermint oil.

Advertisement

­

1. Countertops & Mirros

­Cle­an marble surfaces with a paste made of baking soda and white vinegar. Wipe clean and buff.­­

Occasionally, scratches in glass and mirrors can become stained. To remove such stains, mix a bit of dry mustard with enough vinegar to make a paste. Work the paste into the scratch and rub it until the stain is gone, then rinse well.

Advertisement

Frequently Asked Questions

Can essential oils be used for bathroom cleaning?
Yes, you can add essential oils like tea tree or eucalyptus to DIY cleaning solutions for their natural antimicrobial properties and fresh scent.
What is the safest way to dispose of homemade cleaning solutions?
Dispose of any excess homemade cleaning solutions by diluting them with water and pouring them down the drain, ensuring first that they are eco-friendly and biodegradable.

Advertisement

Loading...